
Before your first export: tax names
- Click Reports in the sidebar (under Insights) and click Accounting Export., click QuickBooks and click QuickBooks Settings.
- For each Garage Invoice tax, enter the QuickBooks tax name exactly as it is set up in QuickBooks (Taxes → Edit [Tax Agency Name] → Edit Rates). Under Text lines in invoice exports, choose what to do with text-only invoice lines. Click Save Settings.
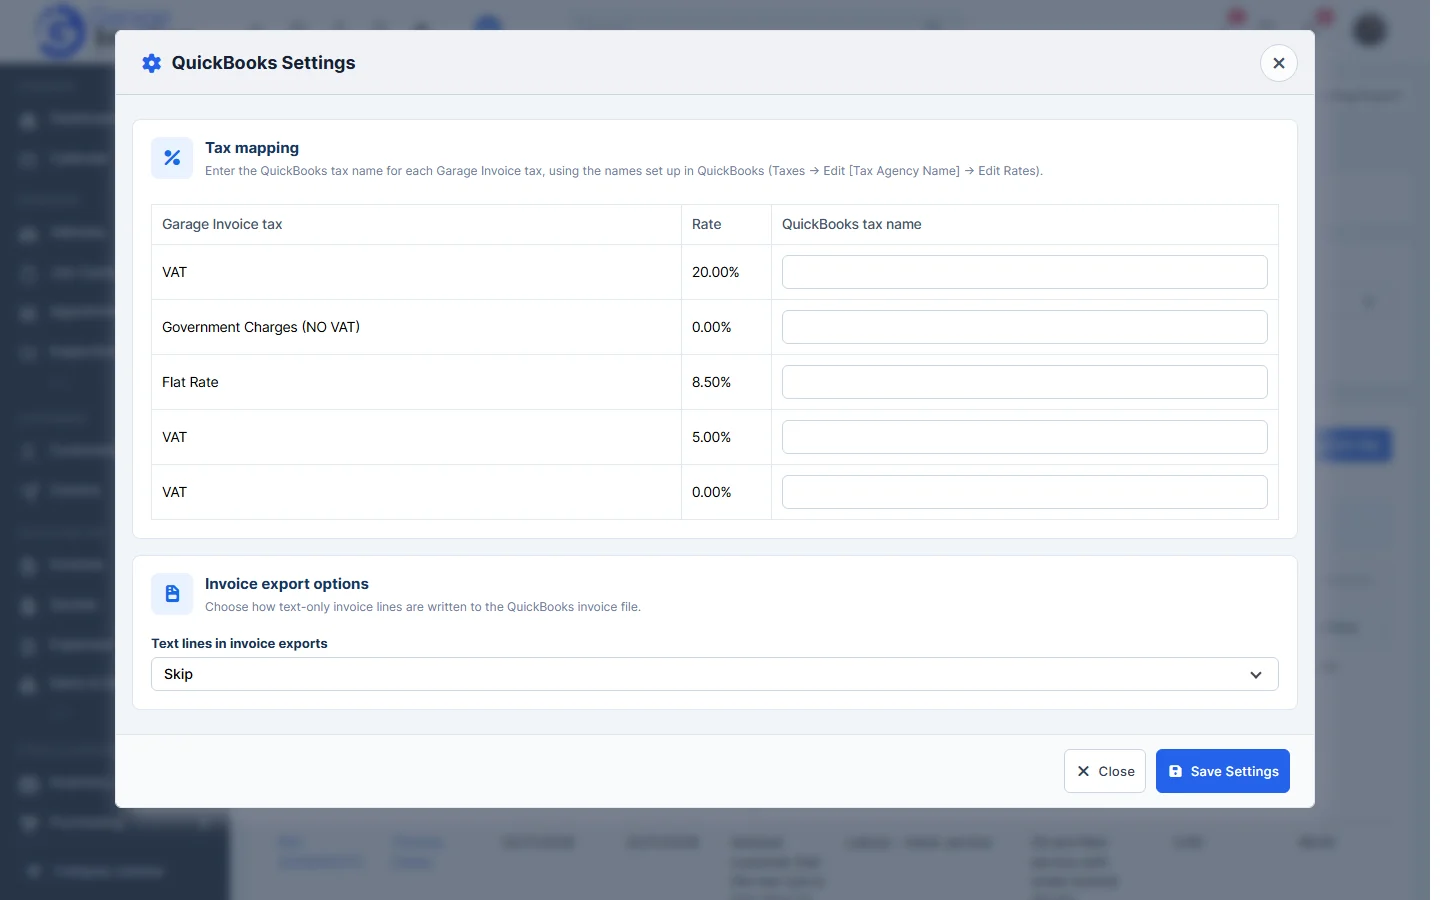
You only need to do this once, or again when you add a tax rate.
Export the file from Garage Invoice
- Click Reports in the sidebar (under Insights) and click Accounting Export. and click QuickBooks.
- On the Sales invoices tab, enter Date From and Date To. Choose the Status (for example Paid or Unpaid), Sale Agent and Currency if you need to. Tick Include paid within period to add invoices paid in the period. Click Filter.
- Check the invoice lines in the table, then click Download CSV file and save the file.
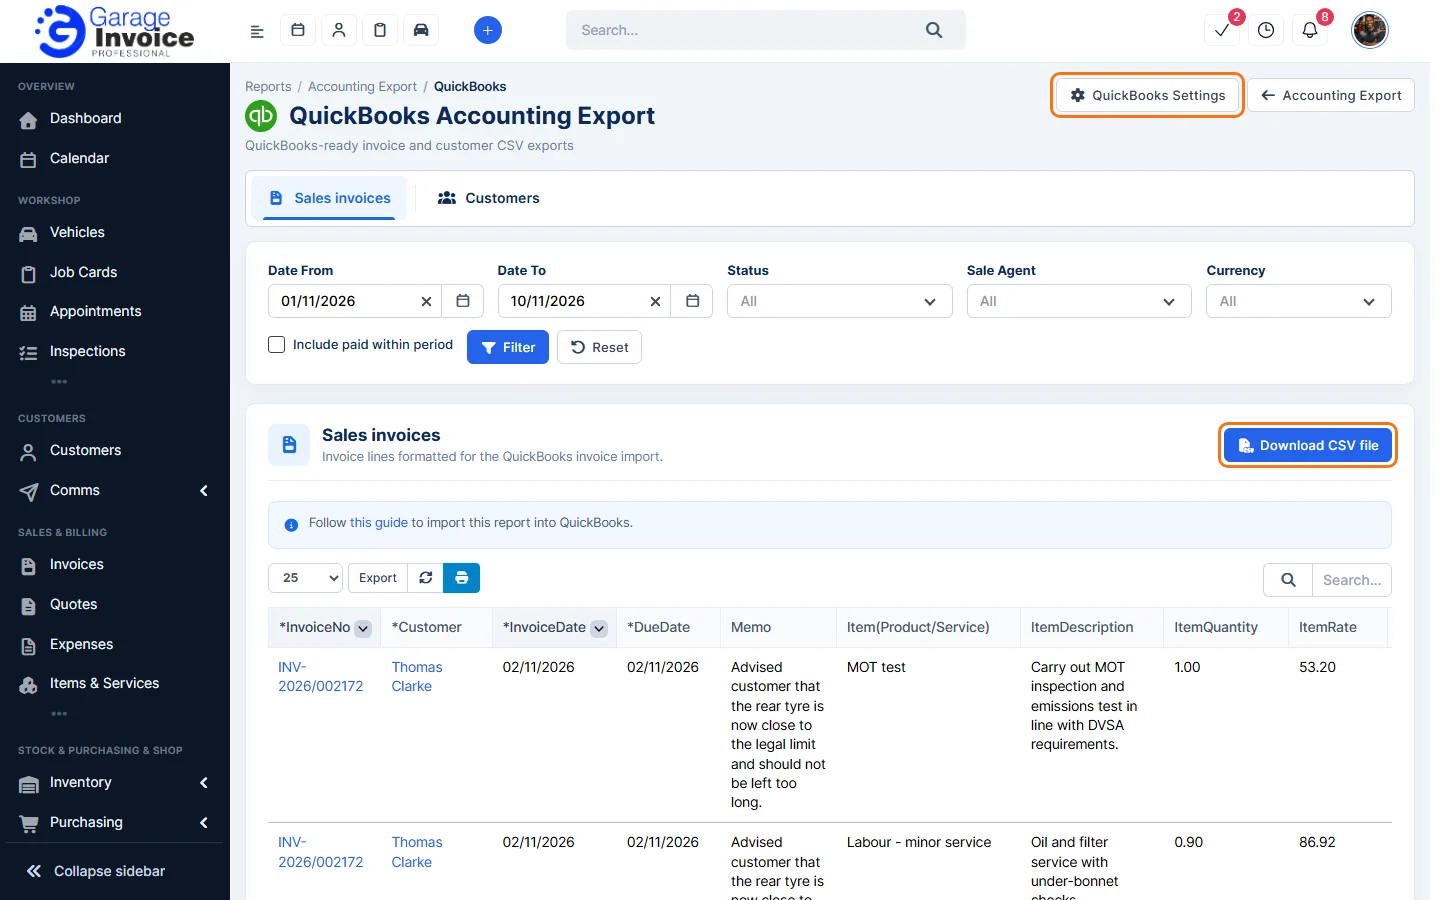
Note: QuickBooks imports up to 1,000 lines at a time. For a bigger file, export shorter date ranges.
Import the file into QuickBooks
- Log In to QuickBooks:
- Access your QuickBooks account and log in.
- Click on the Gear Icon in the upper-right corner.
- Select the Import Data option from the menu.

- Select the Data Type:
- Click on the Invoices tile to begin the import process.

- Upload the CSV File:
- Click Browse and select the CSV file you exported from Garage Invoice.

- Make sure to check the options for Add new contacts and Add new products/services. This allows QuickBooks to automatically create new entries if they aren’t already in your system.

- Click the Next button.
- Map the Columns:
- QuickBooks will automatically map the columns from your CSV file.
- Ensure that the Invoice Date field is set to the D/M/YYYY format.
- Set the Item Amount option to Exclusive of tax if asked.

- Click Next to proceed.

- Map Tax Codes/Values:
- In this step, map the tax codes or values as needed.
- For future imports, you can save your QuickBooks tax names in Garage Invoice, ensuring that the report always has the correct tax codes assigned (QuickBooks Settings button above the report in Garage Invoice).
- Click Next to continue.

- Review and Confirm:
- The next screen will show you how many invoices will be imported and how many new customers/items will be created.
- Review this information carefully.
- Click the Start Import button when you’re ready.

- Complete the Import:
- Your invoices will now be imported into QuickBooks.

- Note: Any duplicate invoice numbers that already exist in QuickBooks will not be imported to avoid conflicts.


Feature Garage reports: see what it does and how it fits your workshop.