
Create a ticket from the Tickets page
- Click Comms in the sidebar, then Tickets, and click New Ticket.
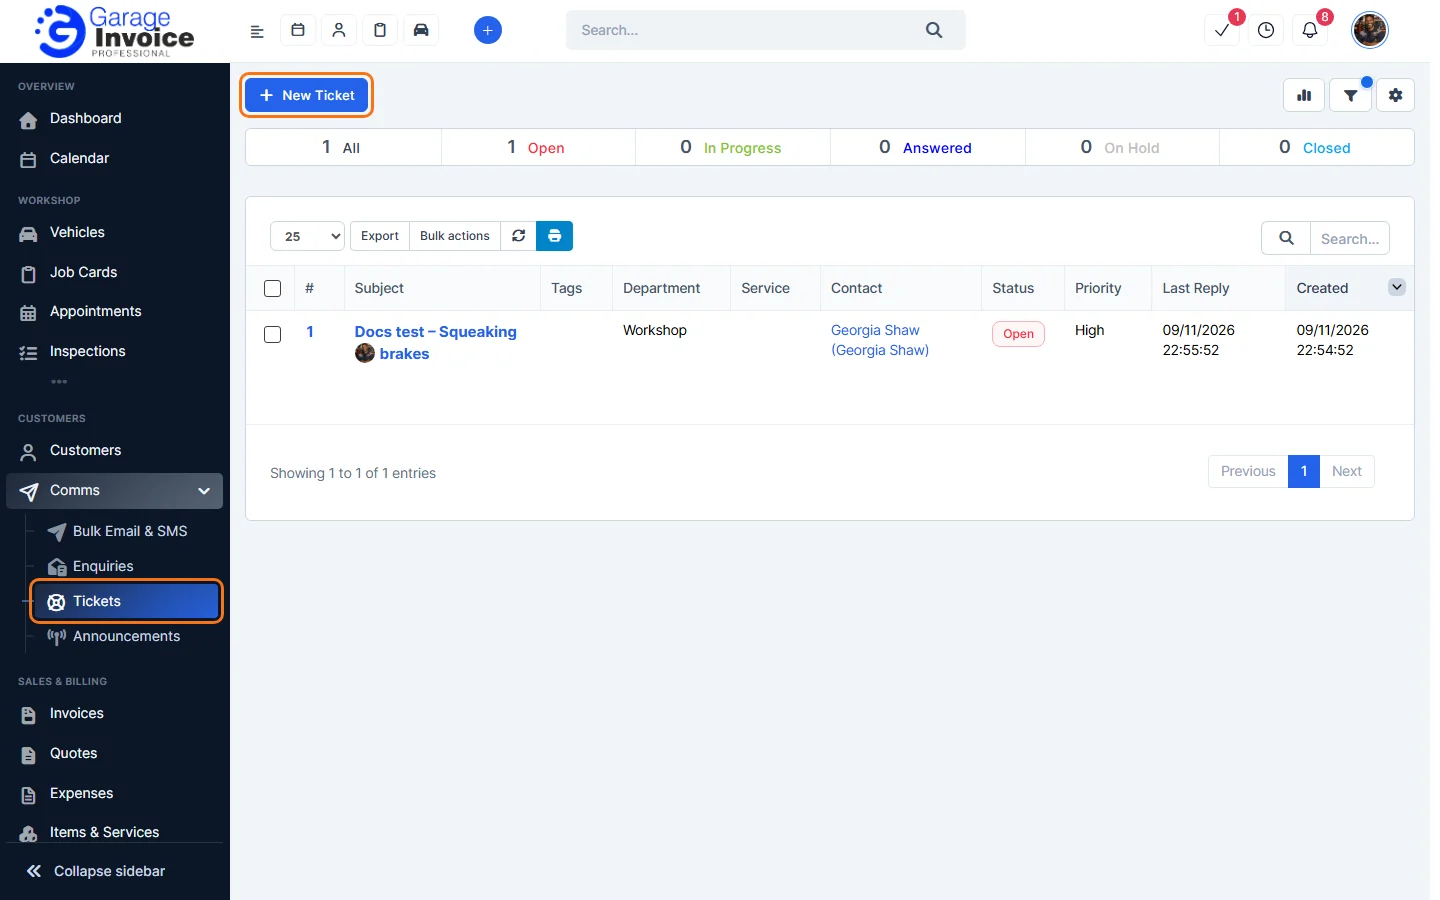
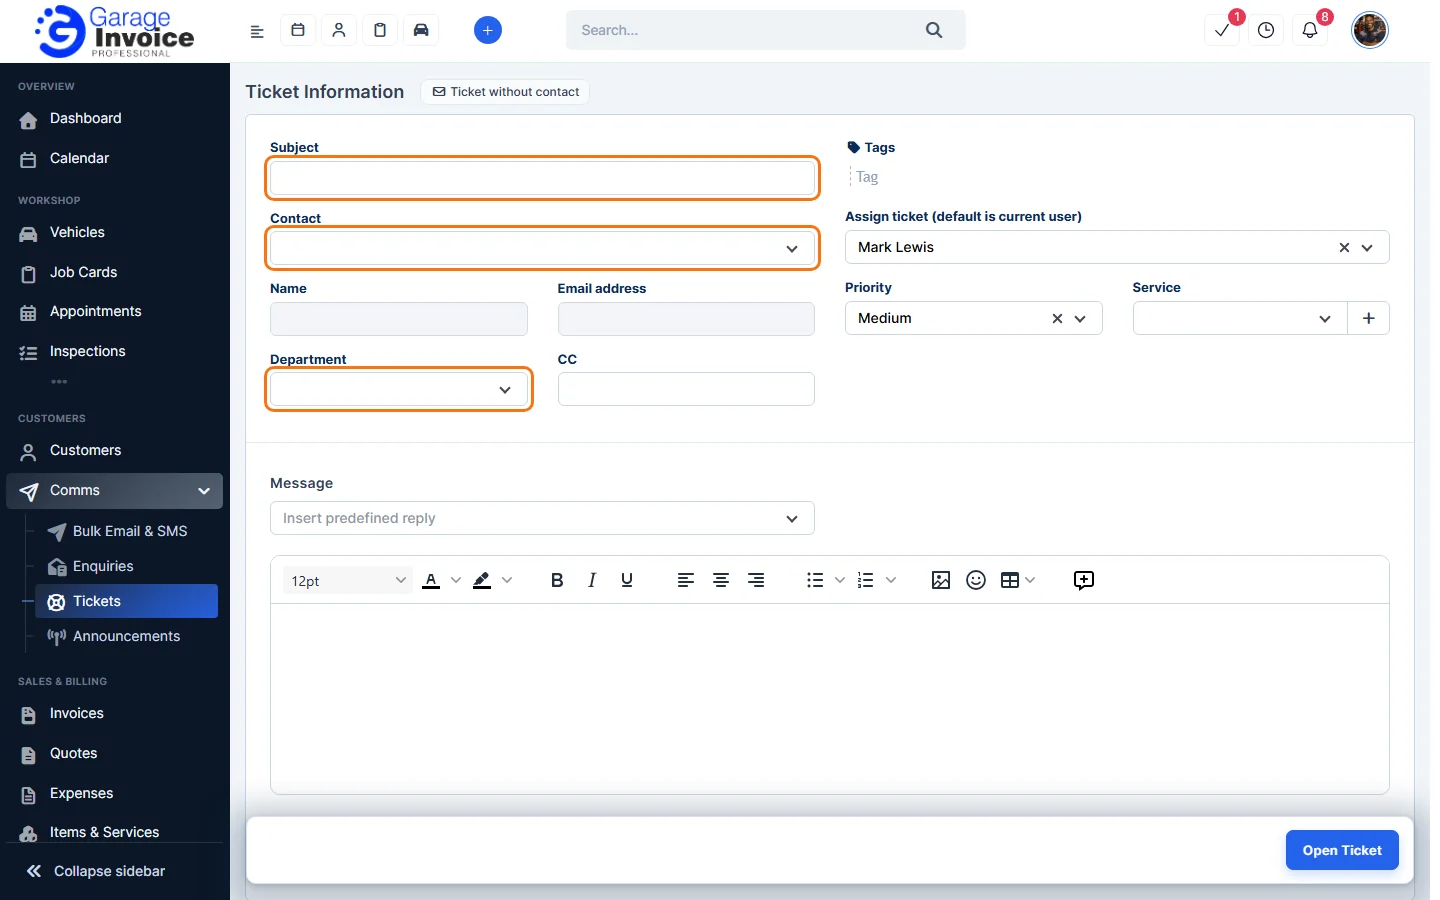
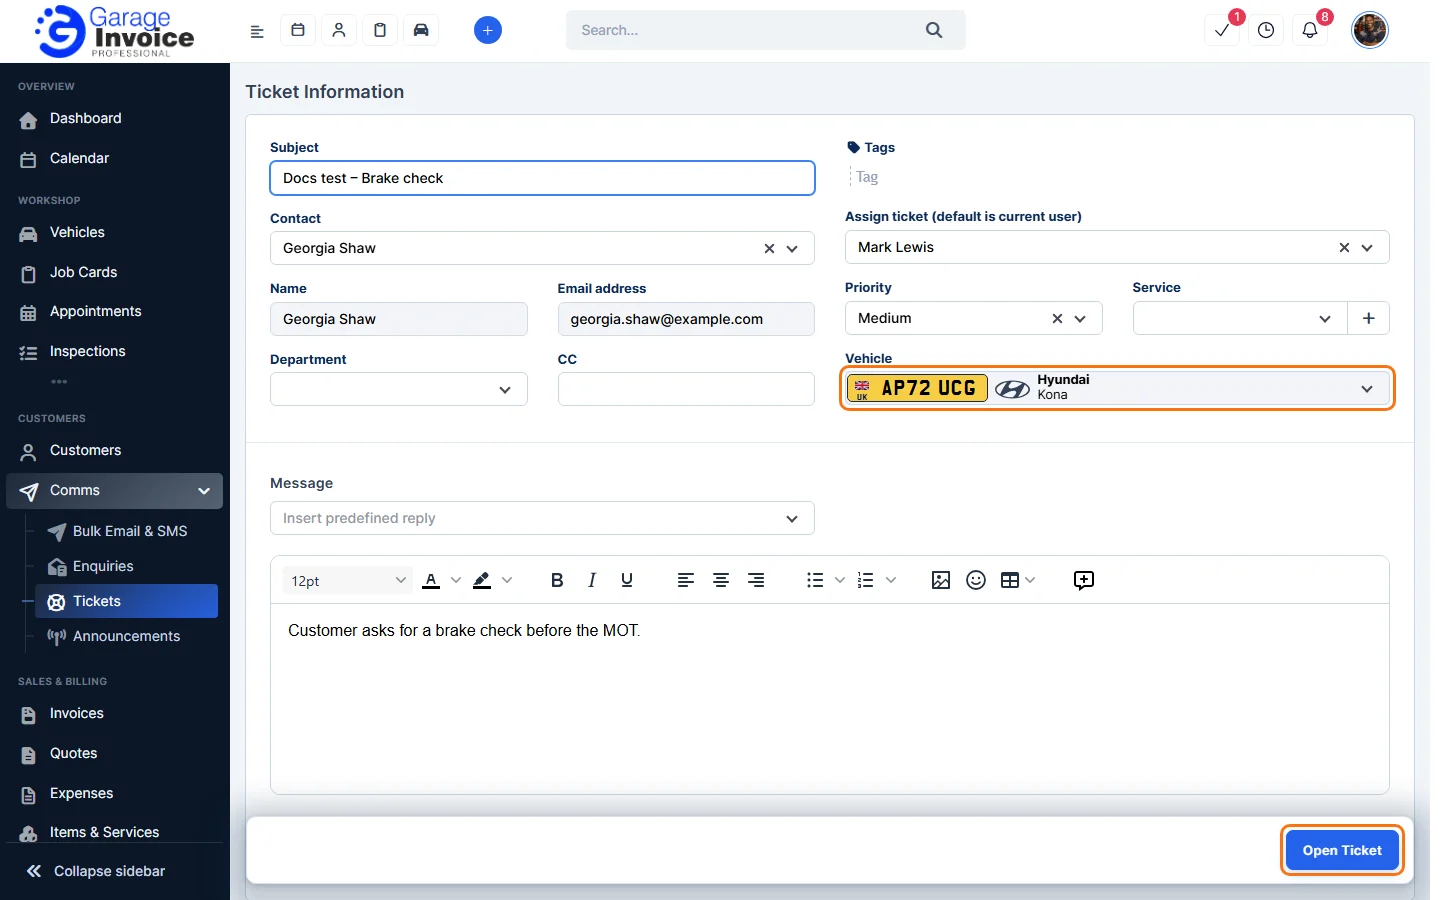
- Under Ticket Information, fill in:
- Subject: a short title, for example “Squeaking brakes”.
- Contact: start typing the customer’s name and choose the contact. Name and Email address fill in automatically, and a Vehicle field appears so you can link one of their vehicles.
- Department: for example Workshop, Store or Reception.
- If you like, also set:
- CC: extra email addresses that get the replies.
- Tags.
- Assign ticket (default is current user): the staff member who looks after the ticket.
- Priority: Low, Medium (default) or High.
- Service: click + to add a new one.
- Type the Message. Use Insert predefined reply to add a saved text. Add files under Attachments (click + for more files).
- Click Open Ticket. The ticket opens and gets the next ticket number.
Create a ticket for someone who isn’t a contact
- On the new ticket form, click Ticket without contact next to Ticket Information.
- The Contact field is replaced by Name and Email address. Type them in. Click Ticket to contact to go back to choosing a contact.
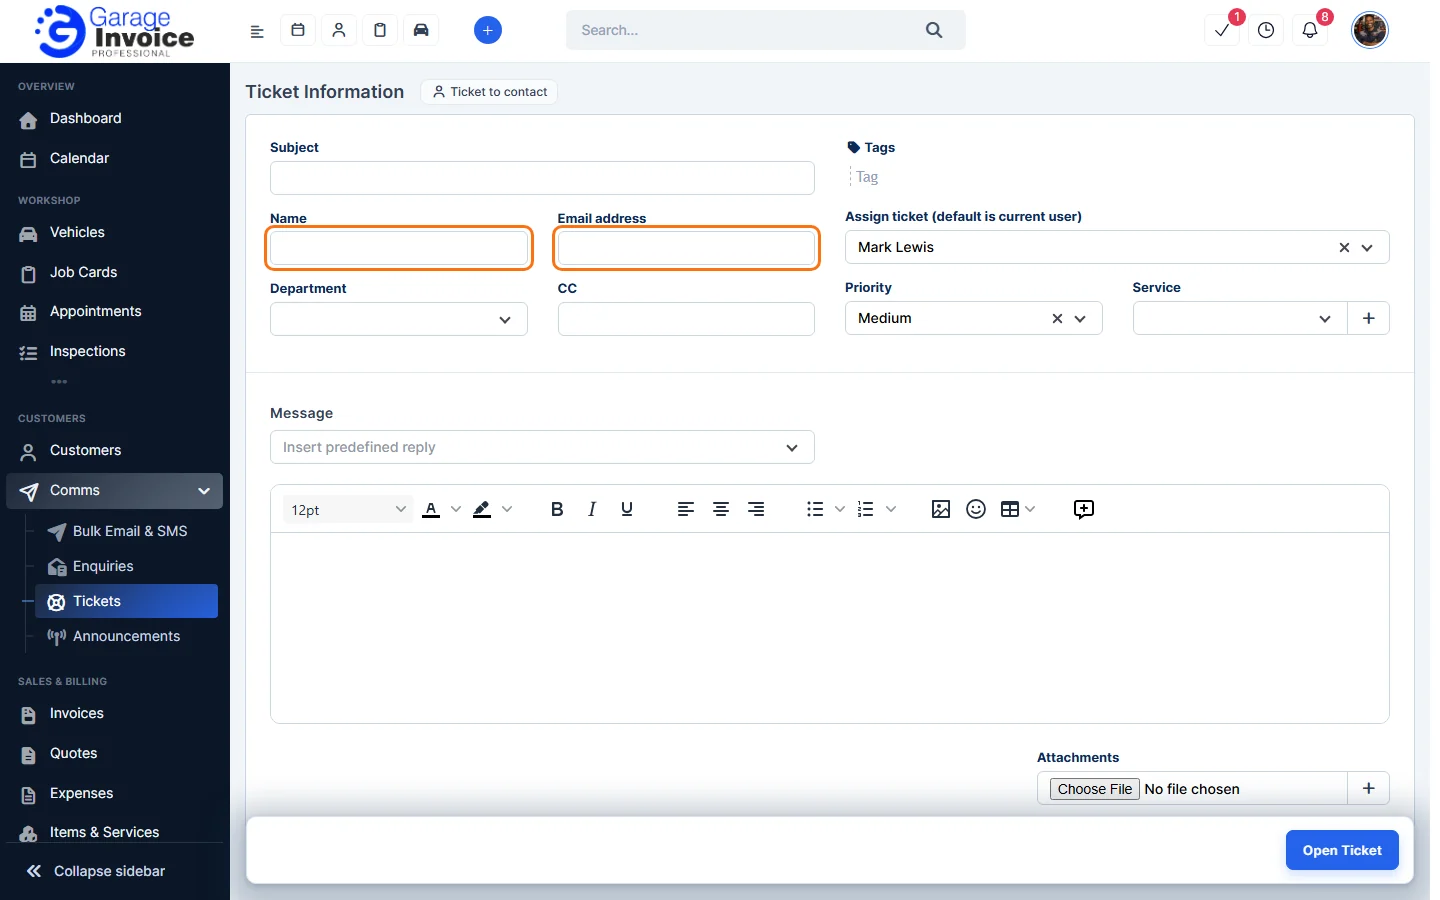
- Fill in the rest of the form and click Open Ticket.
Create a ticket from a vehicle
- Open the vehicle, click the Communication tab, then Tickets. The Tickets Summary shows the vehicle’s tickets by status.
- Click New Ticket.
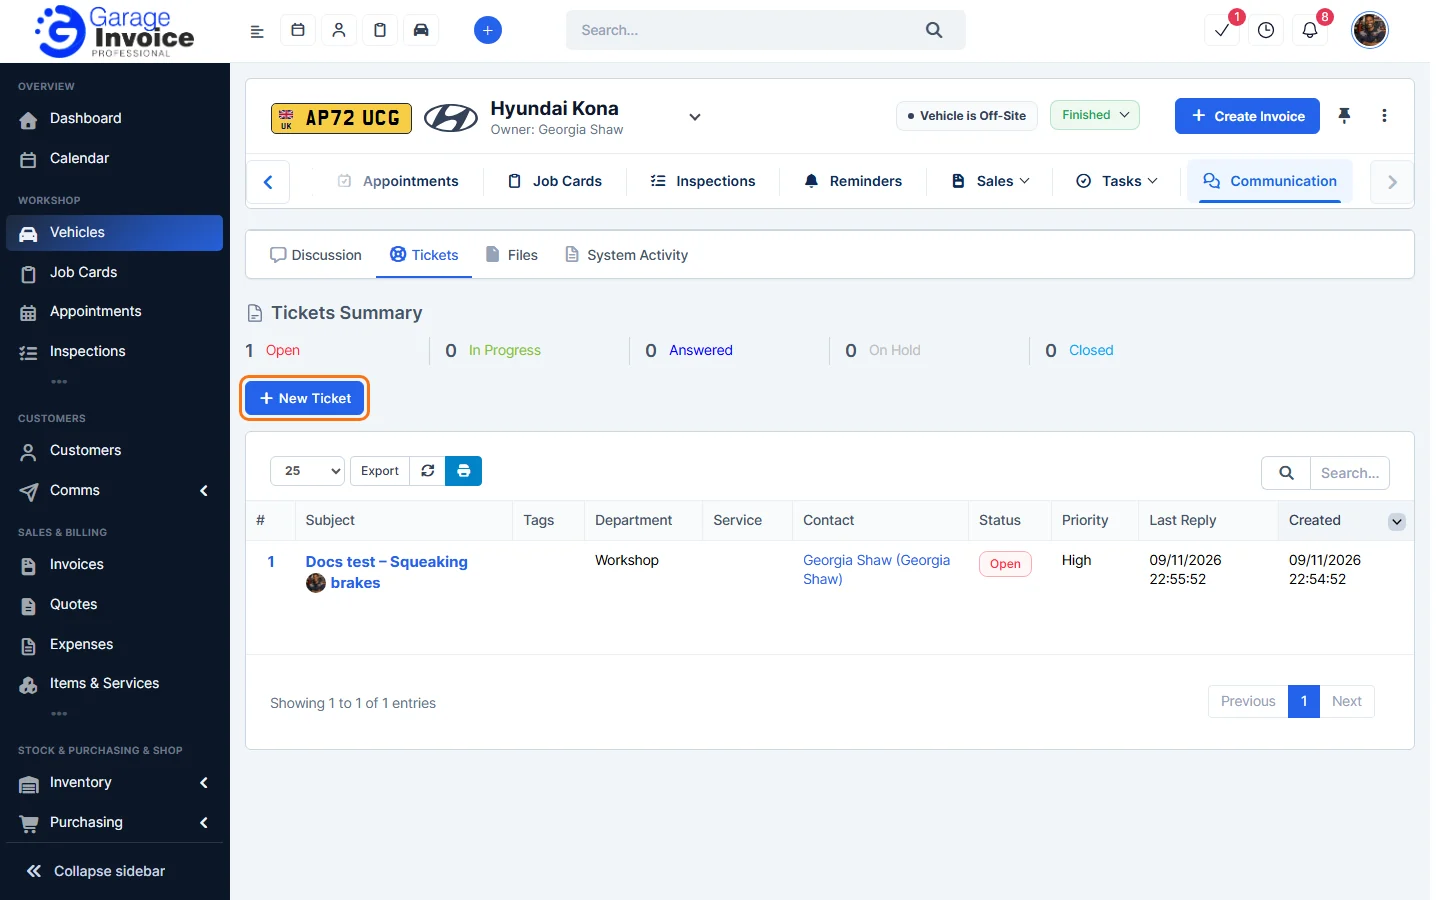
- The vehicle’s owner and the Vehicle are already filled in. Add the Subject, Department and Message and click Open Ticket.
Tip: what the customer sees on the public form, and who gets notified about new tickets, is set in Support Ticket Settings.