
Apply Markup works out new selling prices for the lines on an invoice from what each part or service cost you (its purchase price). You can add the same markup to every line, set a different markup for each item type, or aim for a target profit margin. You see the new prices before anything changes, and nothing is saved until you save the invoice.
Open the invoice for editing first: click Invoices in the sidebar, hover over the invoice and click Edit. See Edit Invoice.
Step 1: Make sure your lines have a purchase price
Markup is calculated from the purchase price, so a line without one is skipped (unless you choose otherwise in the window). Lines get their purchase price in two ways:
- From Items & Services: when you add an item that has a Purchase Price saved, the line uses it. See Add an Item or Service and Bulk Update Items.
- Typed on the line: for a one-off part, or an item with no purchase price saved, add it on the invoice as shown below.
Add a purchase price to a line
- In Invoice Items, move your mouse over the Price box on the line. A small tag button appears next to the price. Its tooltip reads “Purchase Price – For internal use only. Used for profit and margin calculations. Not visible to the customer.”
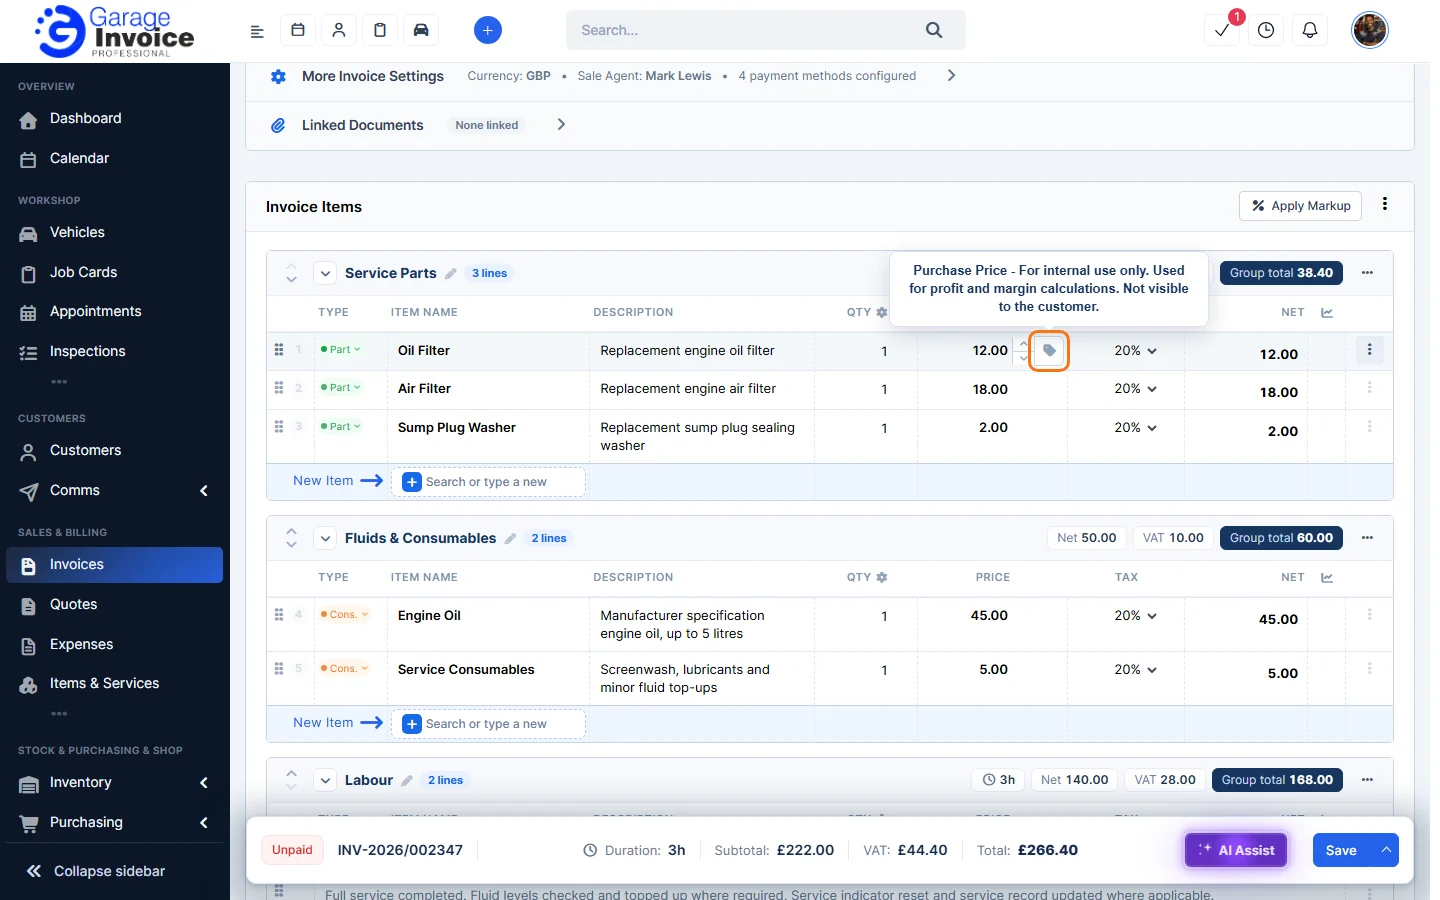
- Click the tag button. In the Purchase Price box, type what the part or service cost you, then press Enter or click anywhere outside the box.
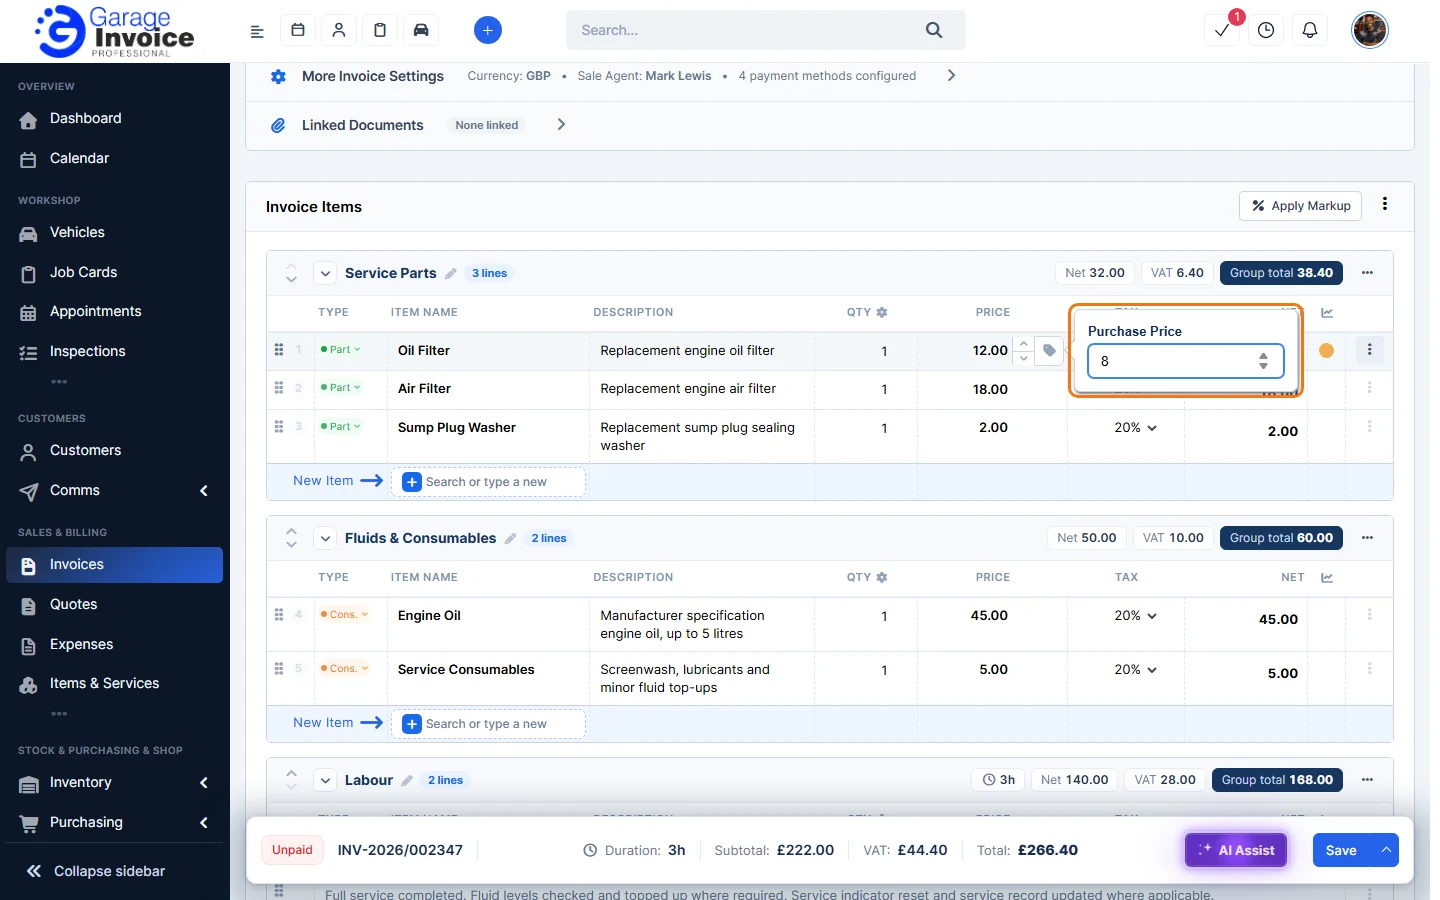
- Repeat for any other lines that need one.
Note: the purchase price is for your own use. It is never shown on the invoice PDF or to the customer. It is stored on this invoice line; to have it filled in automatically next time, add the purchase price to the item in Items & Services.
Check the margin on each line
Once a line has a purchase price, a coloured dot appears in the column with the chart icon, at the end of the line. Hover over the dot to see the line’s Cost, Charge, Margin, Profit and Markup. The tooltip also suggests a price, for example “Click to set price to £13.33”. Click the dot to use that price.
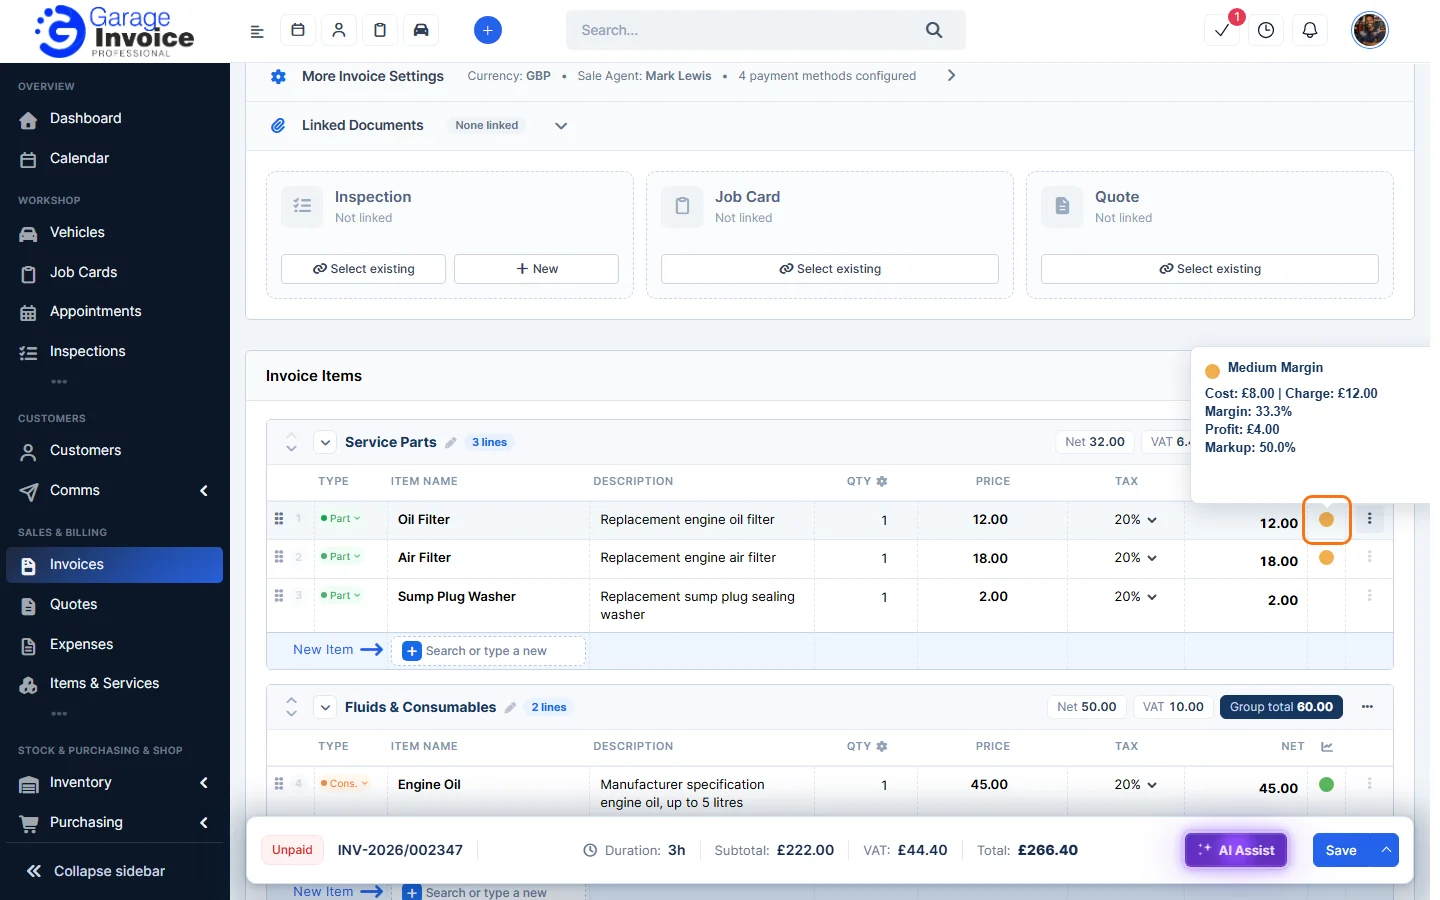
- An orange dot means a medium margin, and a green dot a healthy one.
- A red warning icon means Selling Below Purchase Price: the line is priced below what it cost you.
Step 2: Apply markup
- Click Apply Markup at the top right of Invoice Items.
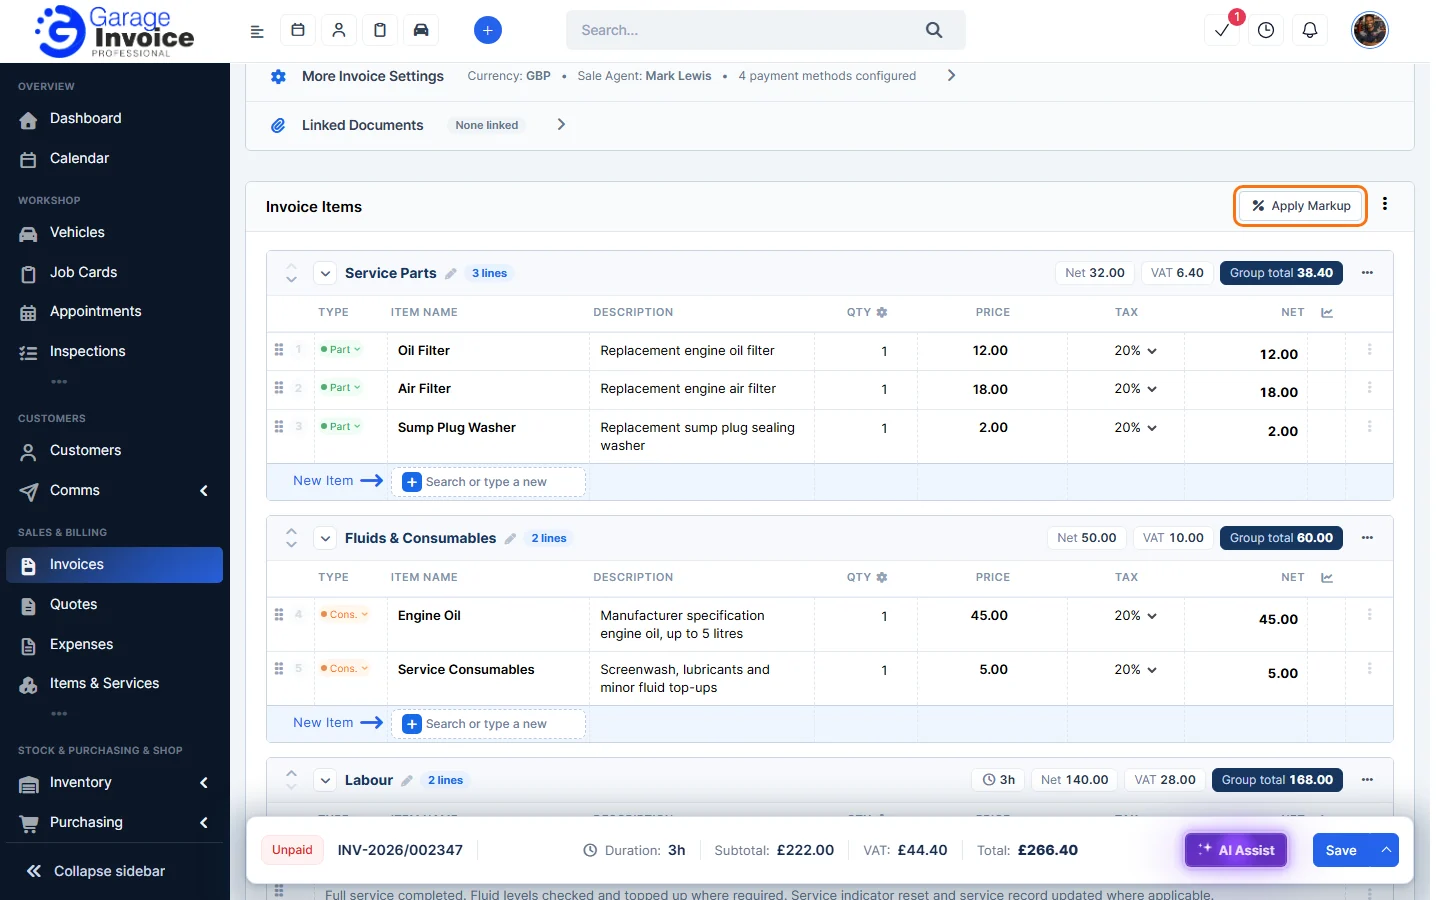
- Under How to apply, pick one option from each pair:
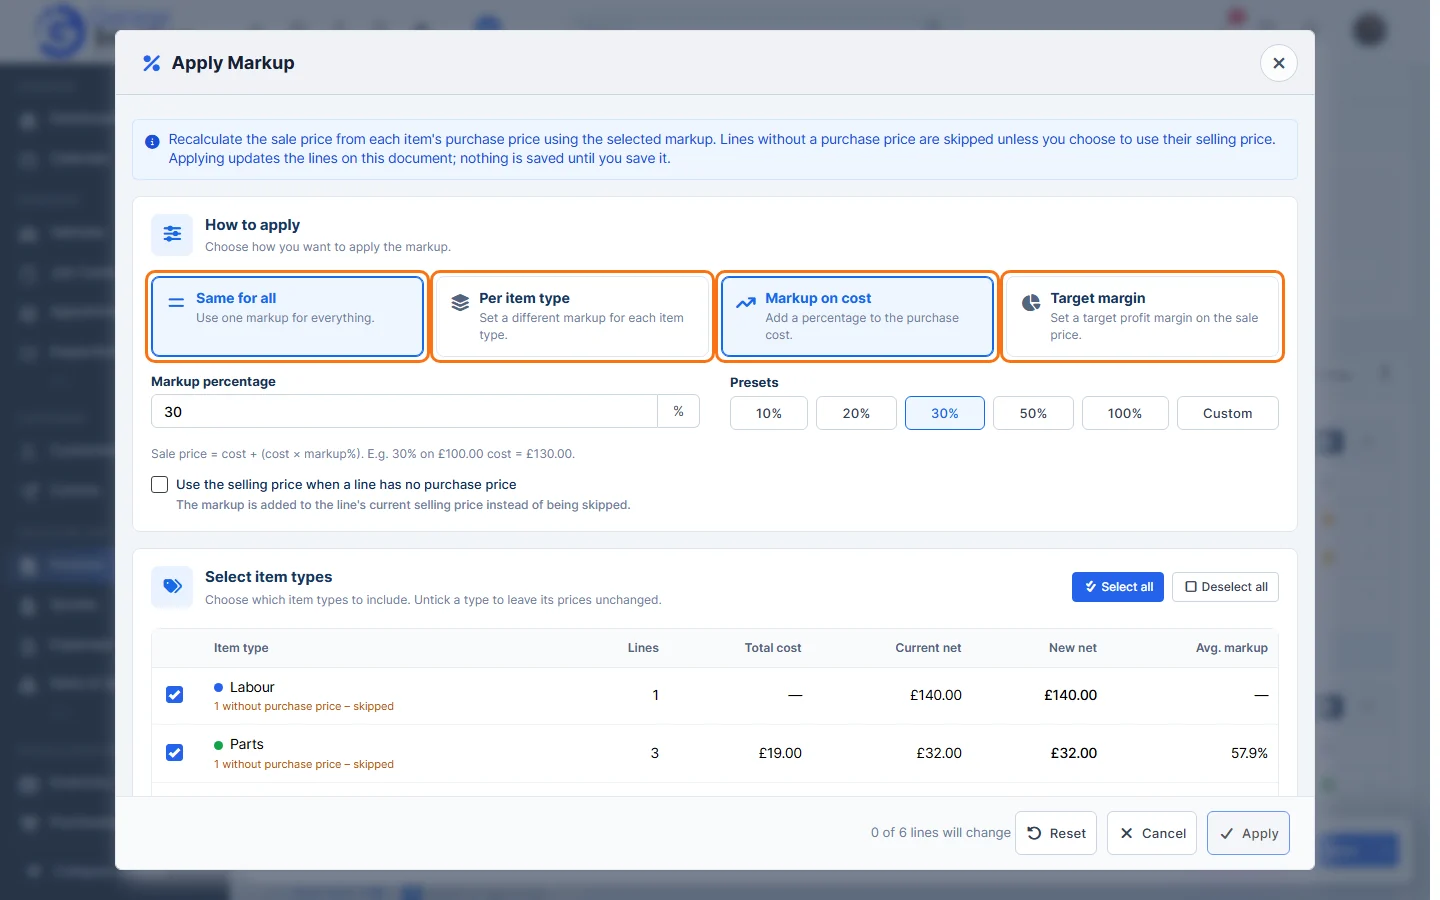
- Same for all: use one percentage for every line.
- Per item type: set a different percentage for each item type, for example 30% on parts and 0% on labour.
- Markup on cost: adds a percentage to the purchase price. Sale price = cost + (cost × markup%). For example, 30% on a £100.00 cost gives £130.00.
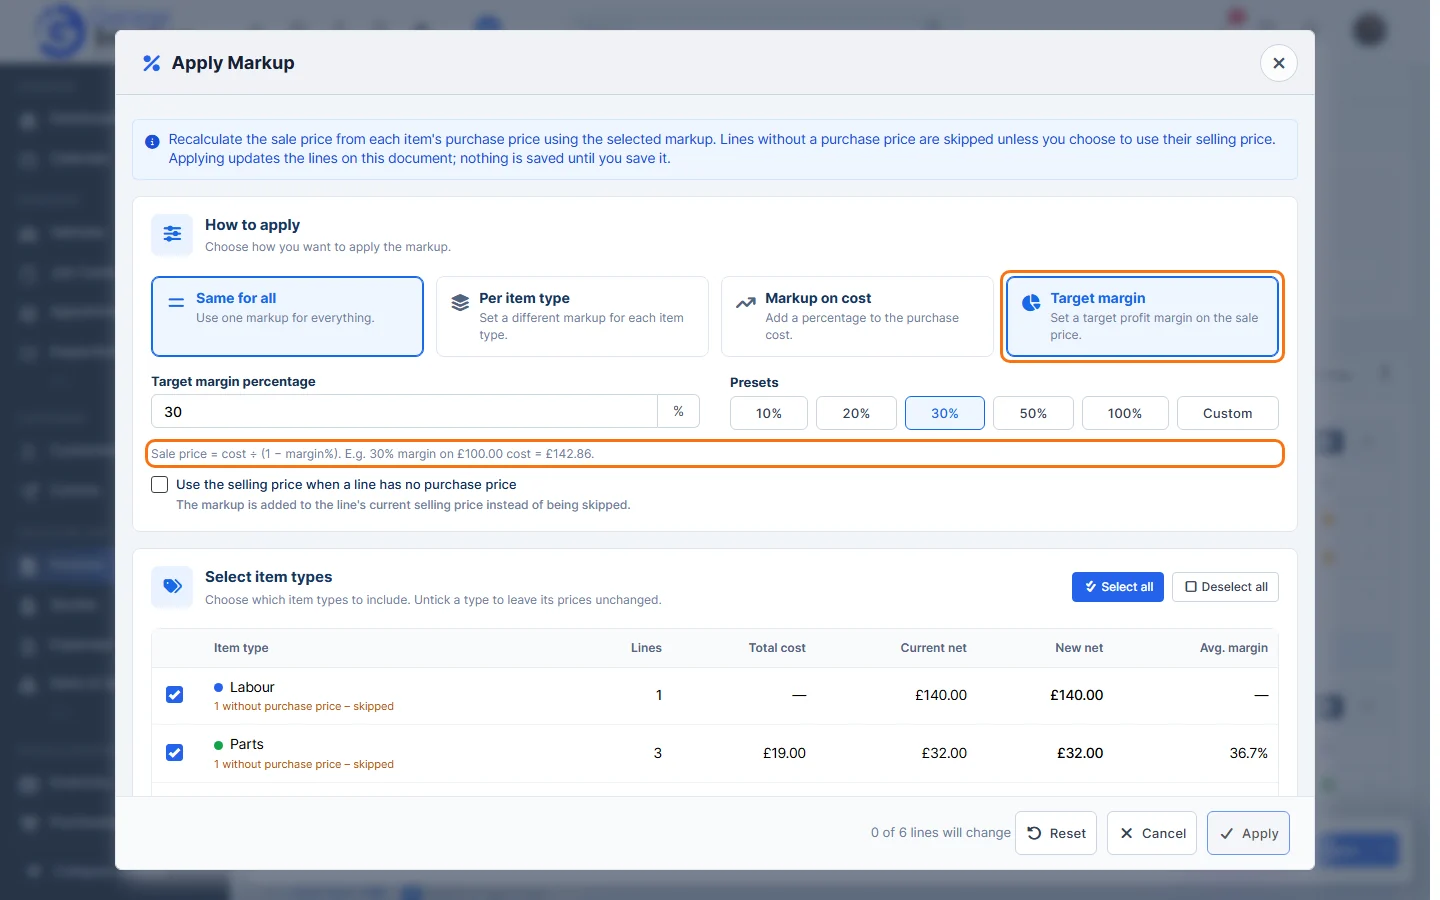
- Target margin: sets the price so that the given percentage of the sale price is profit. Sale price = cost ÷ (1 − margin%). For example, a 30% margin on a £100.00 cost gives £142.86. A target margin must be below 100%.
- Enter the Markup percentage (or Target margin percentage), or click a preset: 10%, 20%, 30%, 50% or 100%. Custom takes you to the box so you can type your own.
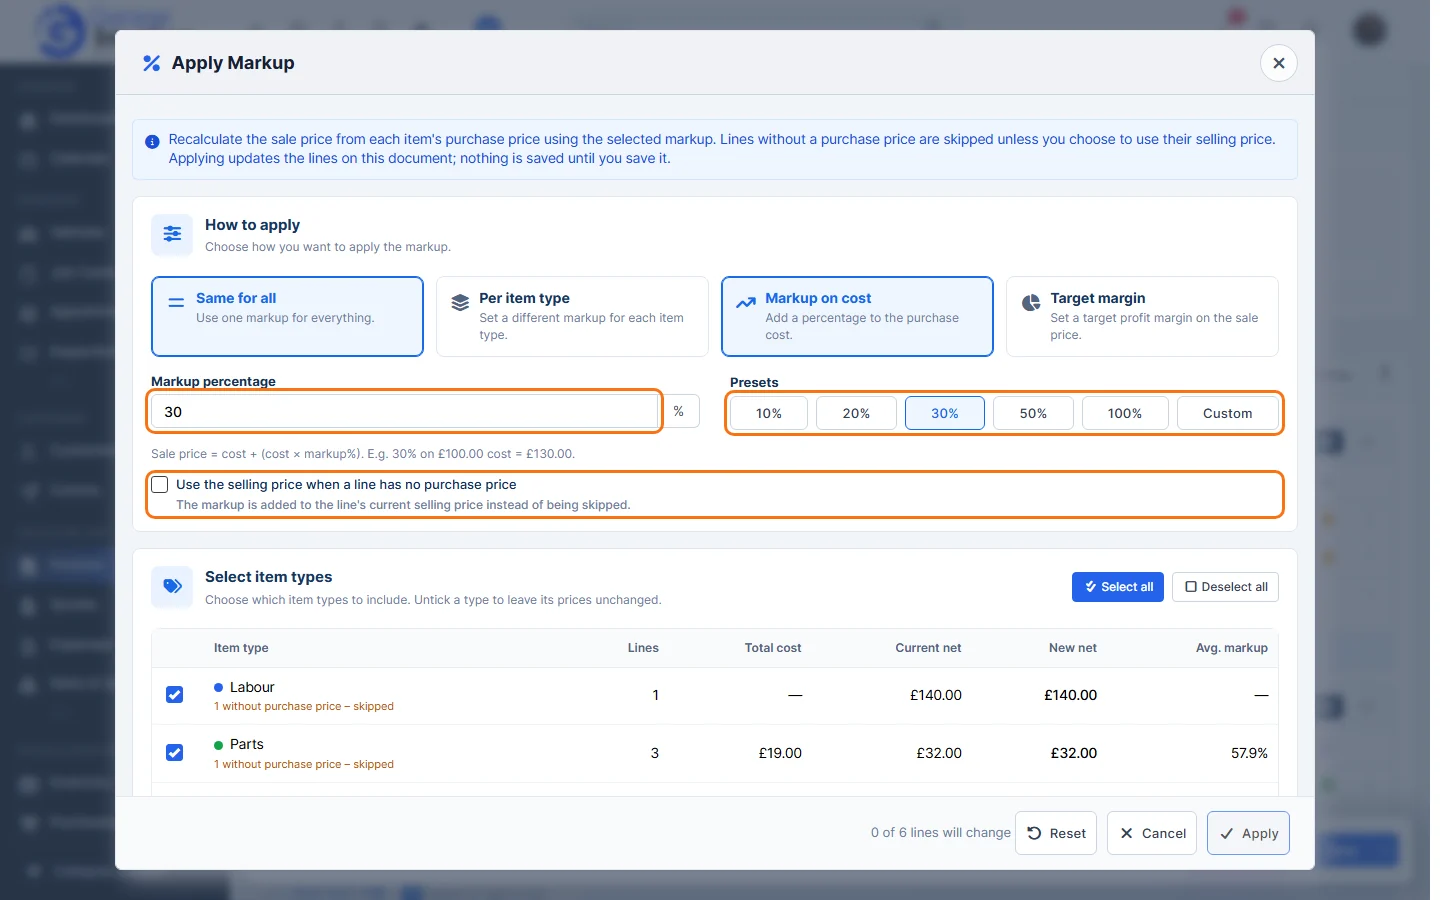
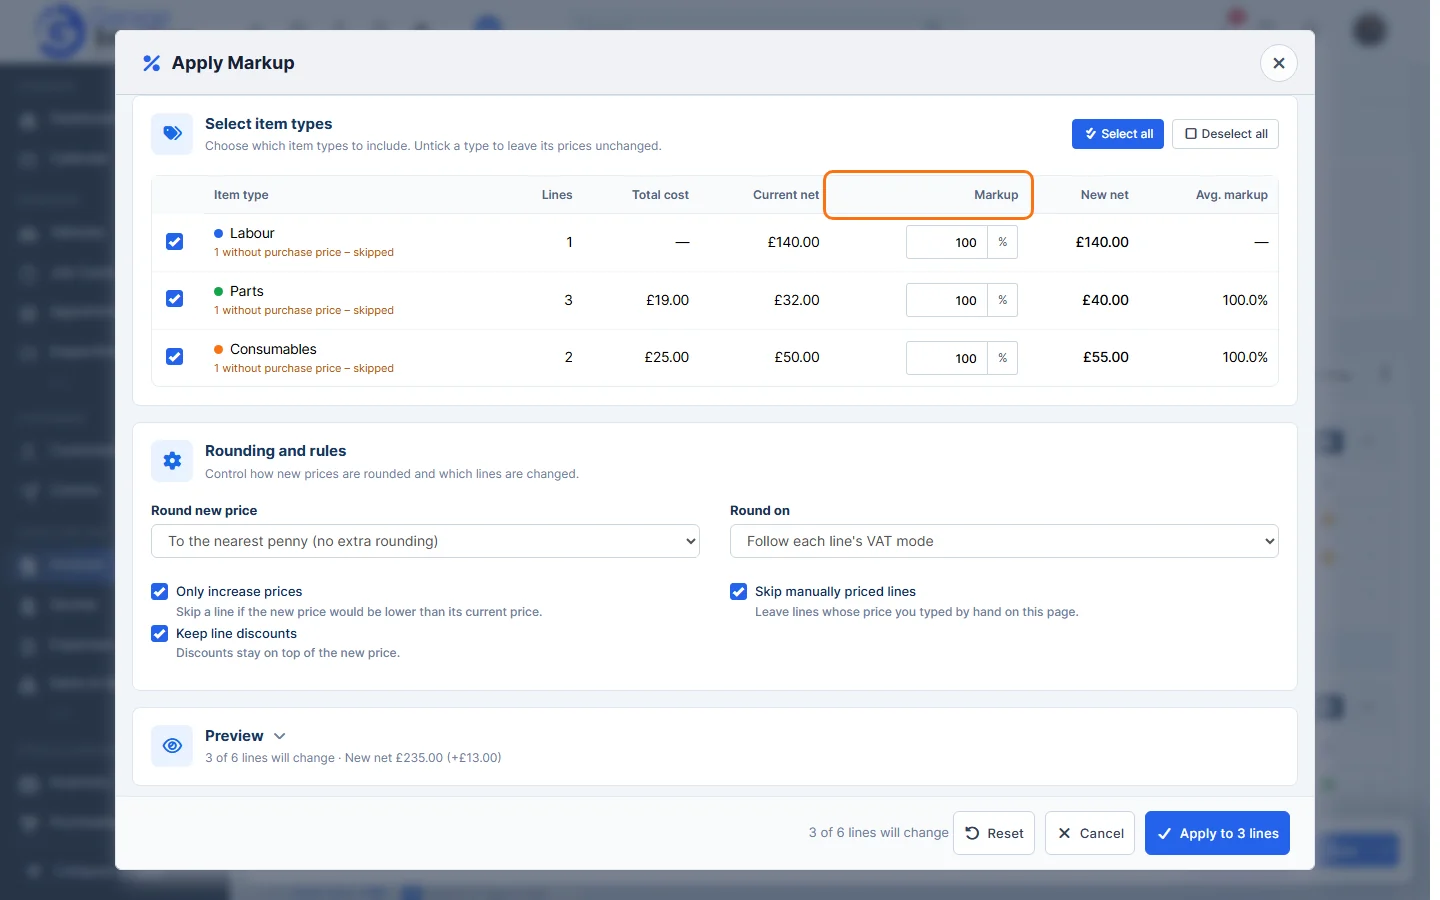
Tick Use the selling price when a line has no purchase price if you also want to raise lines that have no cost: the markup is then added to the line’s current selling price instead of the line being skipped. - Under Select item types, tick the item types to include (such as Labour, Parts and Consumables). Untick a type to leave its prices as they are. Use Select all or Deselect all to change them all at once. For each type the table shows:
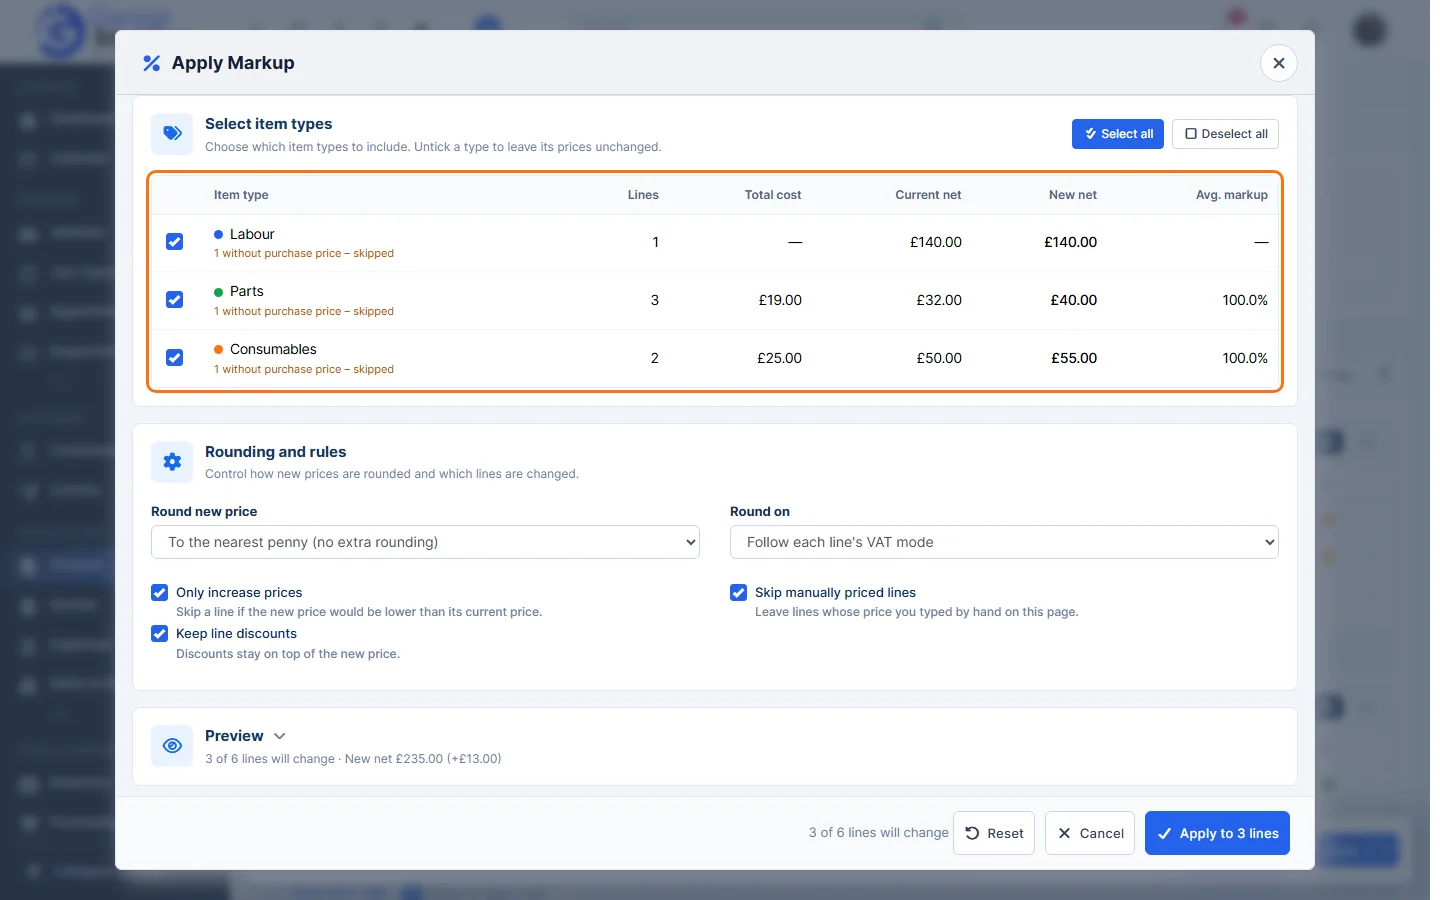
- Lines: how many lines of that type are on the invoice, with a note in orange such as “1 without purchase price – skipped”.
- Total cost, Current net and New net: the purchase cost and the net price now and after the markup.
- Avg. markup (or Avg. margin for a target margin): the result across those lines.
If you chose Per item type, each type has its own Markup box. Type the percentage for each one.
- Under Rounding and rules, choose how the new prices are rounded and which lines may change:
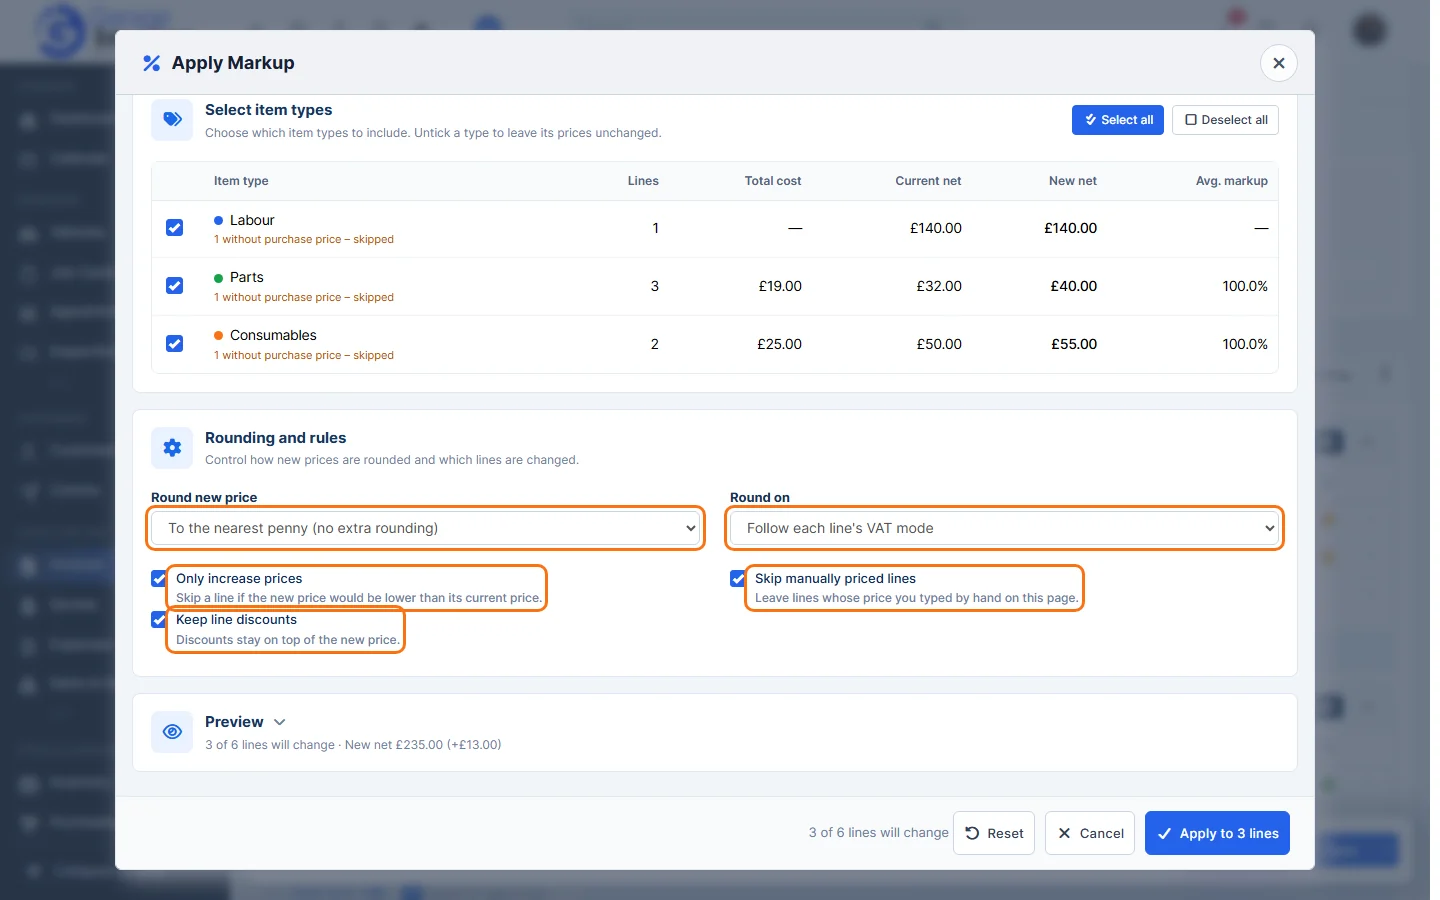
- Round new price: To the nearest penny (no extra rounding), To the nearest 0.05, 0.10, 0.50 or 1.00, or Up to a price ending .99.
- Round on: Follow each line’s VAT mode, Price excl. VAT or Price incl. VAT. For example, choose Price incl. VAT if you want the price the customer pays to end in .99.
- Only increase prices (on by default): skip a line if the new price would be lower than its current price.
- Keep line discounts (on by default): a discount on a line stays on top of the new price.
- Skip manually priced lines (on by default): leave lines whose price you typed by hand on this page.
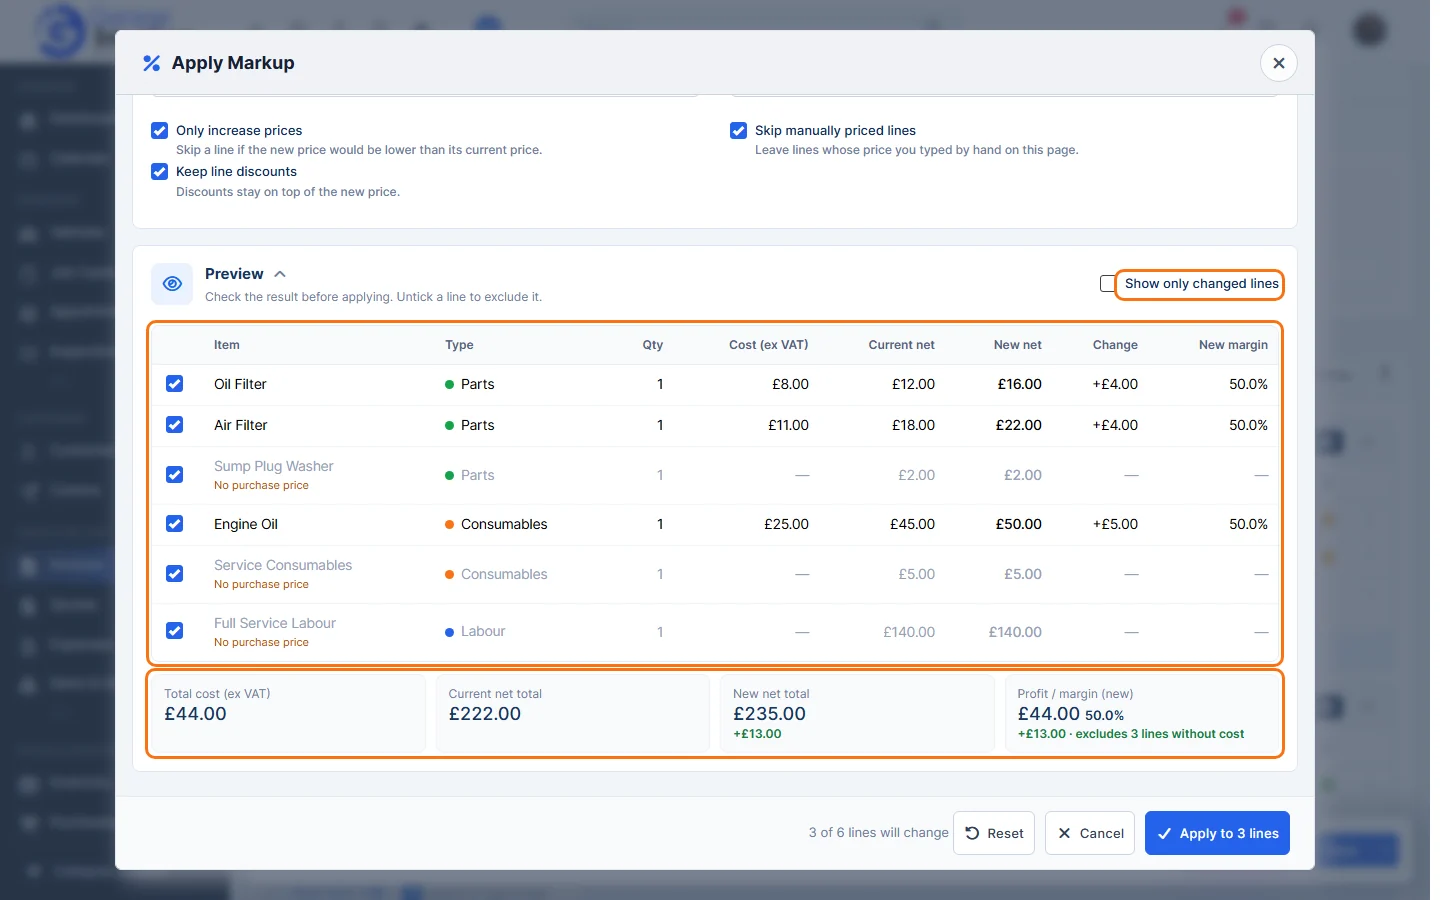
- Click Preview to check every line before you apply. For each line you see the Cost (ex VAT), Current net, New net, the Change and the New margin. Lines that won’t change say why, for example No purchase price or Would lower the price. Untick a line to leave it out, or tick Show only changed lines to hide the rest. Underneath are the totals: Total cost (ex VAT), Current net total, New net total and Profit / margin (new).
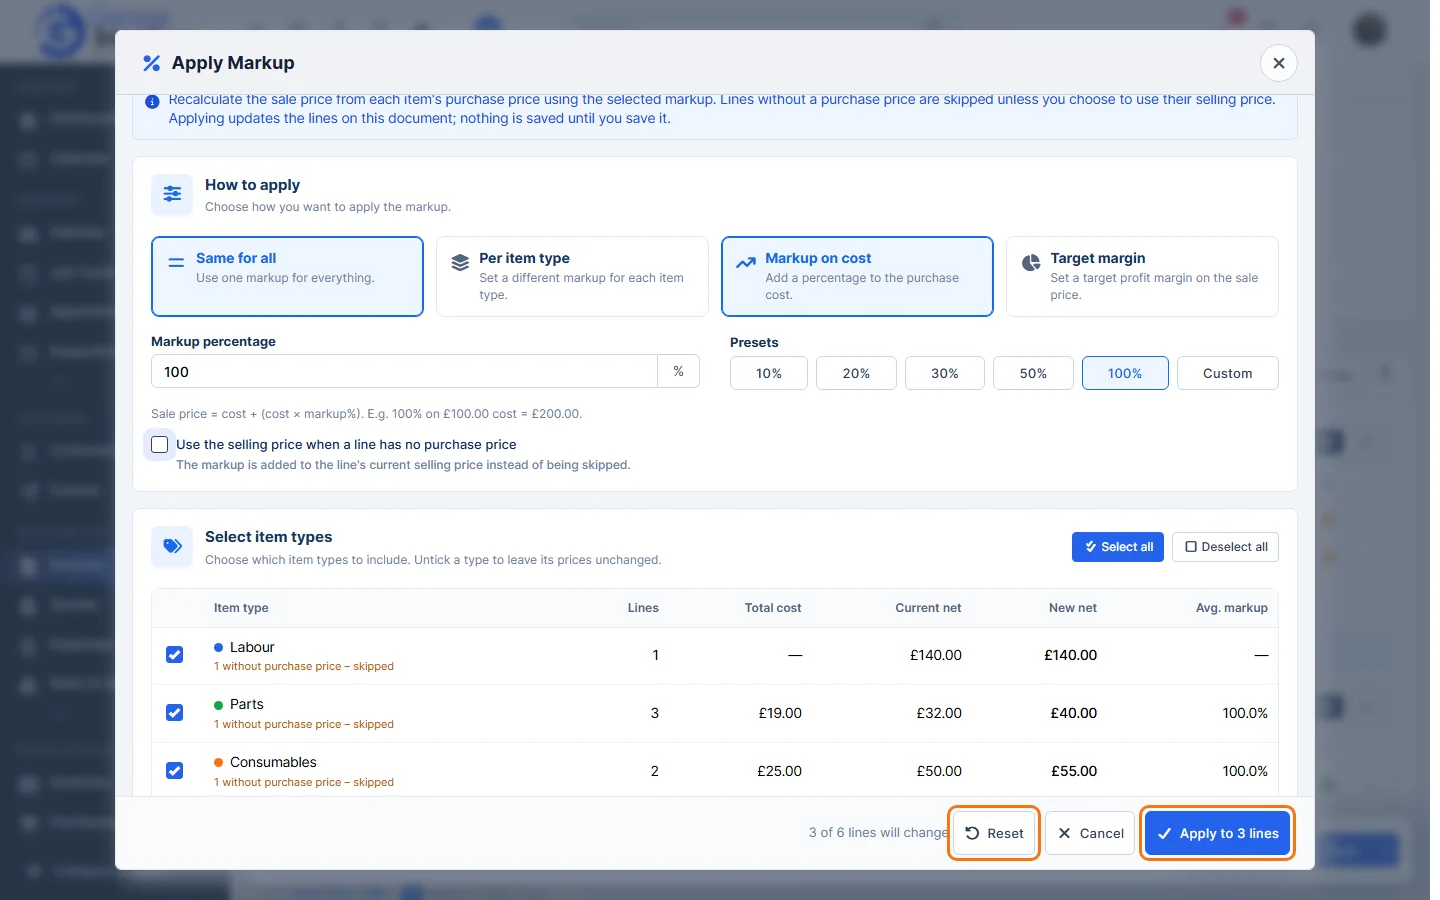
- The bottom of the window shows how many lines will change, for example “3 of 6 lines will change”. Click Apply to 3 lines (the button shows the number). Click Reset to start again, or Cancel to close without changing anything.
- The new prices appear on the lines and you’ll see “Markup applied to 3 lines. Save the document to keep the new prices.” Check the totals and click Save.
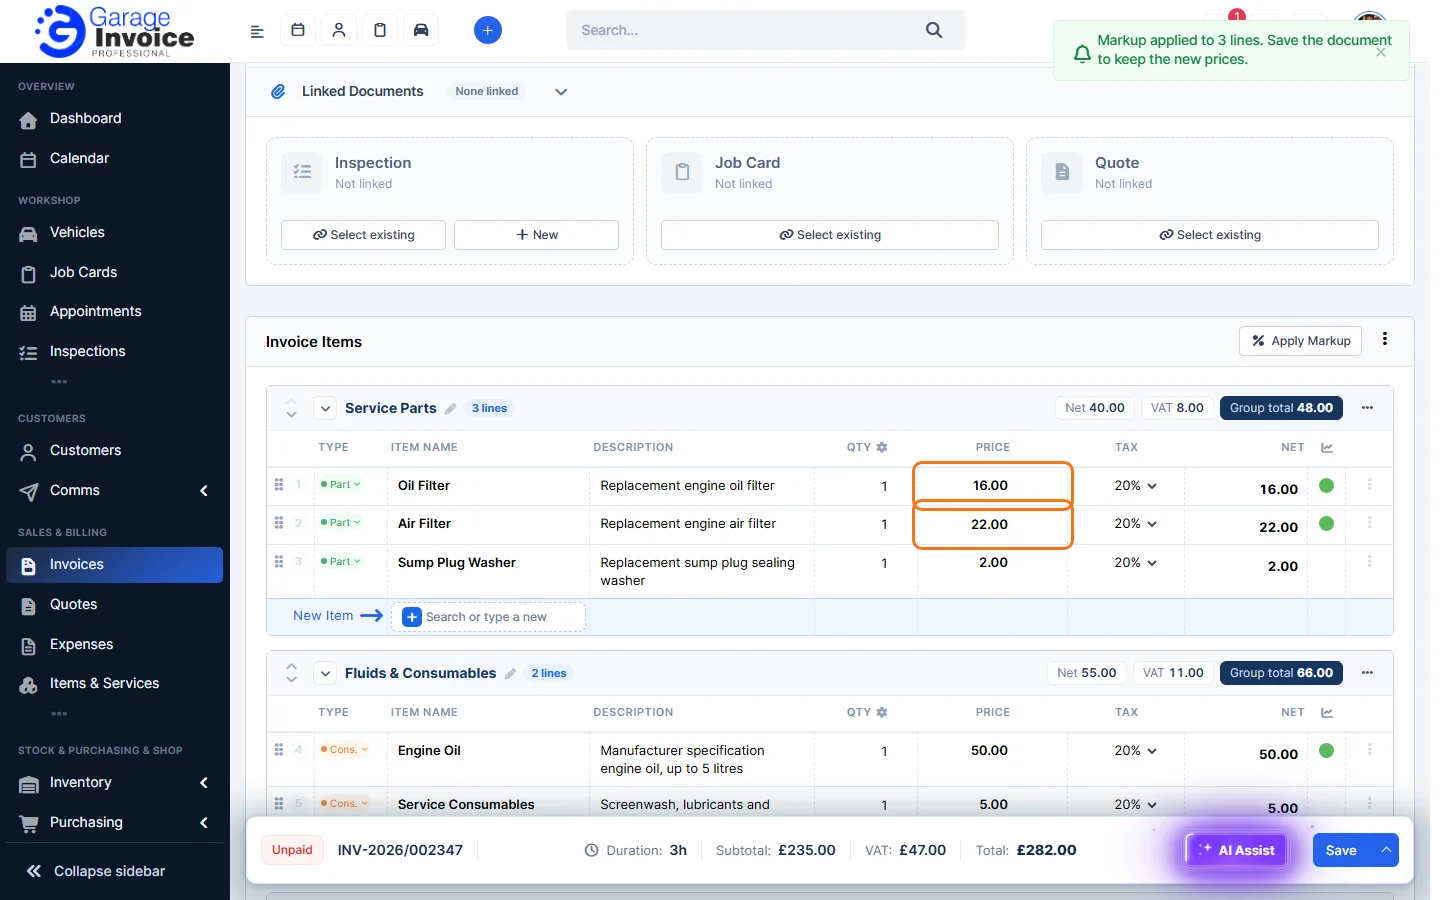
Note: if you leave the page without saving, the new prices are lost. Purchase prices you added on the lines are saved with the invoice.
Tip: purchase prices also power your profit reports. See Profit & Margin Report.
Related: Add New Invoice · Edit Invoice · Add an Item or Service
Feature Garage invoicing software: see what it does and how it fits your workshop.