
An inspection template is the checklist your technician fills in. You choose a template in Select Template when you create an inspection.
Manage templates
- Click Inspections in the sidebar, click the gear button and choose Templates.
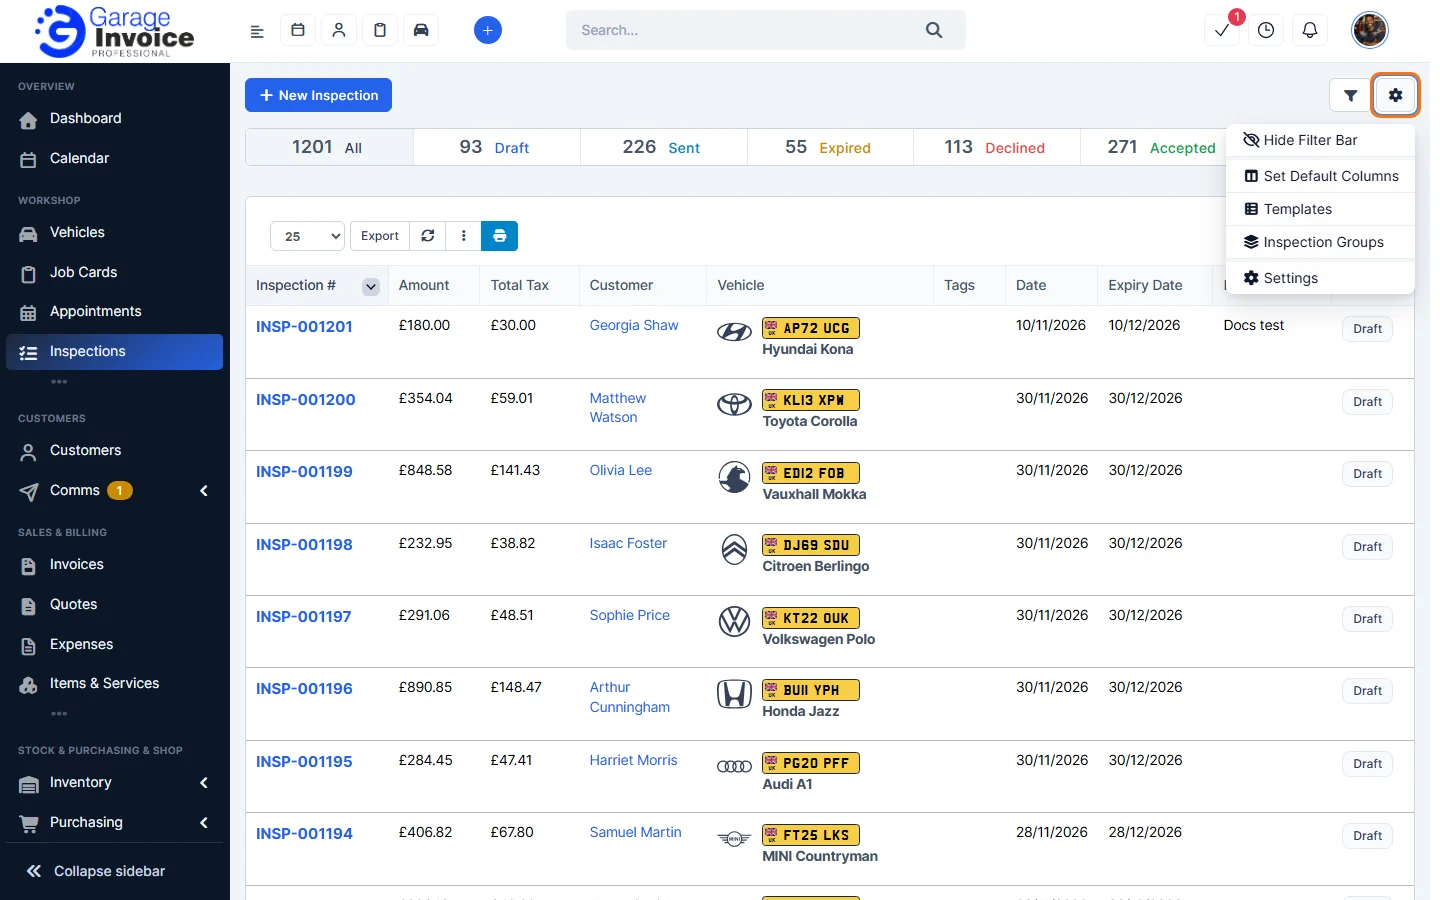
- The list shows each template with its number of Fields. The one marked default is selected for new inspections. Hover over a template for Edit, Copy, Make default and Delete. Click the print button to print a blank copy of the template.
Create a template
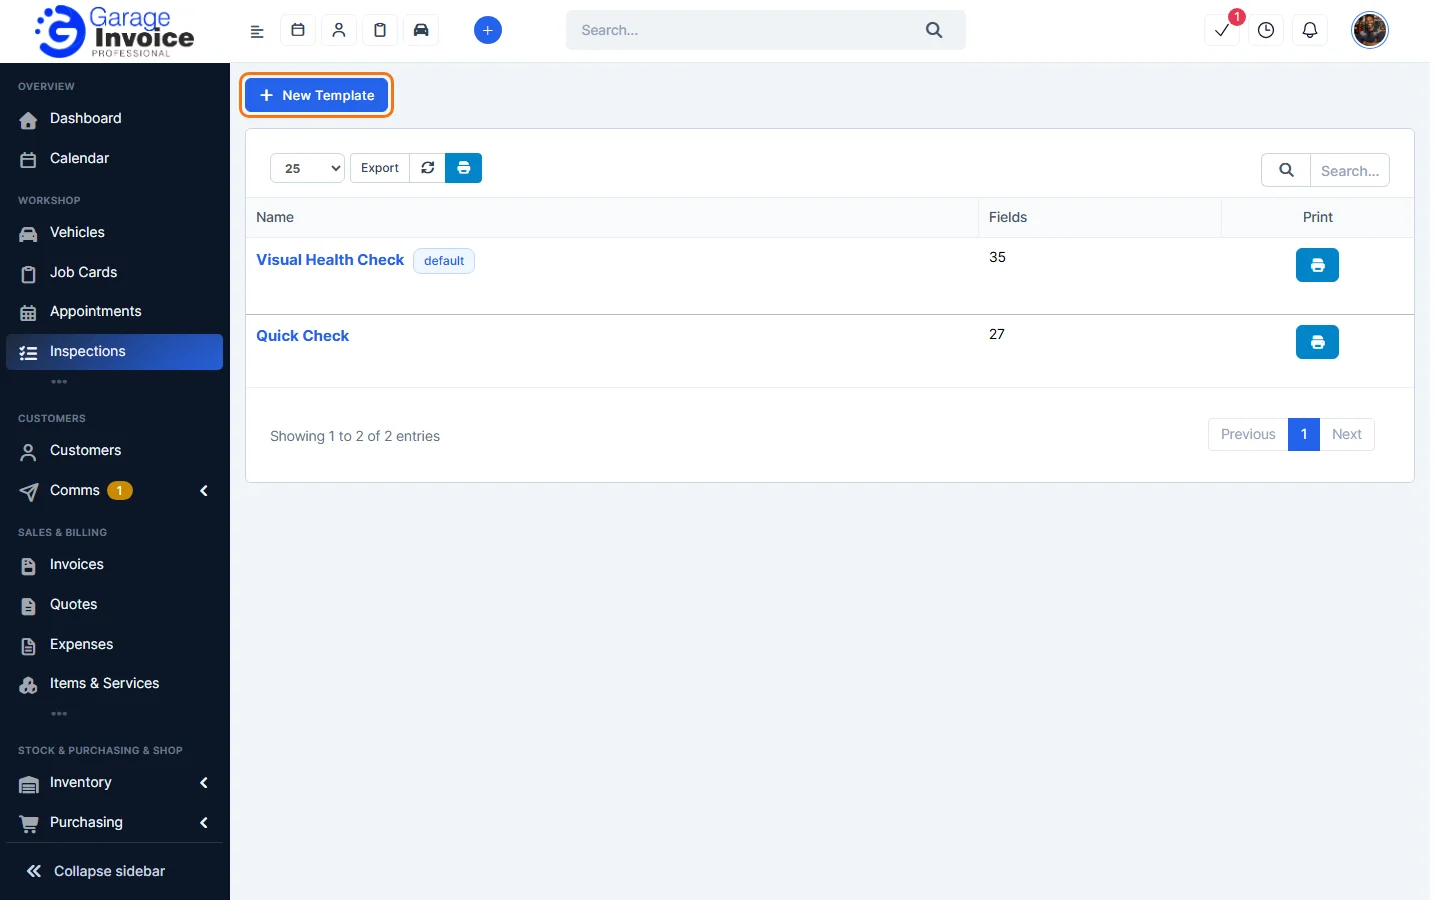
- Click New Template.
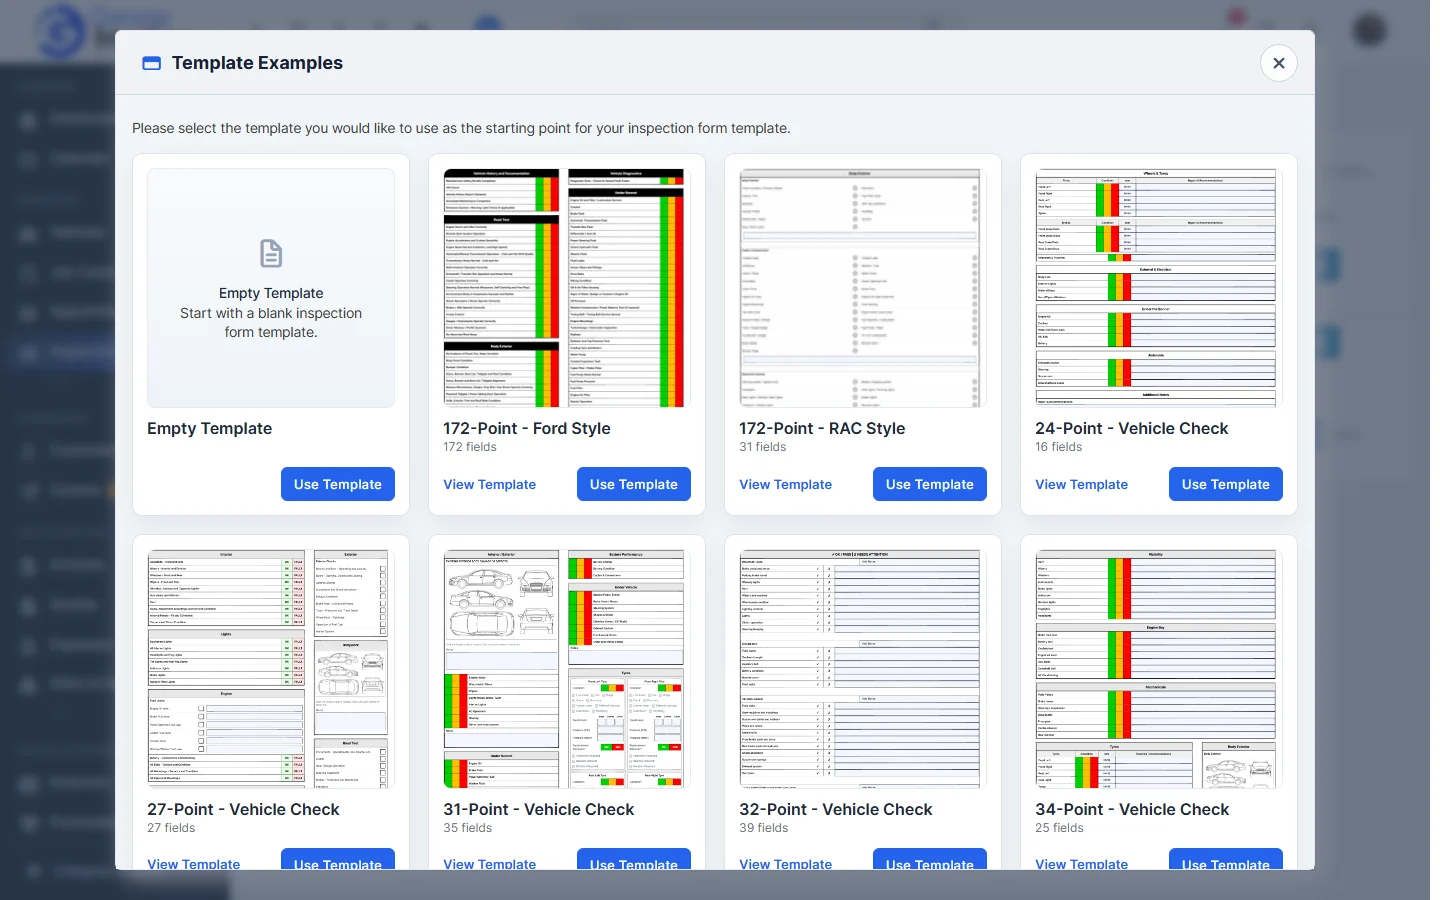
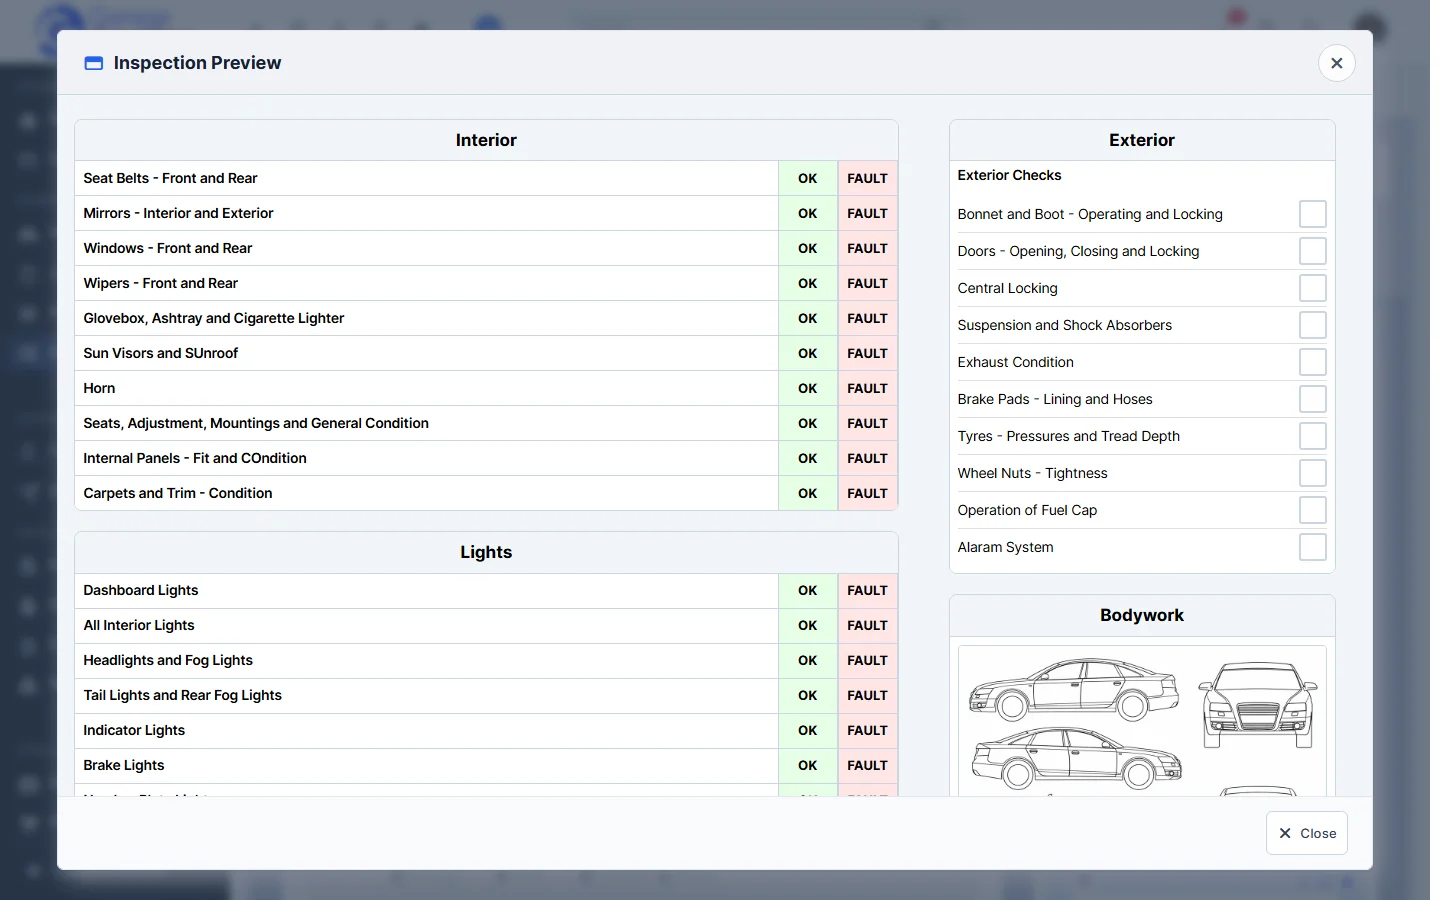
- In Template Examples, choose Empty Template to start from scratch, or a ready-made check (for example 172-Point – Ford Style, 31-Point – Vehicle Check or 88-Point – VAN Check). Click View Template to look at one first, then click Use Template.
- Enter a Name and build the form (see below).
- Click Preview to see how it looks, then click Save Template.
Build the form
The form is made of rows, columns, groups (sections) and fields (checks).
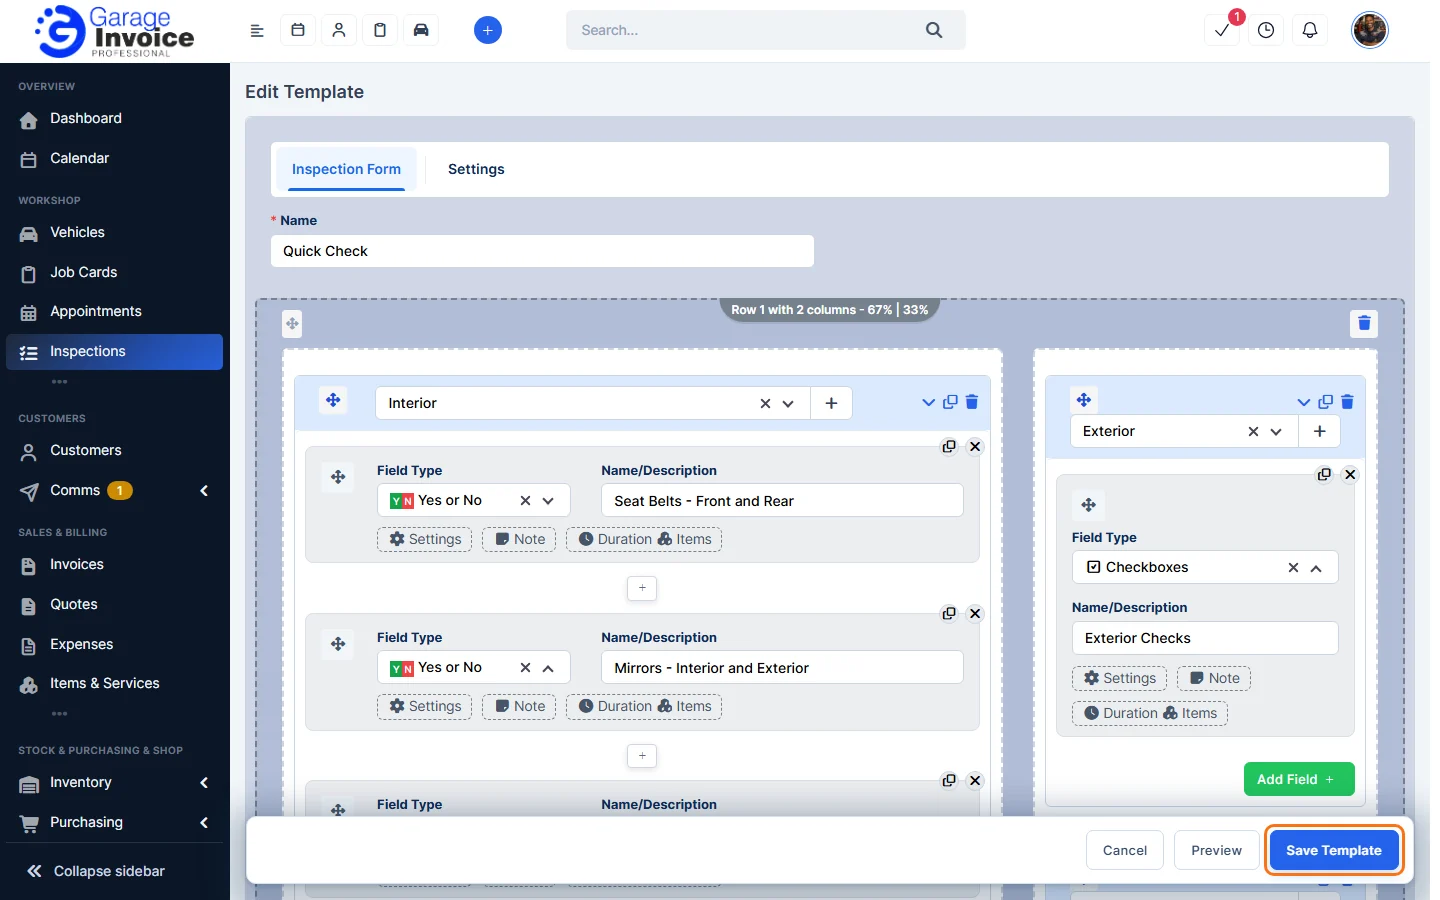
- Rows and columns: at the bottom, choose a layout (for example 100%, 50% | 50% or 66% | 33%) and click Add Row. Use the bin at the top right of a row to remove it, and drag it by the cross-arrows.
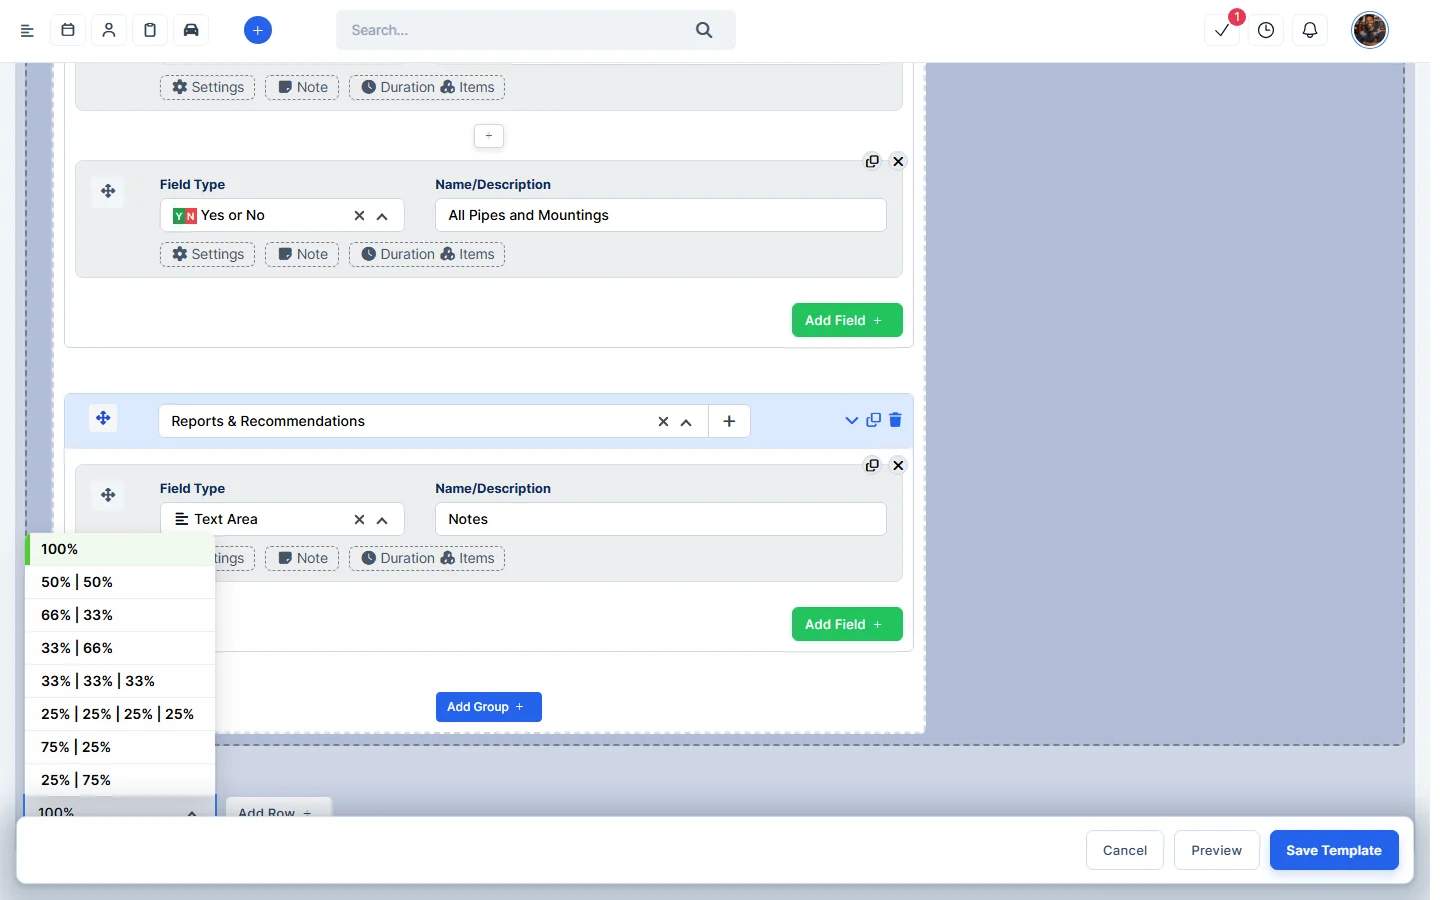
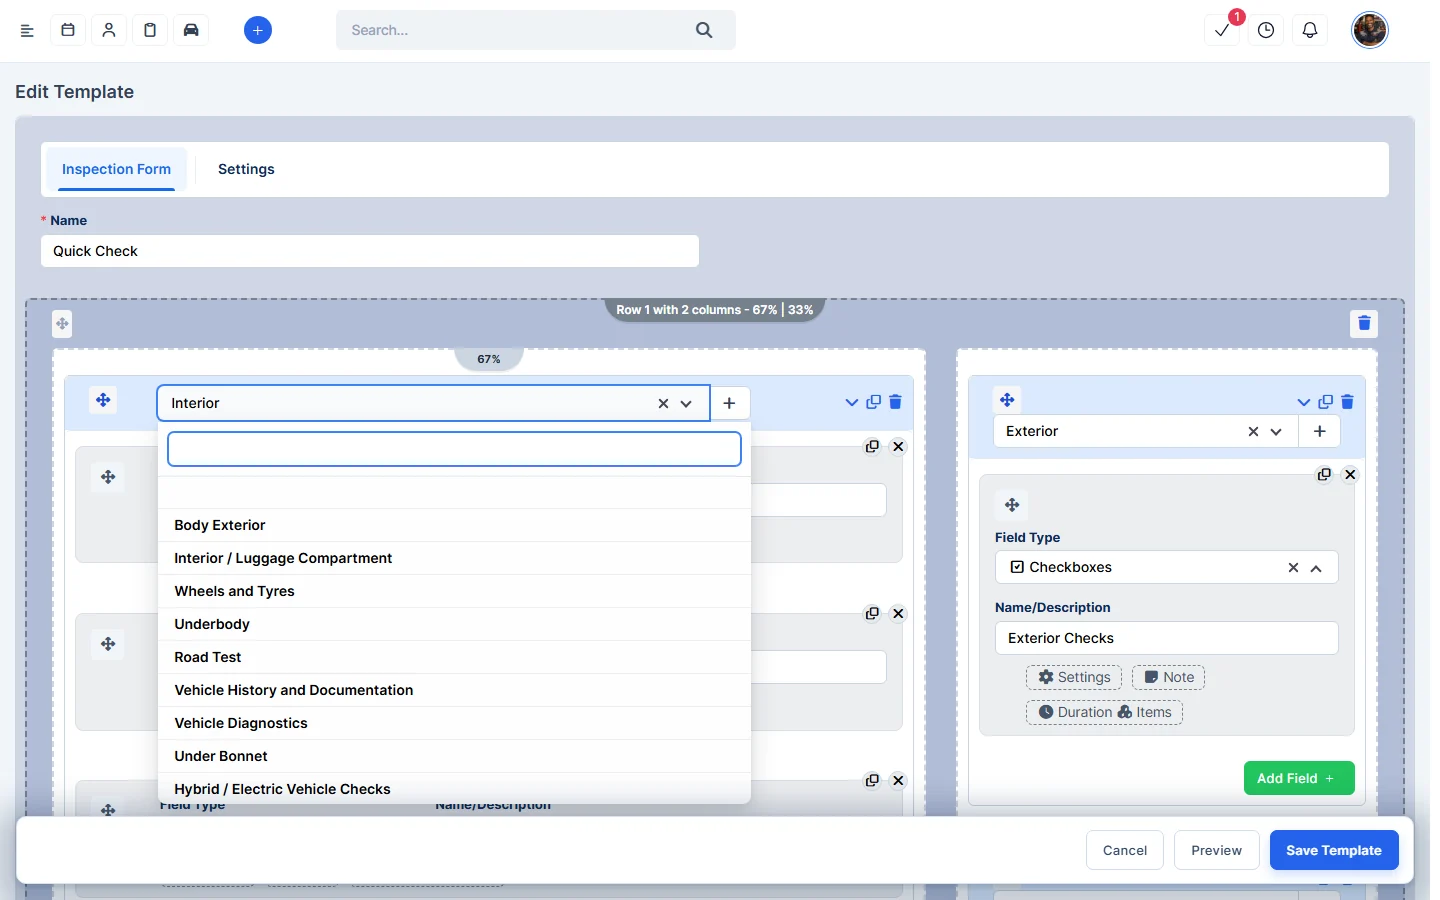
- Groups: click Add Group in a column, then pick the group name from the list, or type a new one and click +. The icons on the right collapse, copy or delete the group. See Inspection Groups.
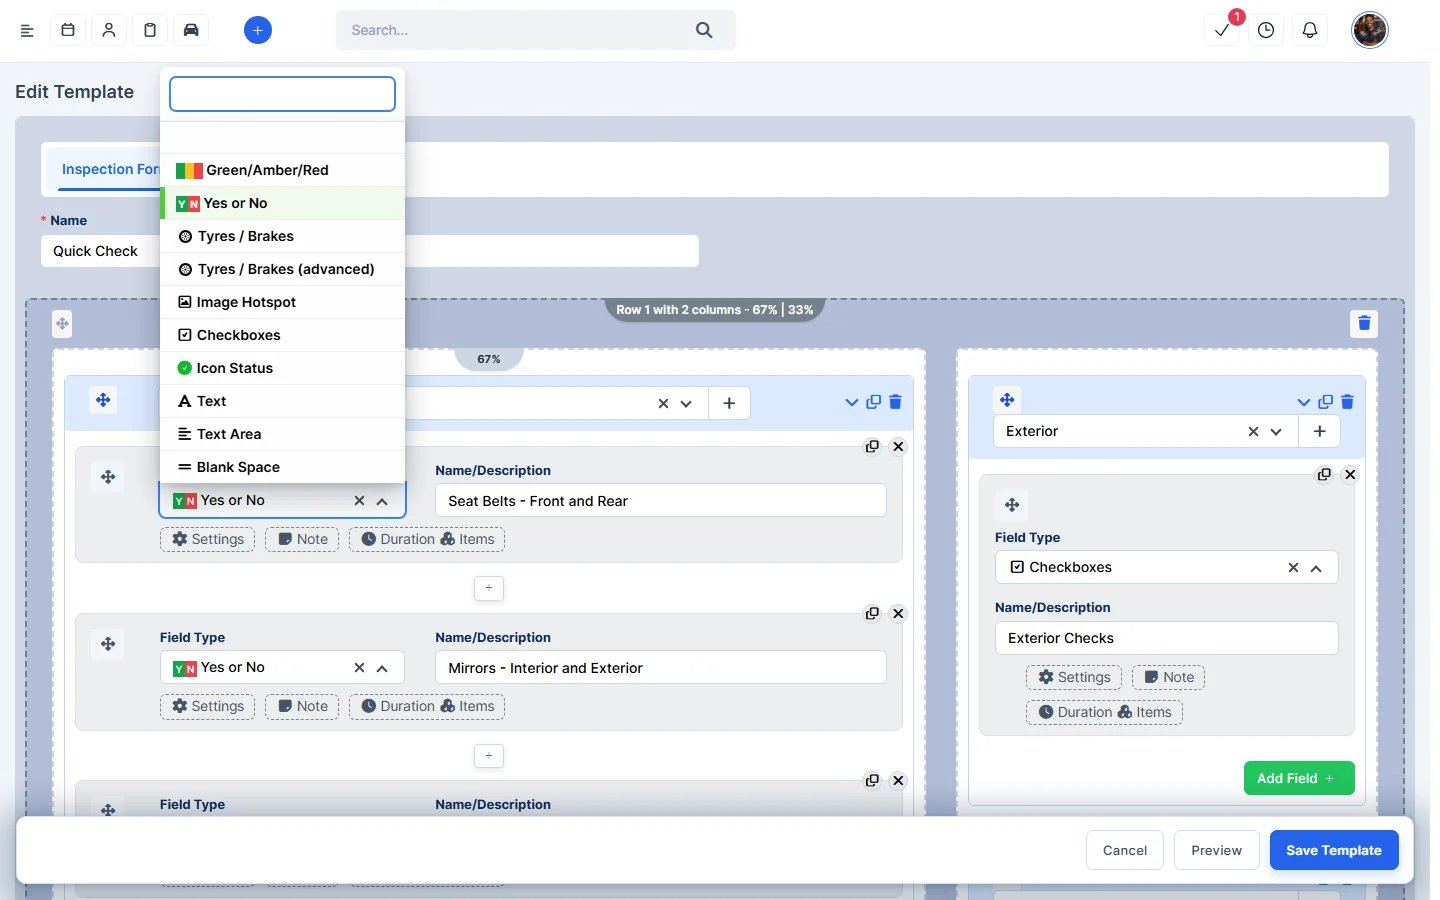
- Fields: click Add Field (or the small + between fields), choose the Field Type and type the Name/Description. Use the icons at the top right to copy or remove a field, and drag it by the cross-arrows.
Field types:
- Green/Amber/Red: OK, advisory or fail.
- Yes or No: two buttons (for example OK and FAULT).
- Tyres / Brakes and Tyres / Brakes (advanced): tyre and brake checks.
- Image Hotspot: a picture (for example car outlines) where you mark damage with numbered hotspots.
- Checkboxes, Icon Status, Text and Text Area.
- Blank Space: an empty gap to tidy the layout.
Under each field:
- Settings: the layout of the field (for example Text on the left, Yes/No on the right or Text, Yes/No, Notes column), the Checkbox Order, and Hide on PDF when empty and Render without borders on PDF.
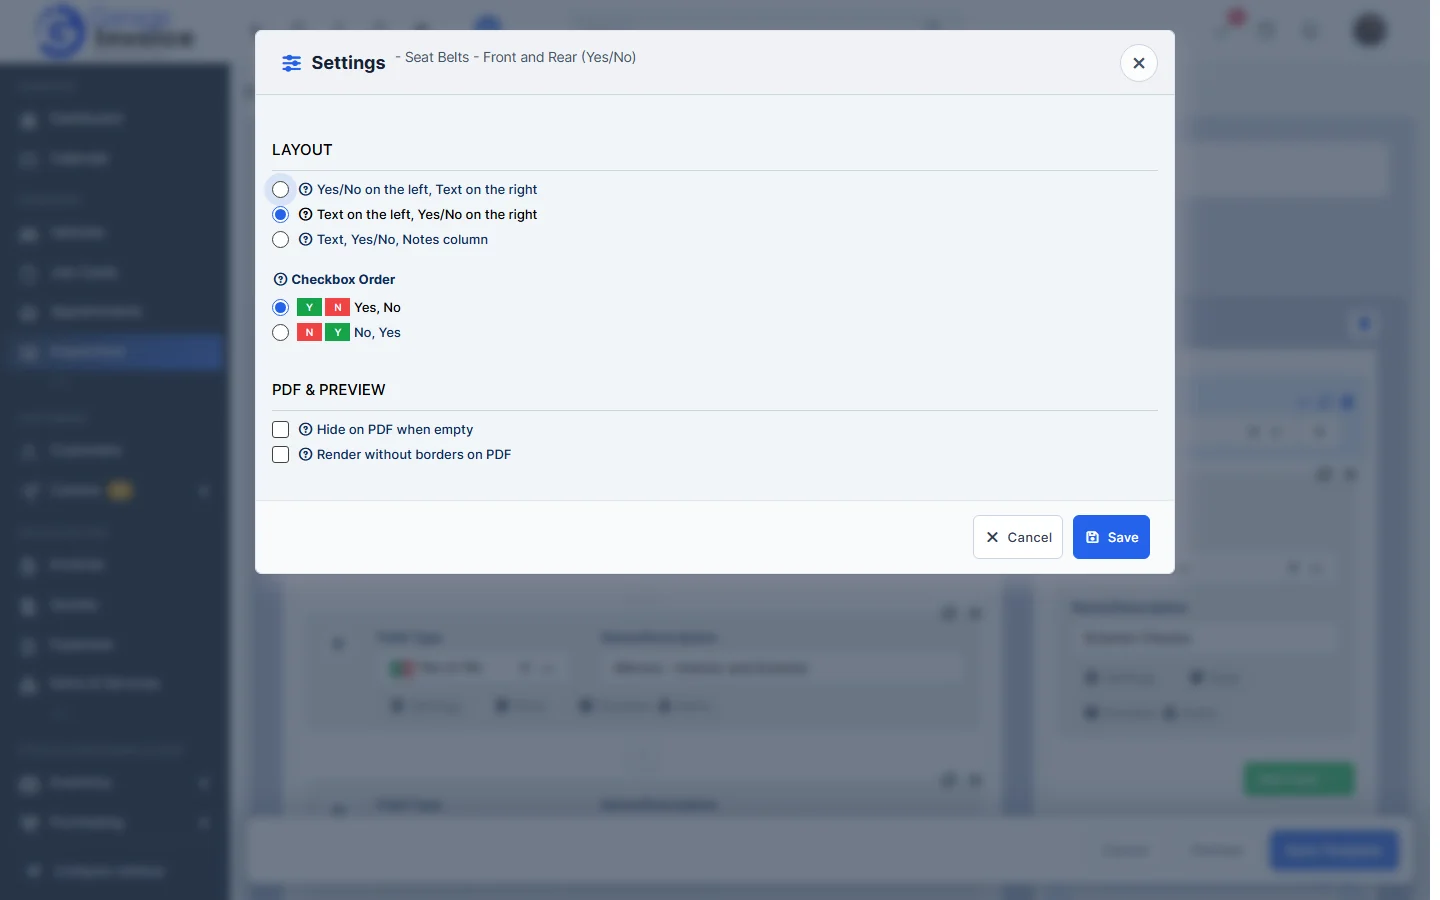
- Note: a ready-made note for each answer (for example a Yes Note and a No Note).
- Duration / Items: for each answer, Include Field Duration in Inspection Totals and Add Items to Document by Default.
Template settings
Click the Settings tab at the top of the template:
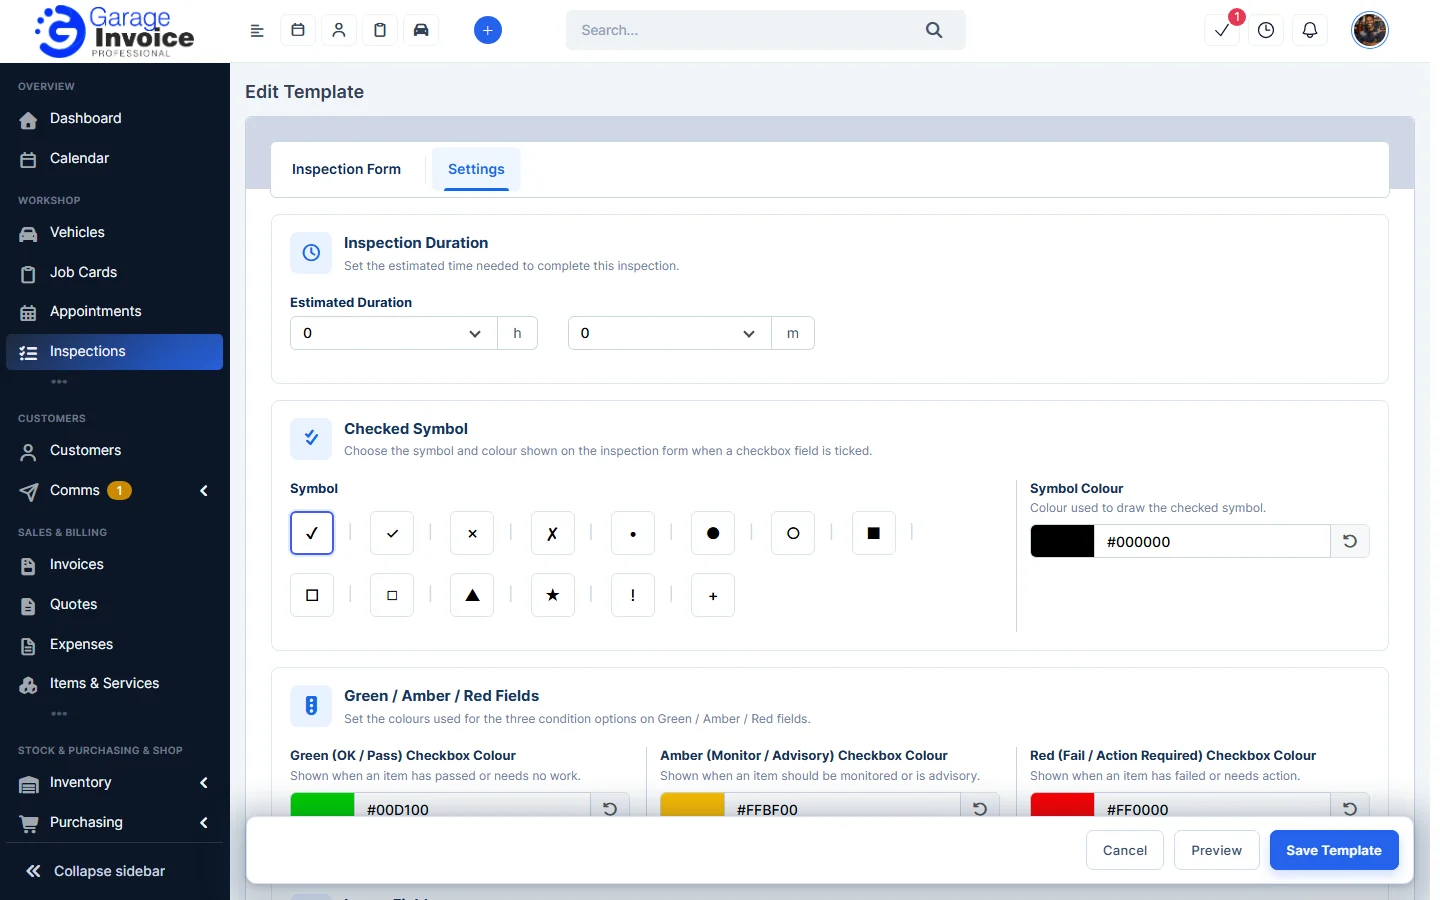
- Inspection Duration: the Estimated Duration of the whole inspection.
- Checked Symbol: the symbol (tick, cross, dot, star and others) and Symbol Colour shown when a checkbox field is ticked.
- Green / Amber / Red Fields: the colours for OK / pass, monitor / advisory and fail / action required.
- Image Fields: hotspot text and background colours.
- Yes / No Fields: the text inside the Yes and No buttons (up to 5 characters, for example OK and FAIL) and their colours.
- Group Headers: text, background and border colours of the group header bars on the PDF.
- Form Appearance: Field Entry Highlight Colour (where text can be entered) and Form Borders Colour.
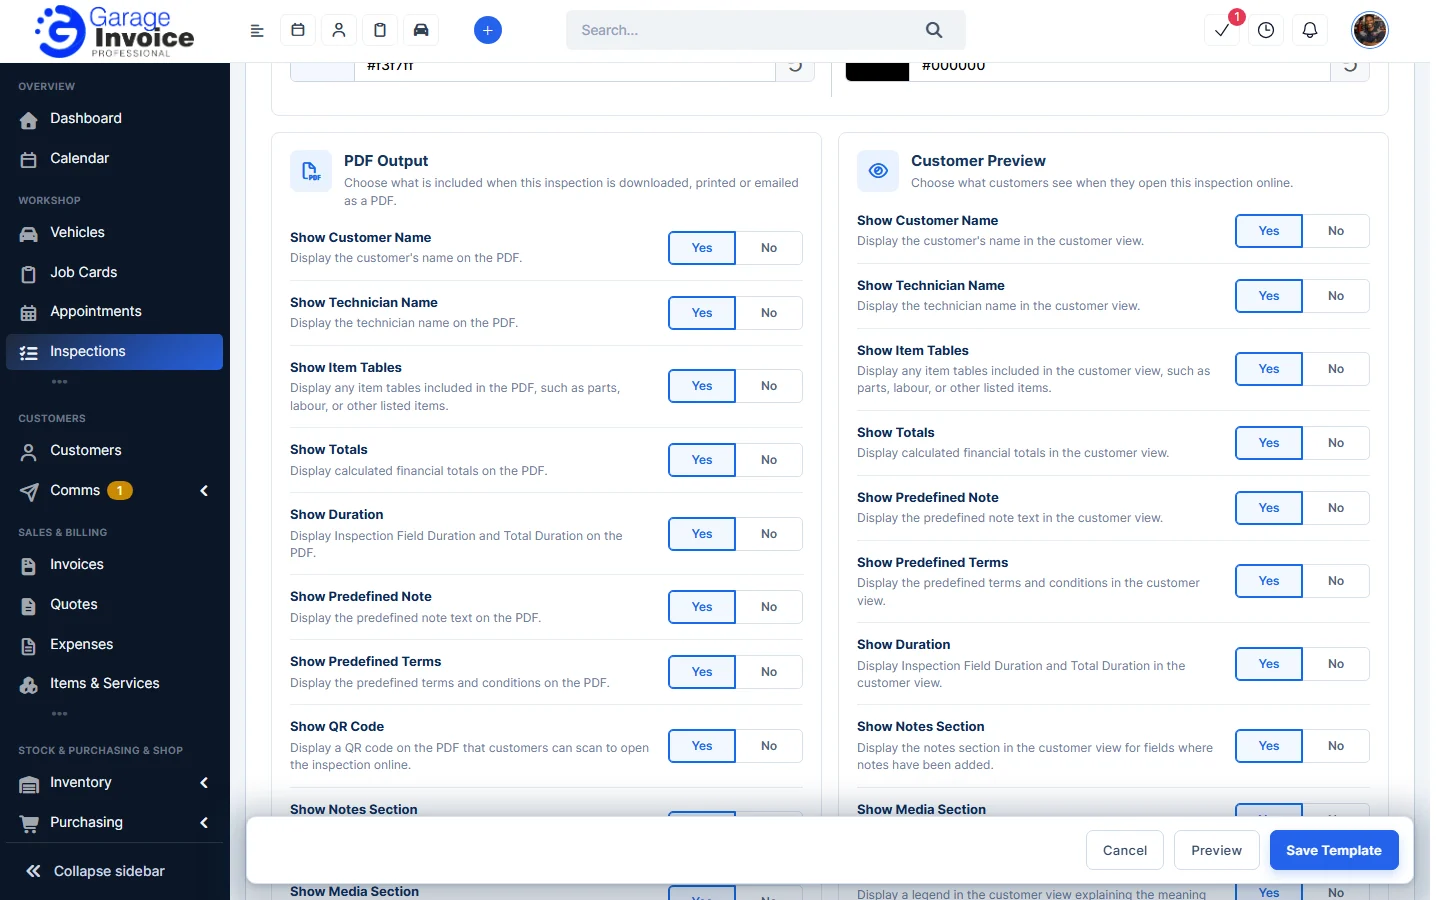
- PDF Output: choose Yes or No for Show Customer Name, Show Technician Name, Show Item Tables, Show Totals, Show Duration, Show Predefined Note, Show Predefined Terms, Show QR Code (customers scan it to open the inspection online), Show Notes Section, Show Media Section and Show Fields Legend, and the Legend Layout (Stacked or Inline).
- Customer Preview: the same choices for what customers see when they open the inspection online.
Note: you can change these settings for one inspection only with Inspection Form Settings on the inspection. See Carry Out an Inspection.
Feature Vehicle inspections: see what it does and how it fits your workshop.