
- Click Settings in the sidebar, open Sales & Operations and click Inspections. (Or click Inspections in the sidebar, click the gear button and choose Settings.)
- Change what you need and click Save Settings.
Inspection Numbering
- Inspection Number Prefix: shown before every inspection number, for example INSP-.
- Next inspection Number: the number the next inspection gets. Set it to 1 to start from the beginning.
- Inspection Number Format: Number Based (sequential number), Year Based (year before the number), Short Year (two-digit year after it) or Month & Year (month and year after it). NUMBER PREVIEW shows the result.
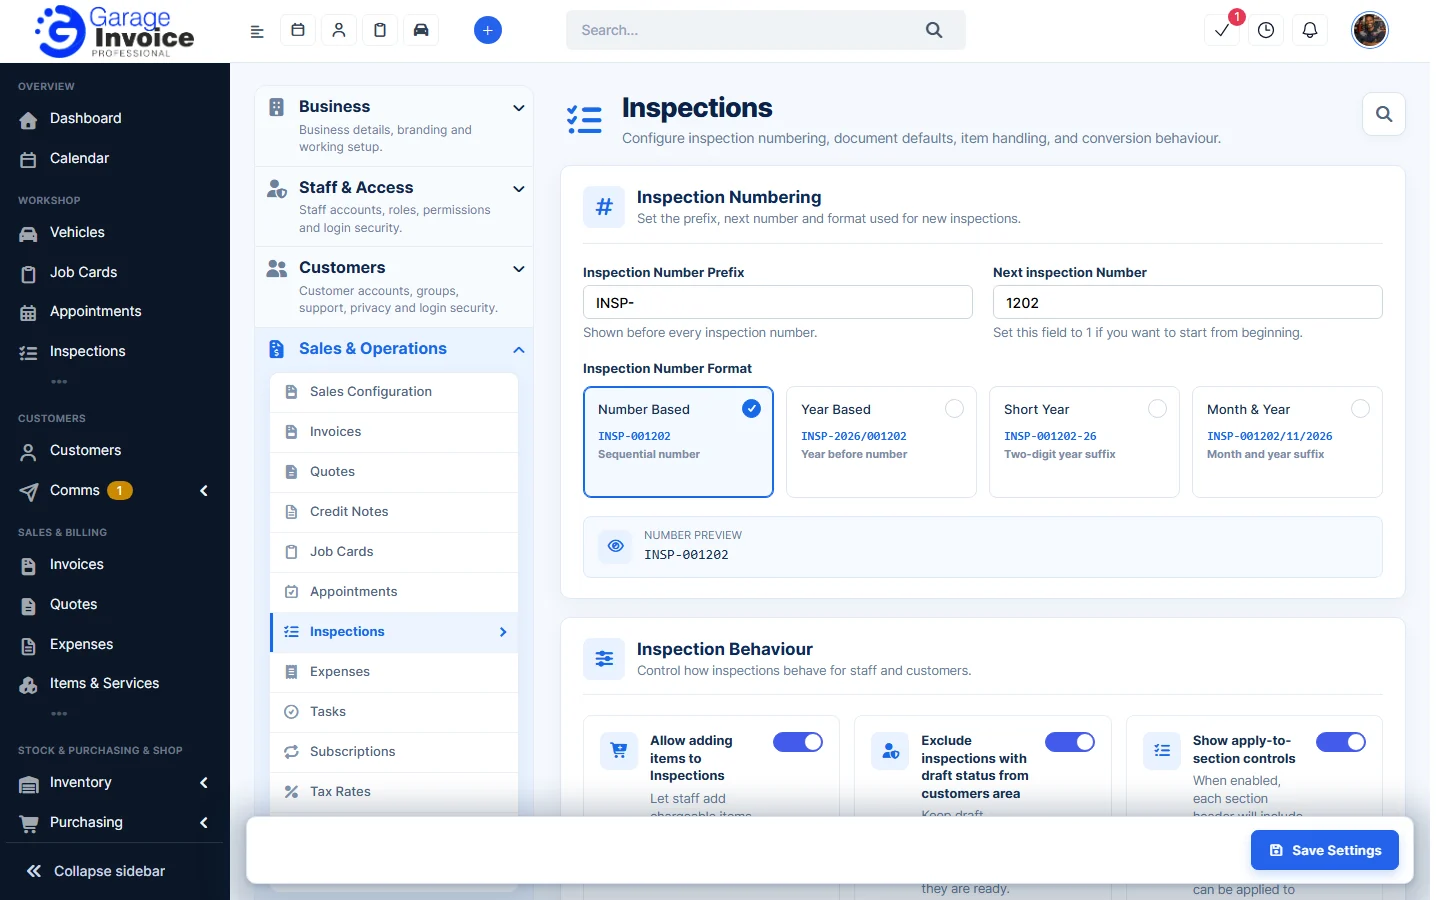
Inspection Behaviour
- Allow adding items to Inspections: lets staff add chargeable items while creating or editing an inspection.
- Exclude inspections with draft status from customers area: keeps draft inspections hidden from customers until they’re ready.
- Show apply-to-section controls: adds green, amber and red controls to each section header, so the same result can be given to every check in that section at once.
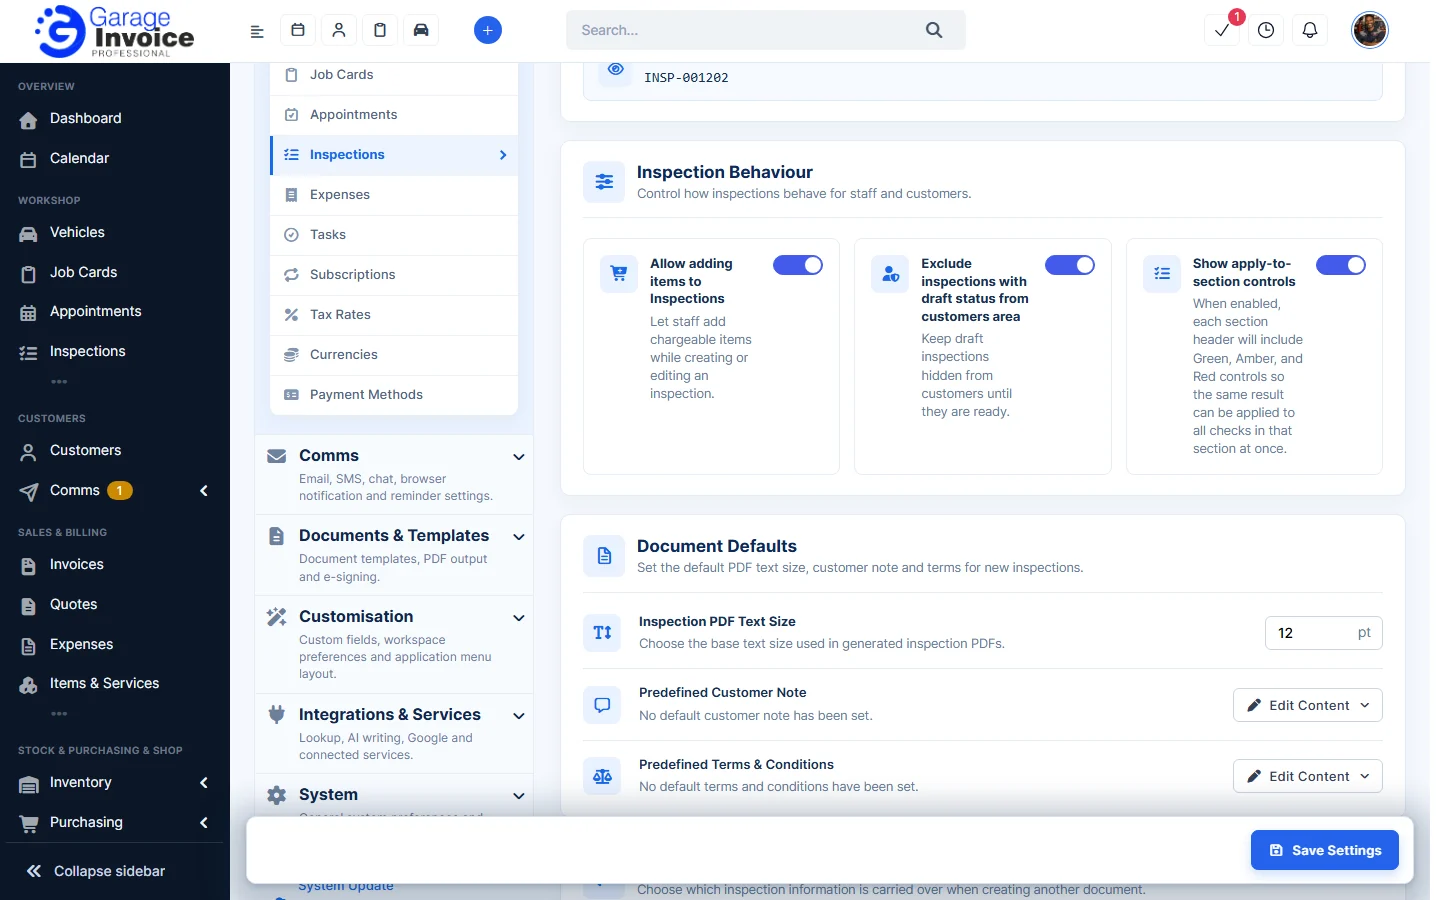
Document Defaults
- Inspection PDF Text Size: the base text size (in pt) of inspection PDFs.
- Predefined Customer Note and Predefined Terms & Conditions: click Edit Content to write the default note and terms for new inspections.
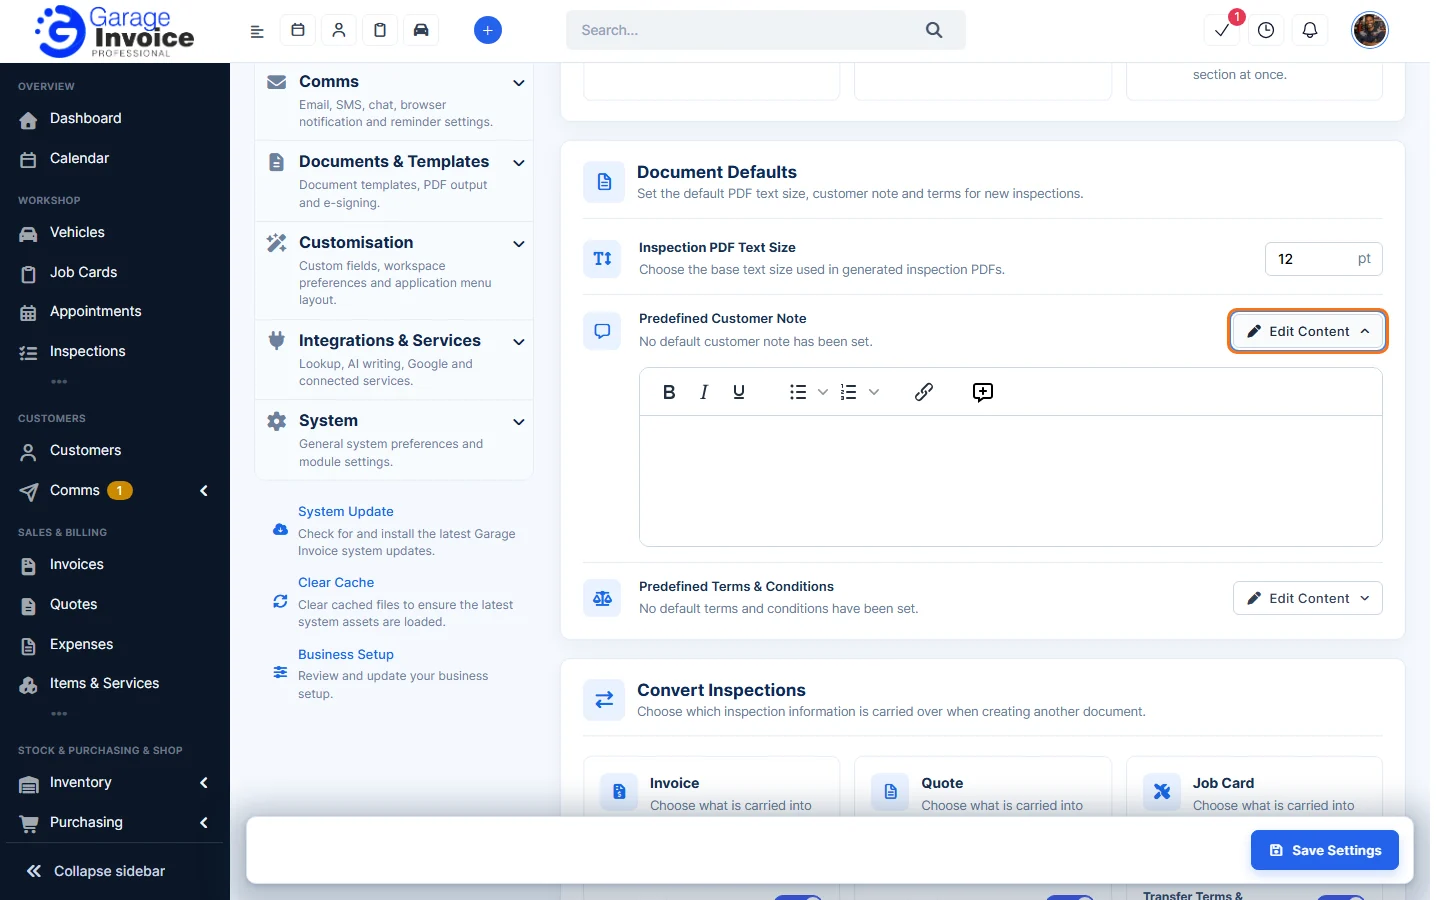
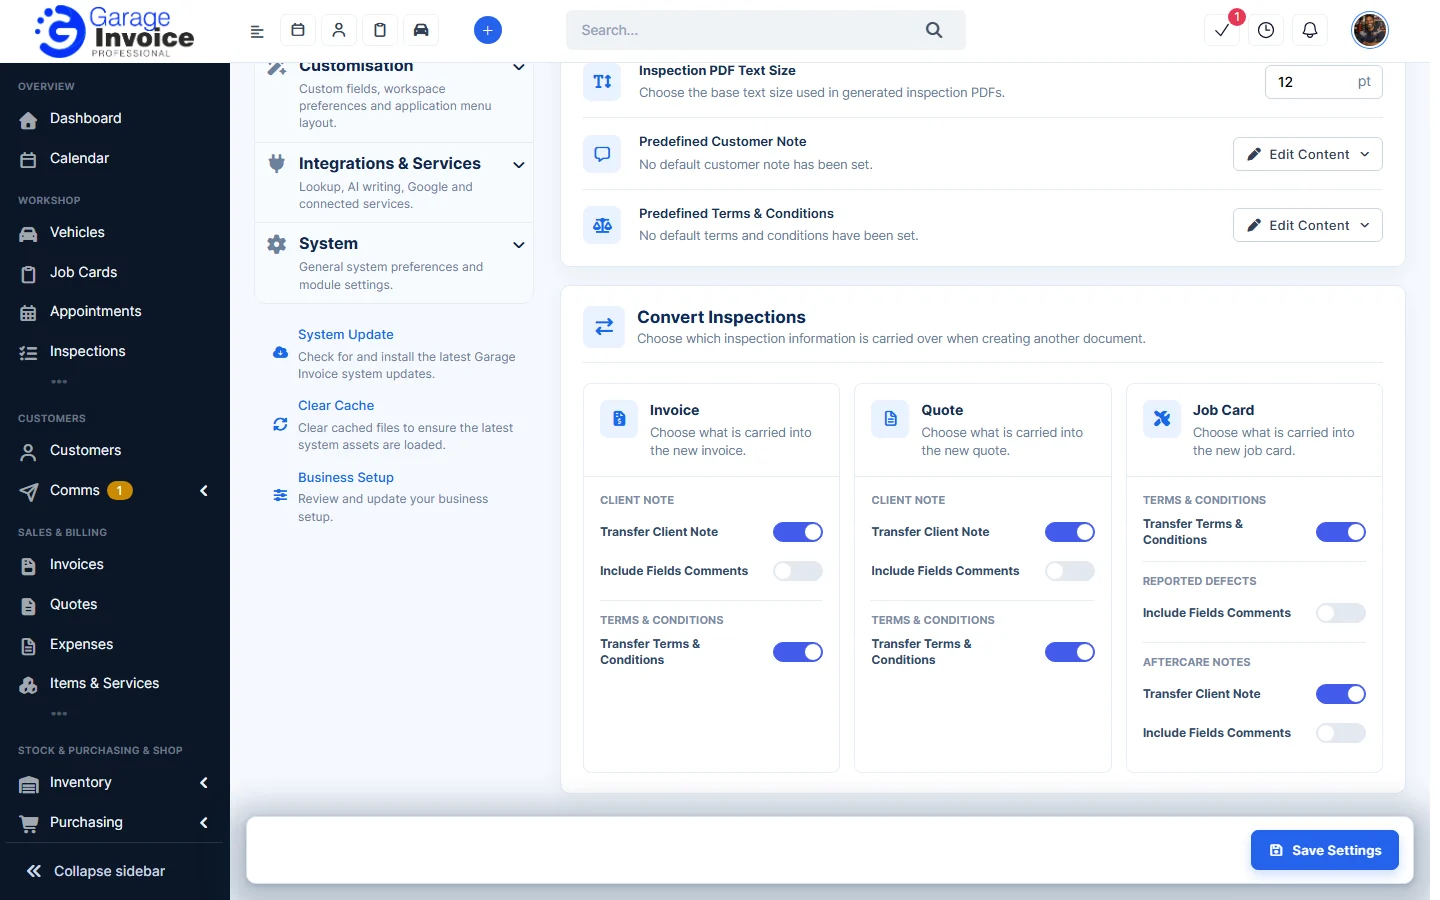
Convert Inspections
Choose what is carried over when you convert an inspection (see Convert Inspection to Quote, Invoice or Job Card):
- Invoice and Quote: Transfer Client Note (the inspection’s customer note), Include Fields Comments (also add the notes recorded against inspection fields) and Transfer Terms & Conditions.
- Job Card: Transfer Terms & Conditions; under Reported Defects, Include Fields Comments; under Aftercare Notes, Transfer Client Note and Include Fields Comments.
Tip: colours, symbols and what appears on each PDF and on the customer page are set per template. See Inspection Templates.
Feature Vehicle inspections: see what it does and how it fits your workshop.