
- Click Appointments in the sidebar and click New Appointment.
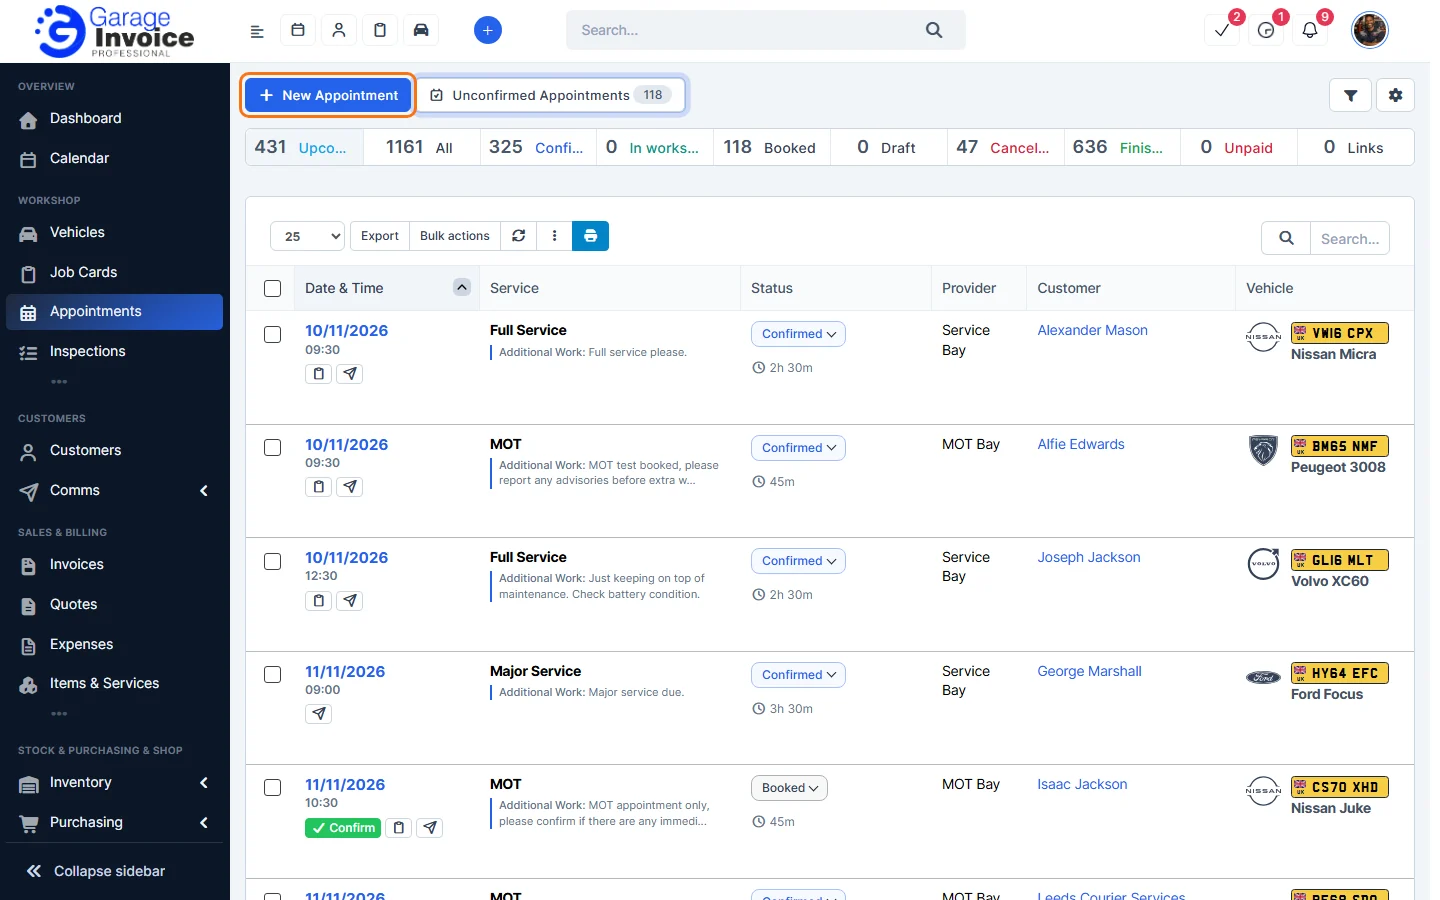
Tip: you can also click Add New on the Calendar and choose Appointment.
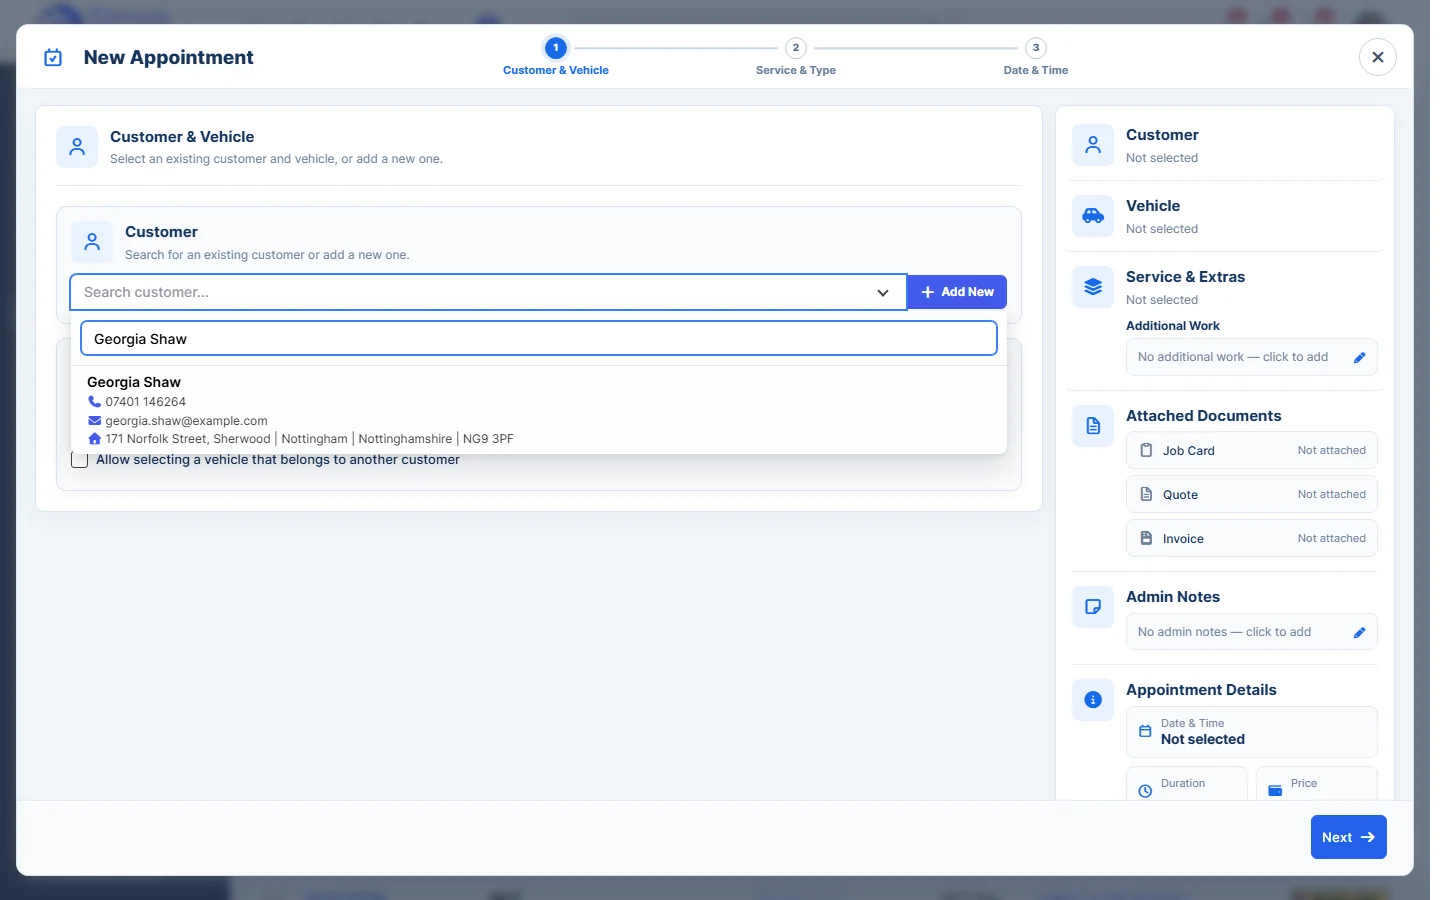
- Customer & Vehicle: click Search customer…, type the customer’s name, phone or email and choose them. Click Add New to create a new customer instead.
- Choose the Contact if the customer has more than one, then click Search vehicle… and choose the vehicle (or click Add New). The Mileage, MOT Due Date and Next Service fields appear so you can check or update them. Click Next.
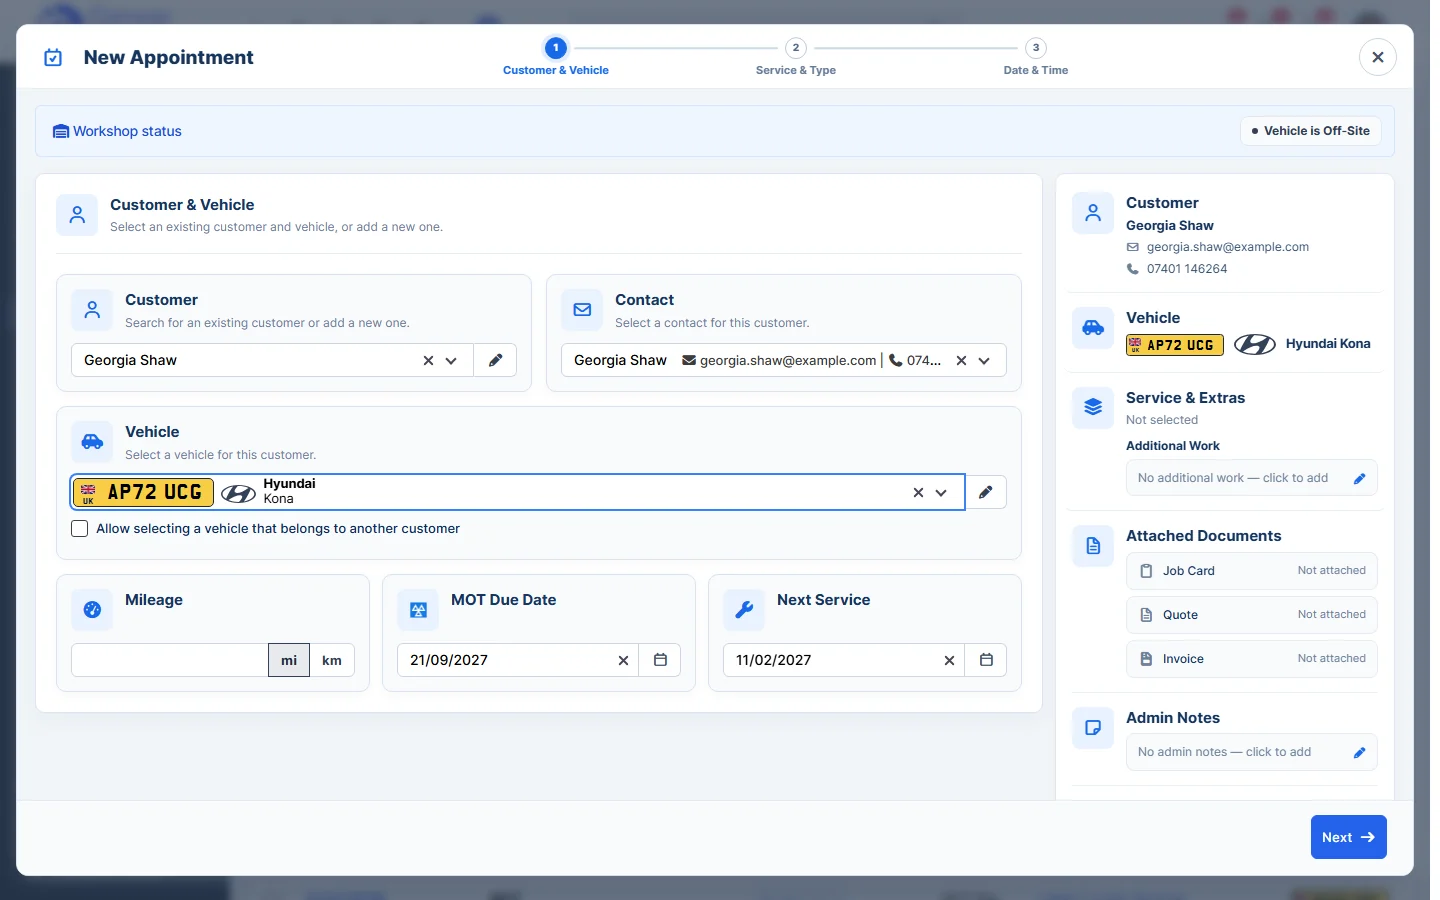
Note: tick Allow selecting a vehicle that belongs to another customer if the vehicle is registered to someone else. Use Vehicle is Off-Site at the top to show whether the vehicle is at the garage.
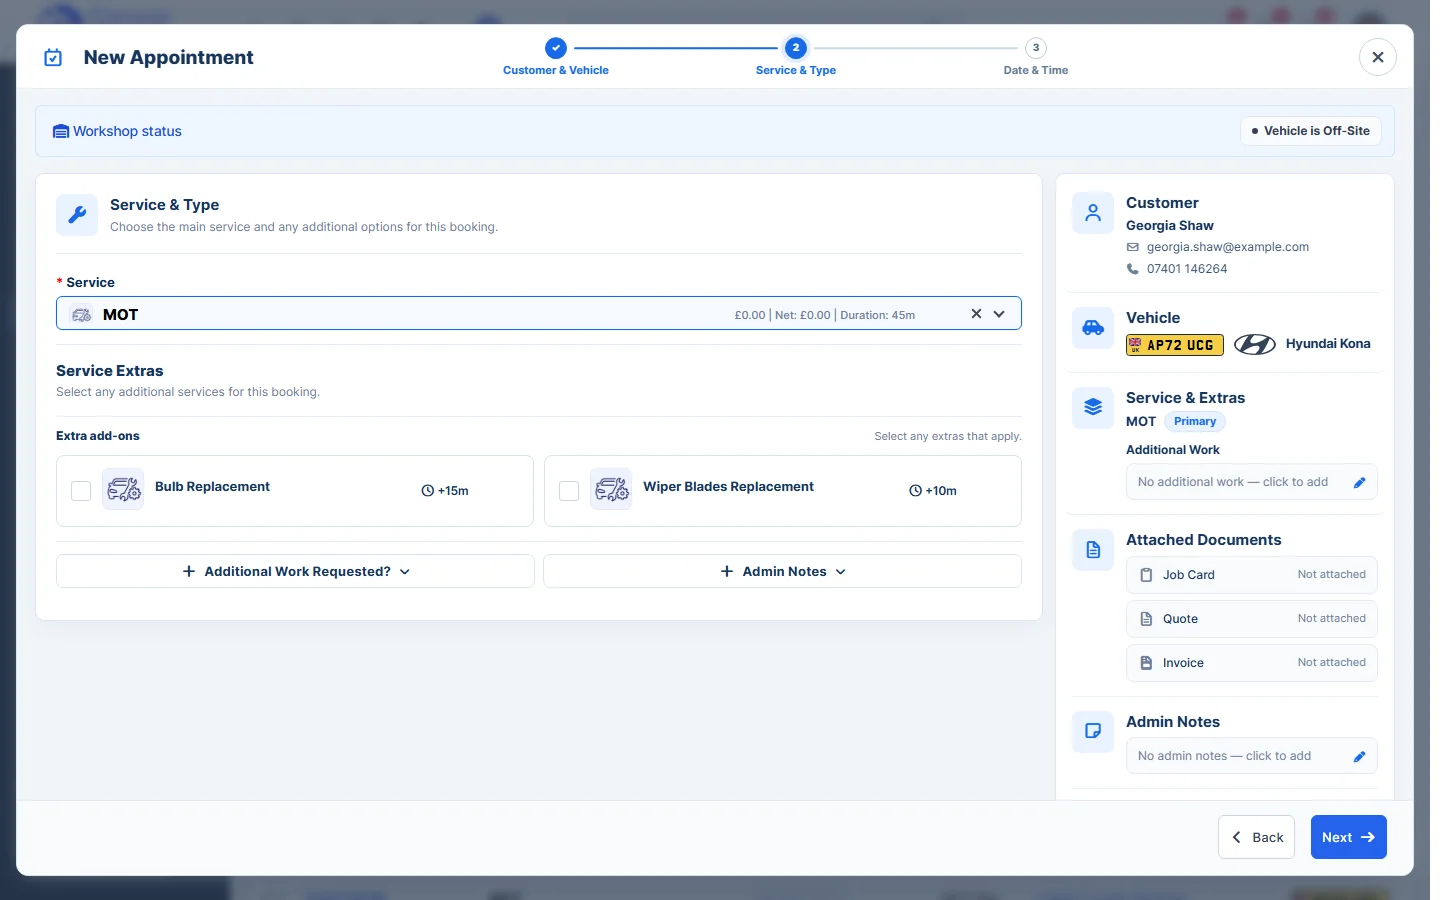
- Service & Type: open the Service list and choose the main service. The list shows each service’s price and duration.
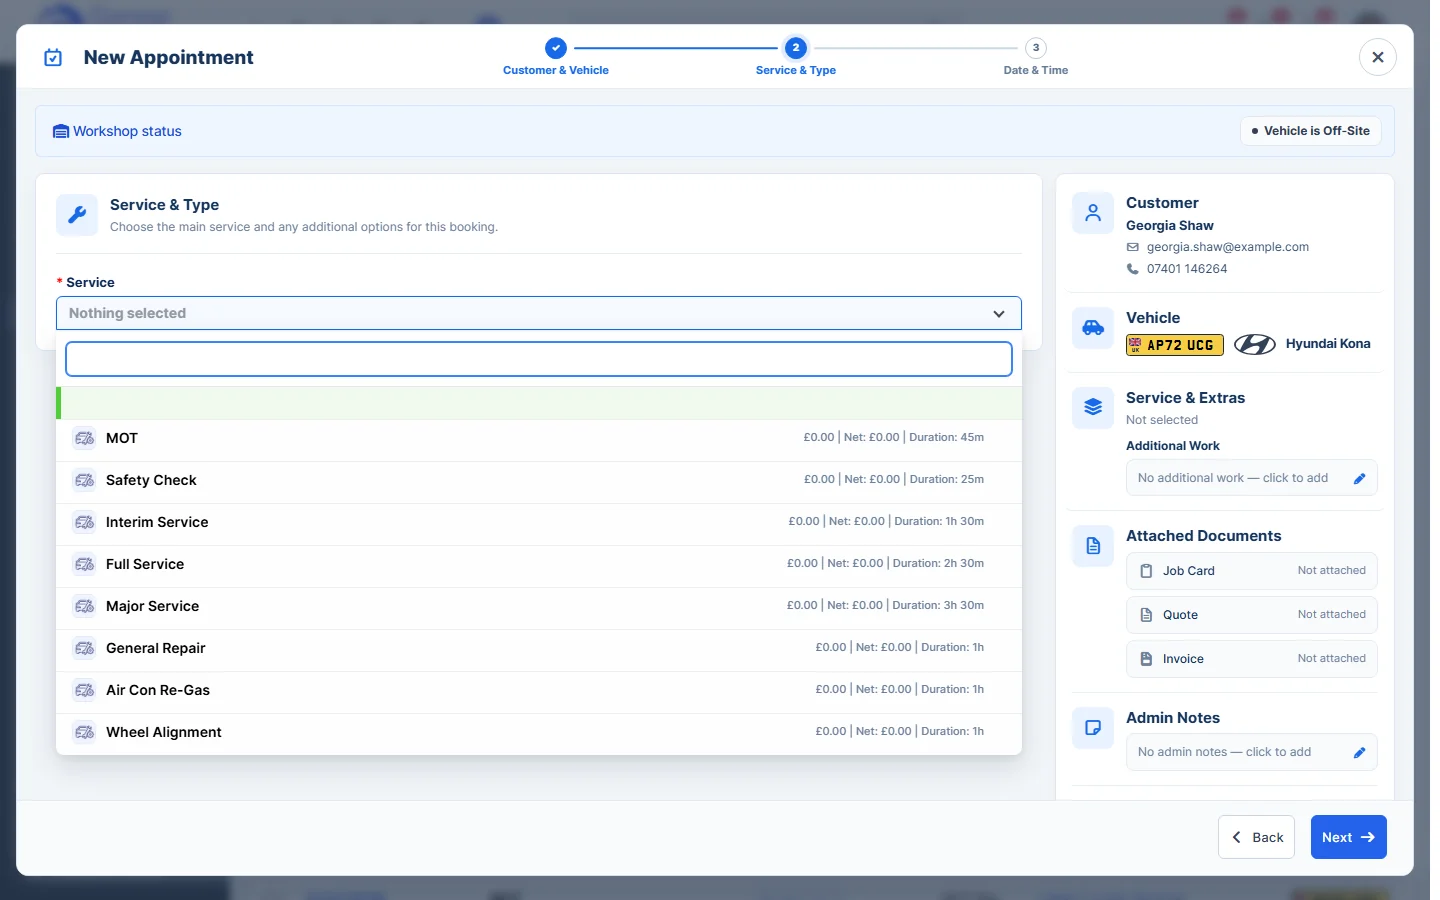
- Tick any Service Extras the customer wants. Click Additional Work Requested? to note extra work, or Admin Notes to add a note for your team. Click Next.
- Date & Time: pick a day in the calendar (the coloured lines show how busy each day is), then pick a slot under Pick a slot. Choose a Provider or leave Any Provider.
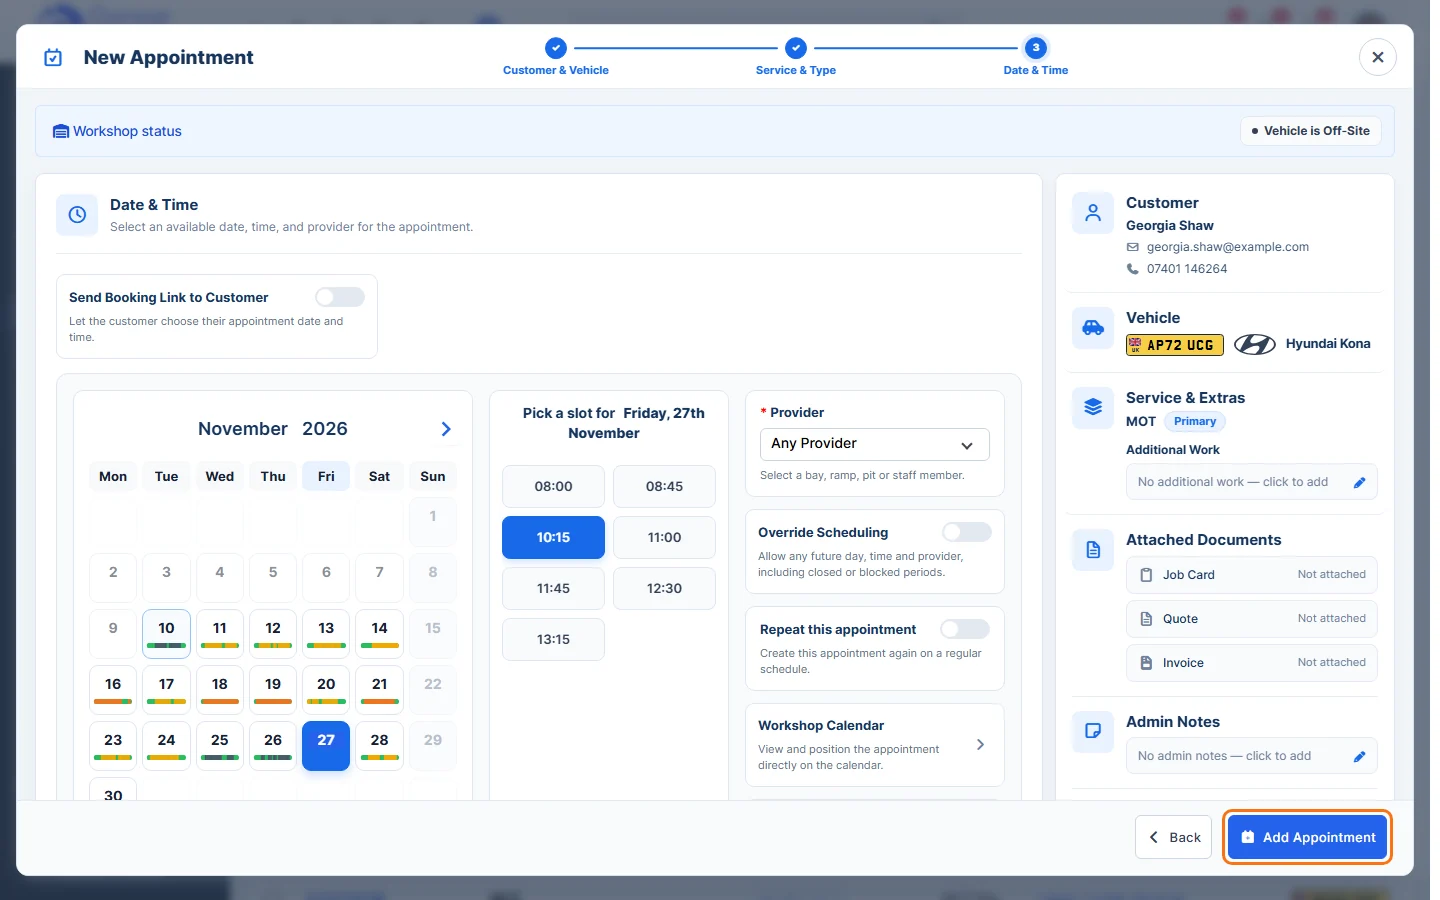
- Override Scheduling: allows any future day, time and provider, including closed or blocked periods.
- Repeat this appointment: creates the appointment again on a regular schedule.
- Workshop Calendar: shows the whole day so you can place the appointment directly on the calendar.
- Send Booking Link to Customer: lets the customer choose their own date and time instead.
The summary on the right shows the customer, vehicle, service and extras, attached documents and admin notes.
- Click Add Appointment.
The appointment appears in the Appointments list and on the Calendar.
Related: View Appointment Details · Send Appointment to Customer · Create Job Card, Quote or Invoice from an Appointment
Feature Online booking and appointments: see what it does and how it fits your workshop.