
Customers send enquiries through a Customer Contact Form. You can have as many forms as you like, for example one for quotes and one for tyres.
Create the form
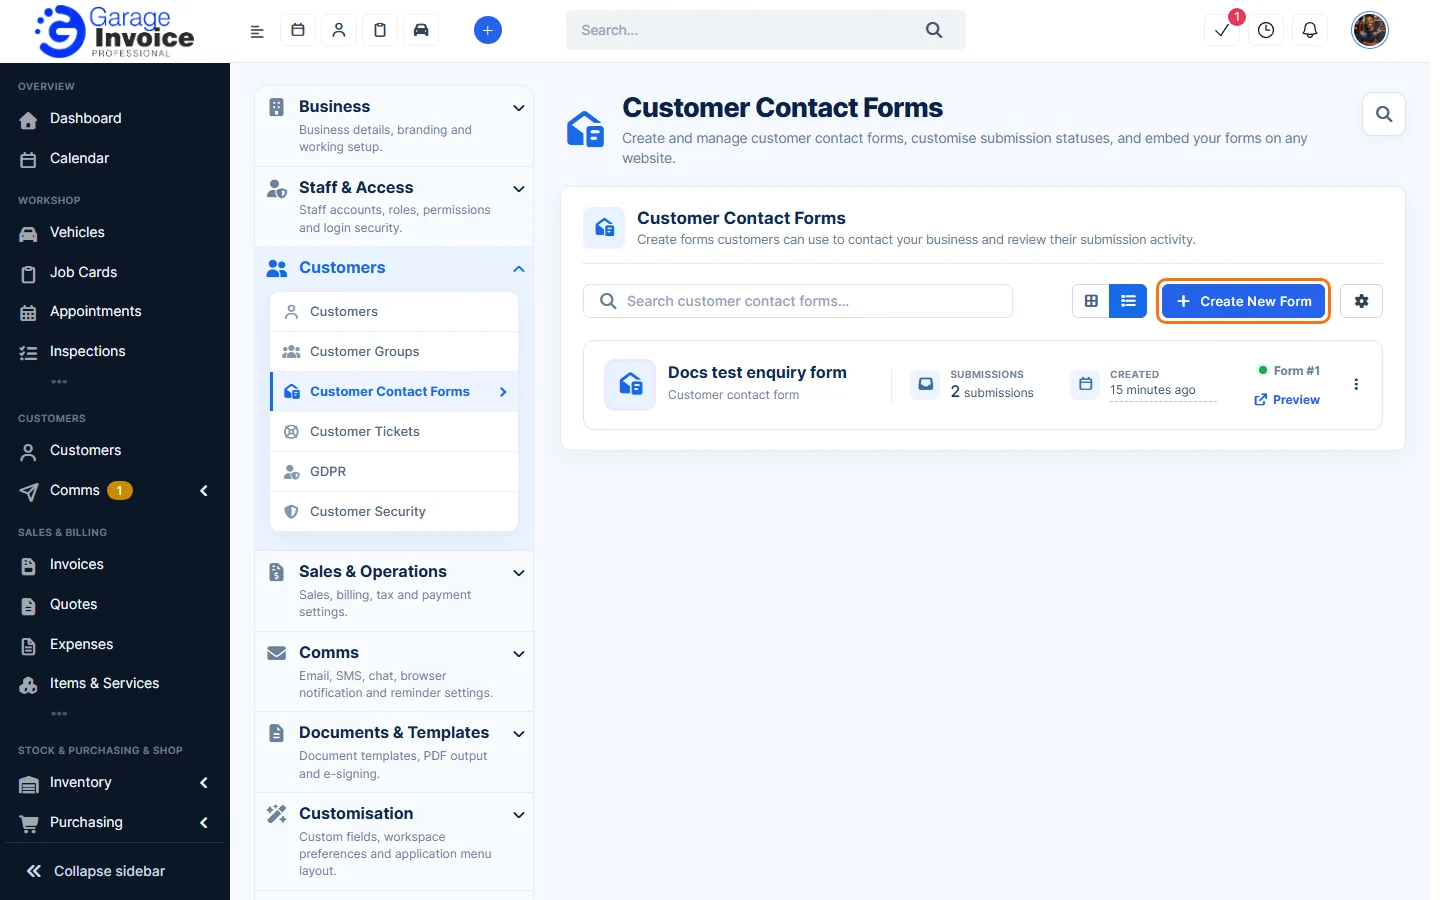
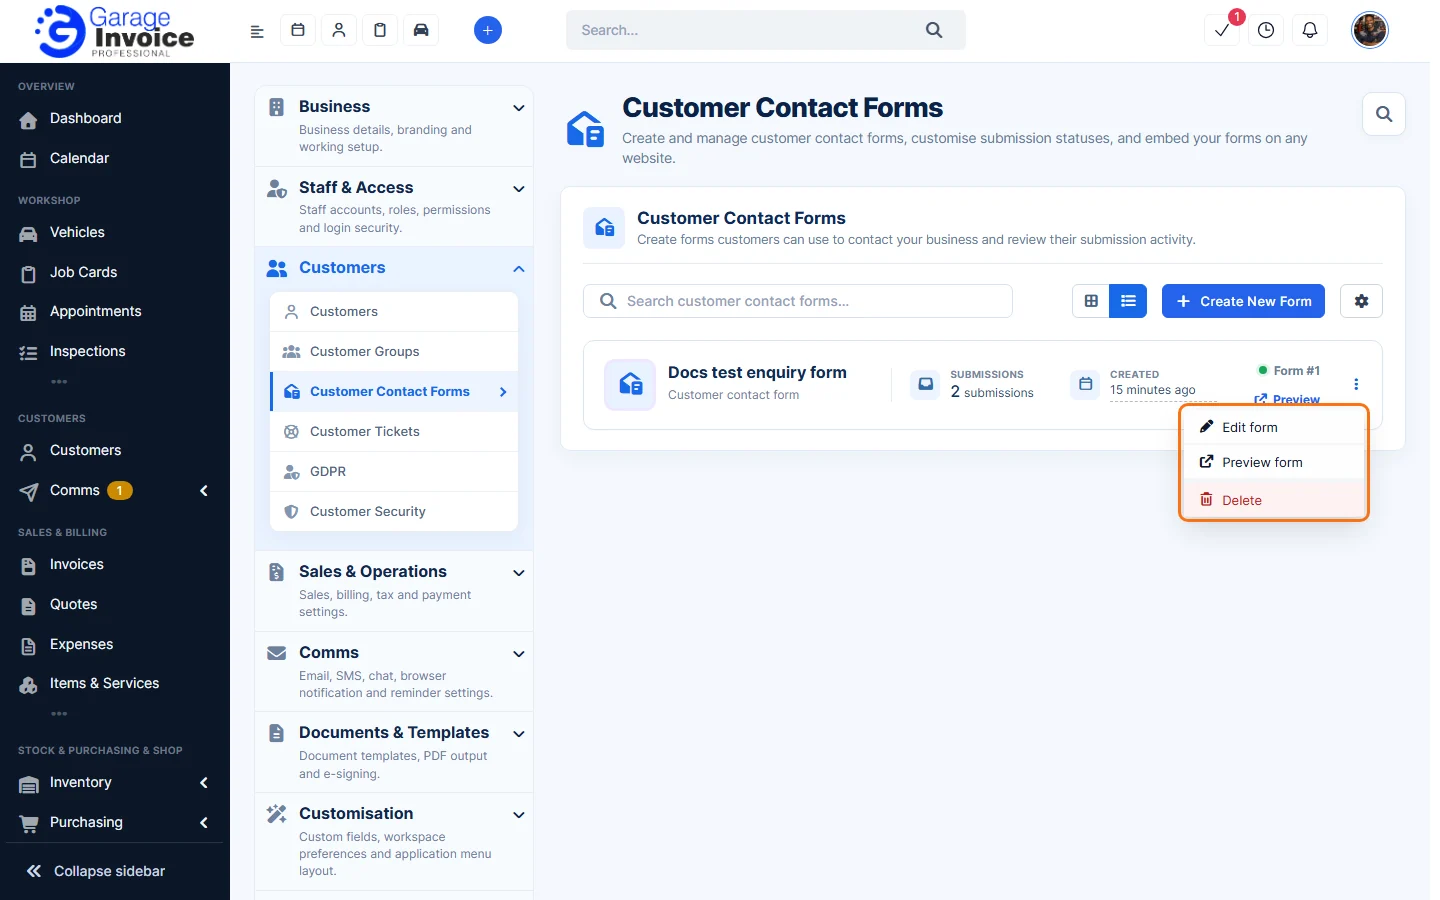
- Click Settings at the bottom of the sidebar. In the panel on the left, open Customers and click Customer Contact Forms. Your forms are listed with the number of Submissions and when they were Created. Click Create New Form.
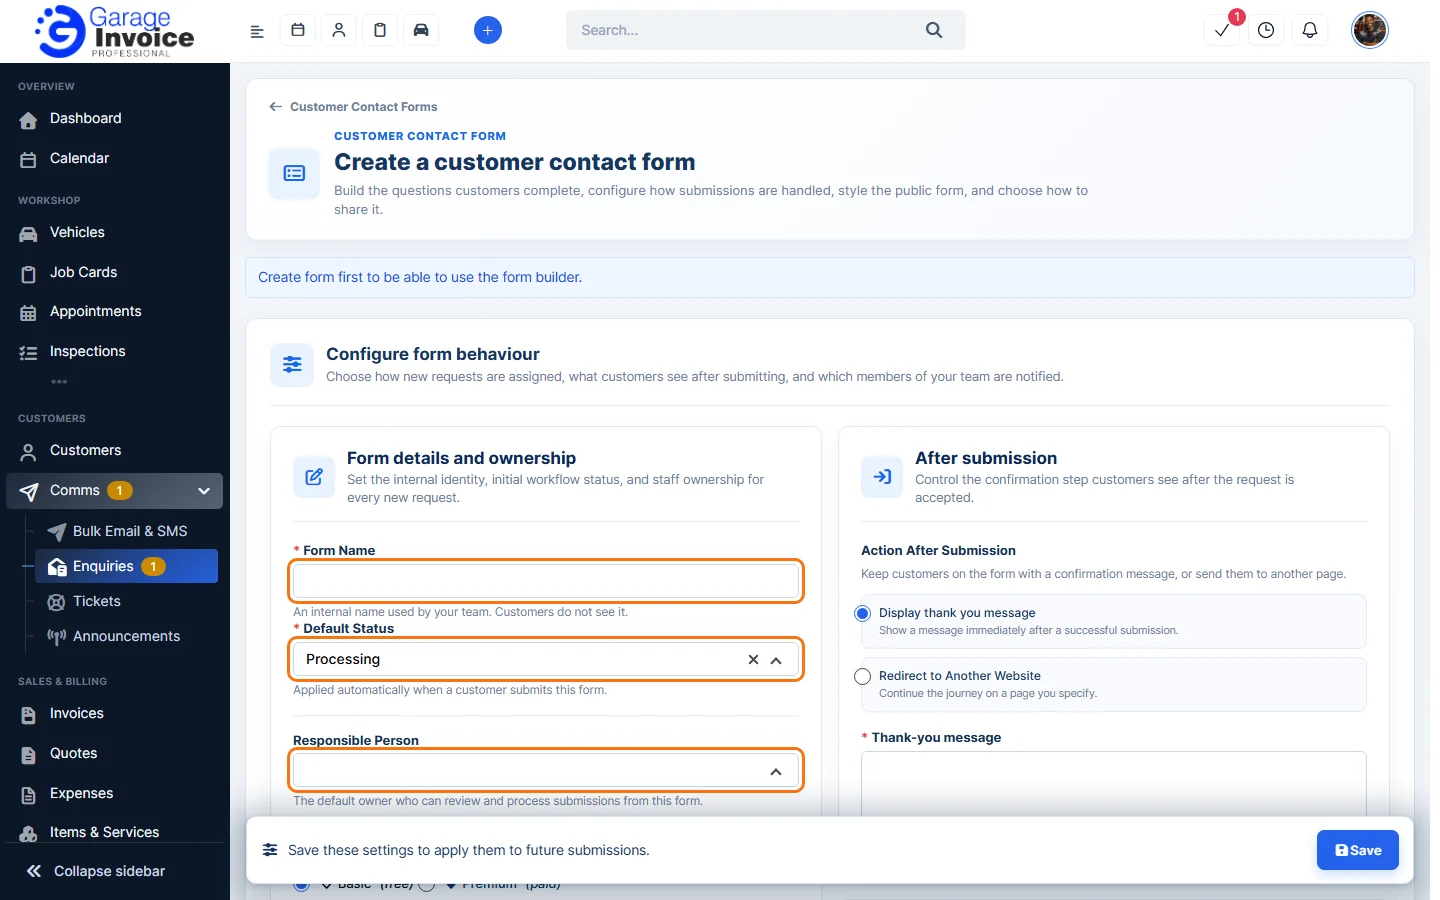
- Fill in Form details and ownership:
- Form Name (required): an internal name for your team. Customers don’t see it.
- Default Status (required): the status each new enquiry gets, for example Processing.
- Responsible Person: the staff member who looks after enquiries from this form.
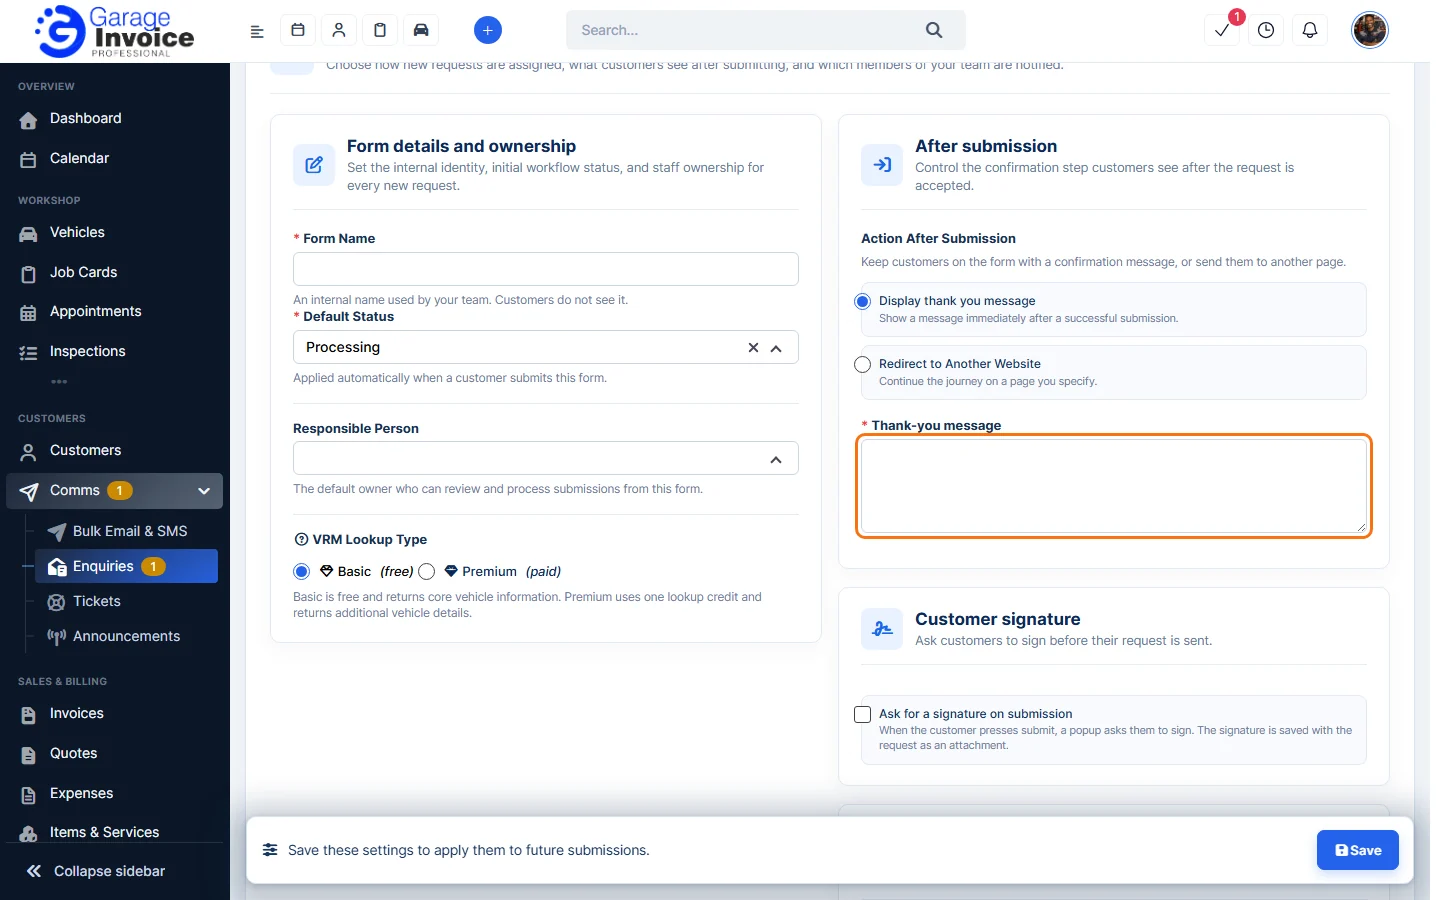
- VRM Lookup Type: Basic (free) returns core vehicle information. Premium (paid) uses one lookup credit and returns more vehicle details. This is used when the form has a Registration Number field.
- Under After submission, choose the Action After Submission:
- Display thank you message: the customer stays on the form and sees your Thank-you message (required).
- Redirect to Another Website: the customer is sent to a page you enter, for example a thank-you page on your website.
Under Customer signature, tick Ask for a signature on submission if the customer must sign before sending. The signature is saved with the enquiry as an attachment.
- Under Notification settings, tick Notify when contact request submitted to get an in-app notification for each new enquiry. Choose who gets it under Notification recipients: Specific Staff Members, Staff members with roles, or the Responsible person.
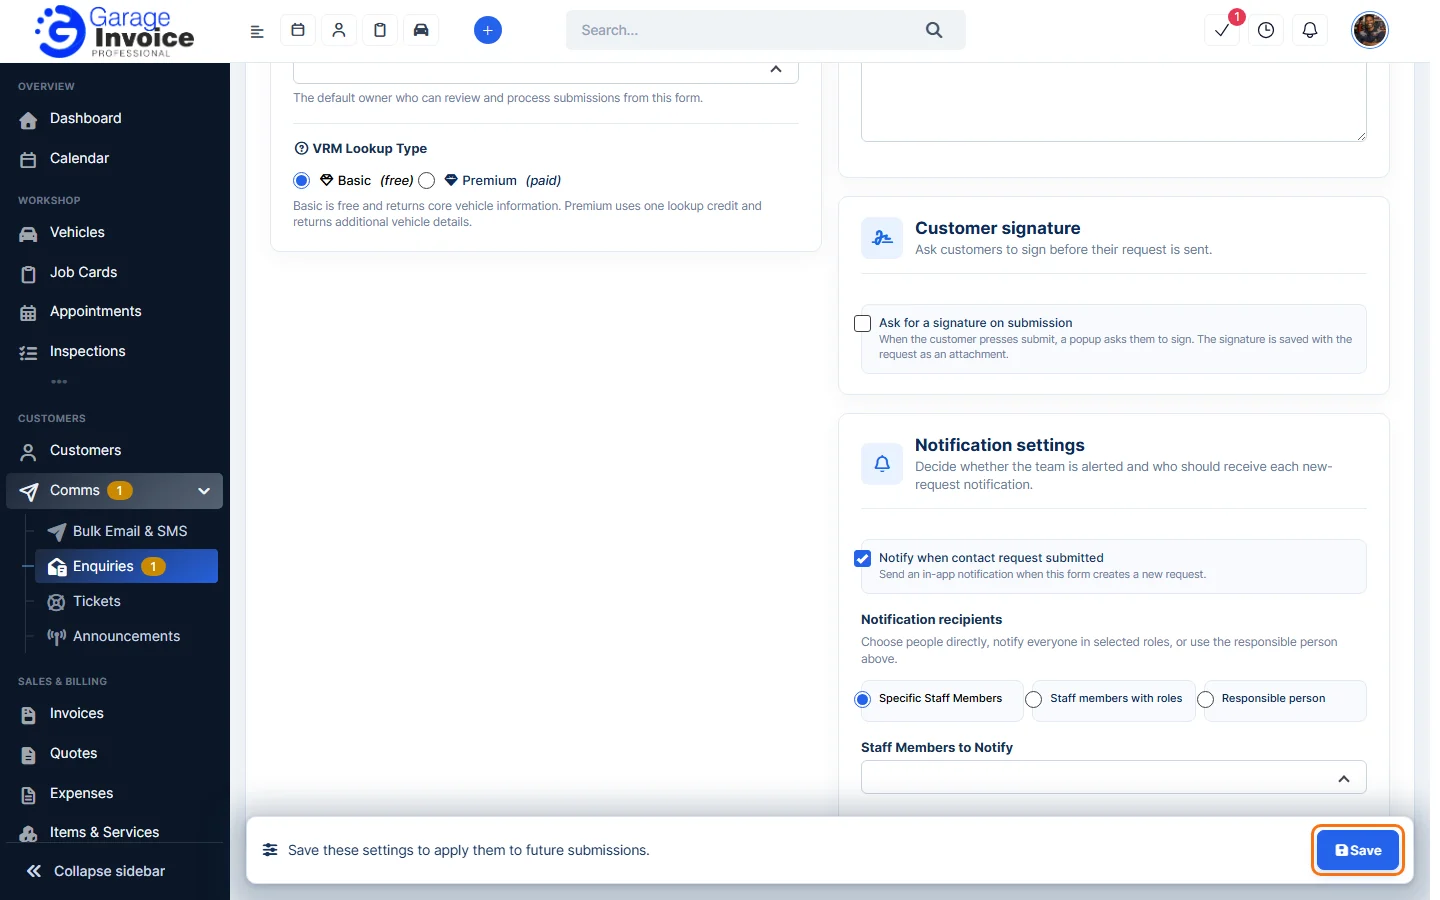
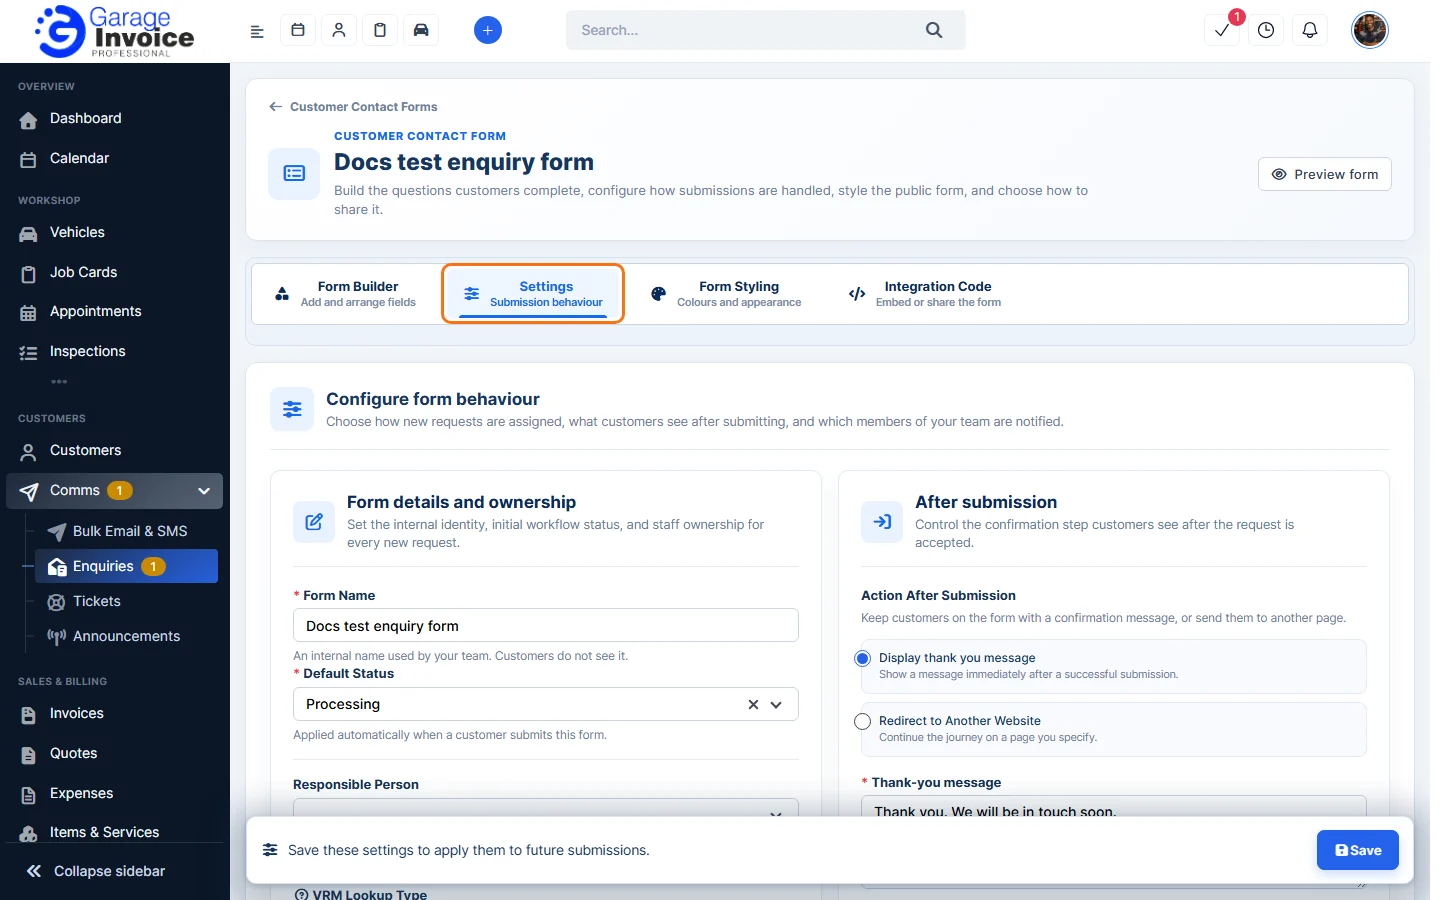
- Click Save. The form opens with four tabs: Form Builder, Settings, Form Styling and Integration Code.
Add the questions
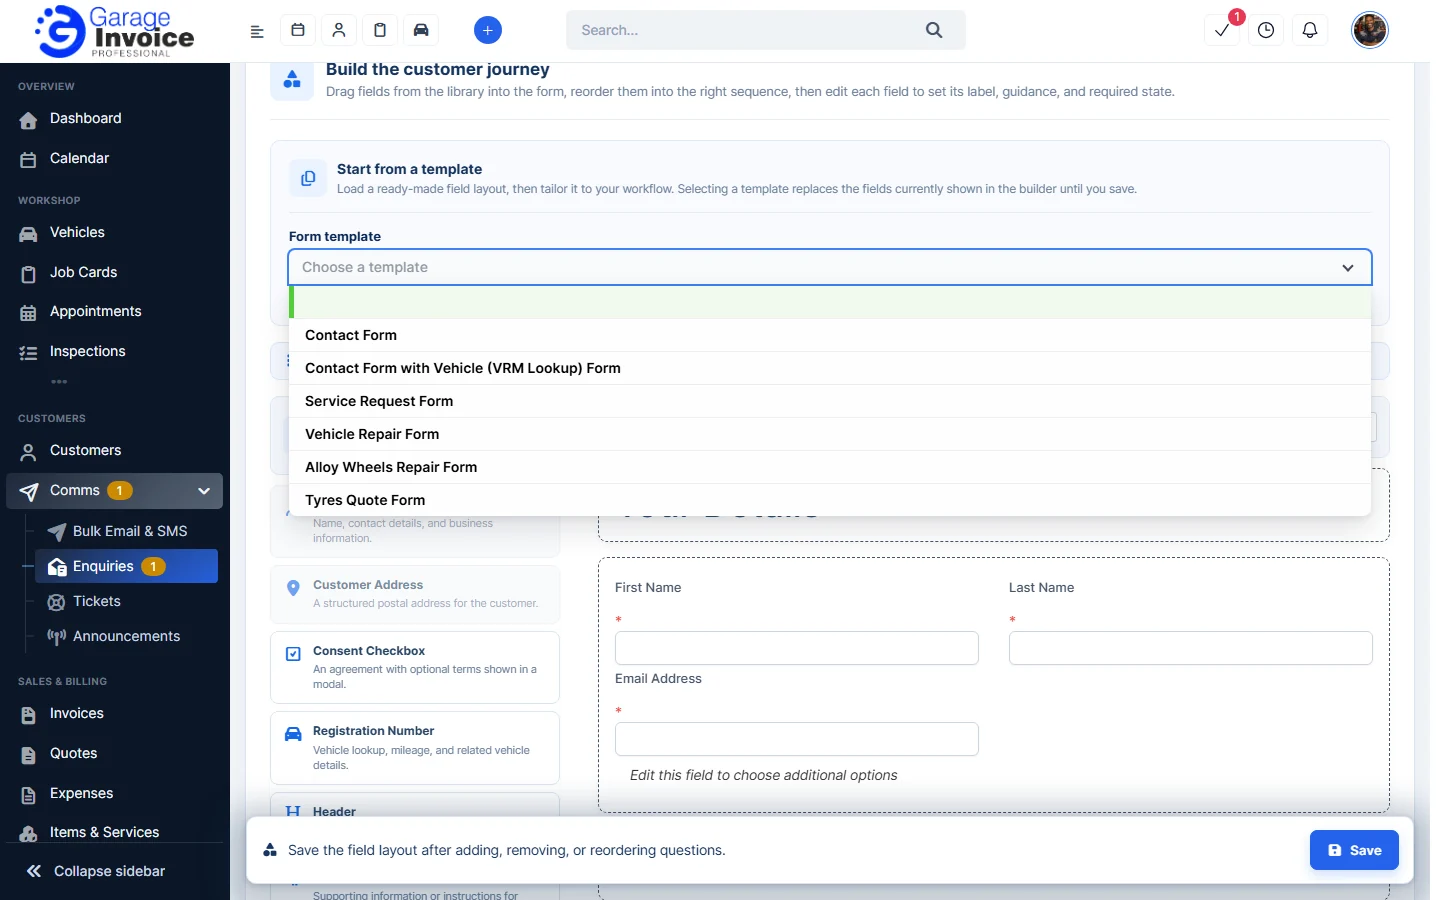
- On the Form Builder tab, choose a ready-made layout under Form template to save time: Contact Form, Contact Form with Vehicle (VRM Lookup) Form, Service Request Form, Vehicle Repair Form, Alloy Wheels Repair Form or Tyres Quote Form. Choosing a template replaces the fields in the builder.
- Drag fields from the Field library on the left into the Form canvas, and drag them up or down to change the order. Click the pencil on a field to change its label, help text and whether it is required.
- Customer Details and Customer Address: name, contact details and postal address.
- Registration Number: the customer types their registration and the vehicle details are looked up.
- Consent Checkbox: an agreement, with optional terms shown in a pop-up.
- Header and Paragraph: headings and instructions.
- File Upload, Text Field, Text Area, Date Field, Date & Time, Select, Checkbox Group and Radio Group: your own questions.
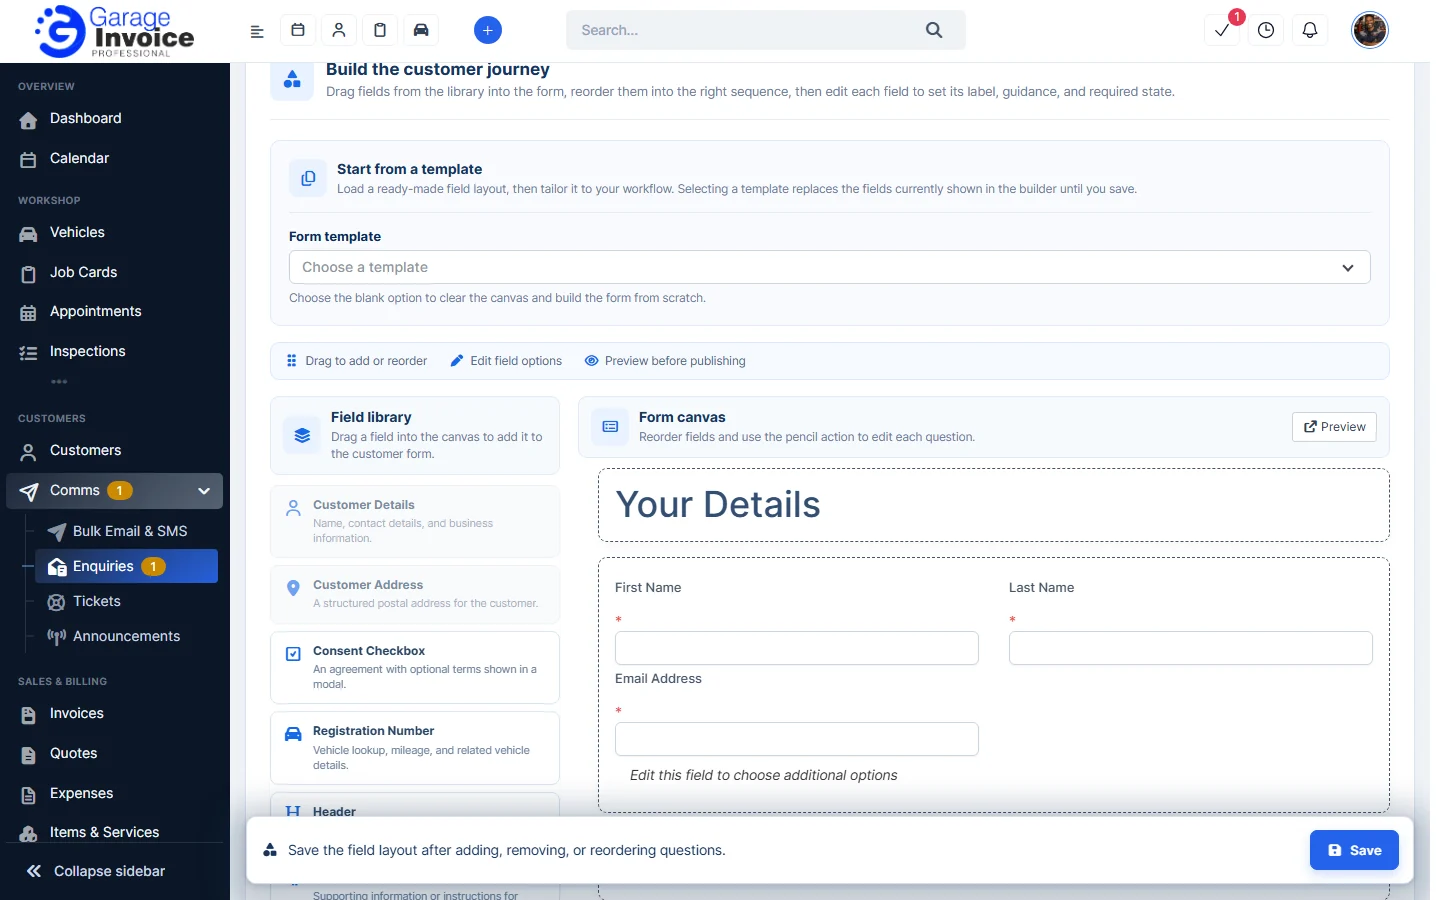
- Click Preview to see the form as customers will, then click Save in the bar at the bottom.
Note: The Form Styling and Integration Code tabs unlock once the form has fields.
Change the settings or the look
- The Settings tab has the same options you chose when you created the form. Change them and click Save.
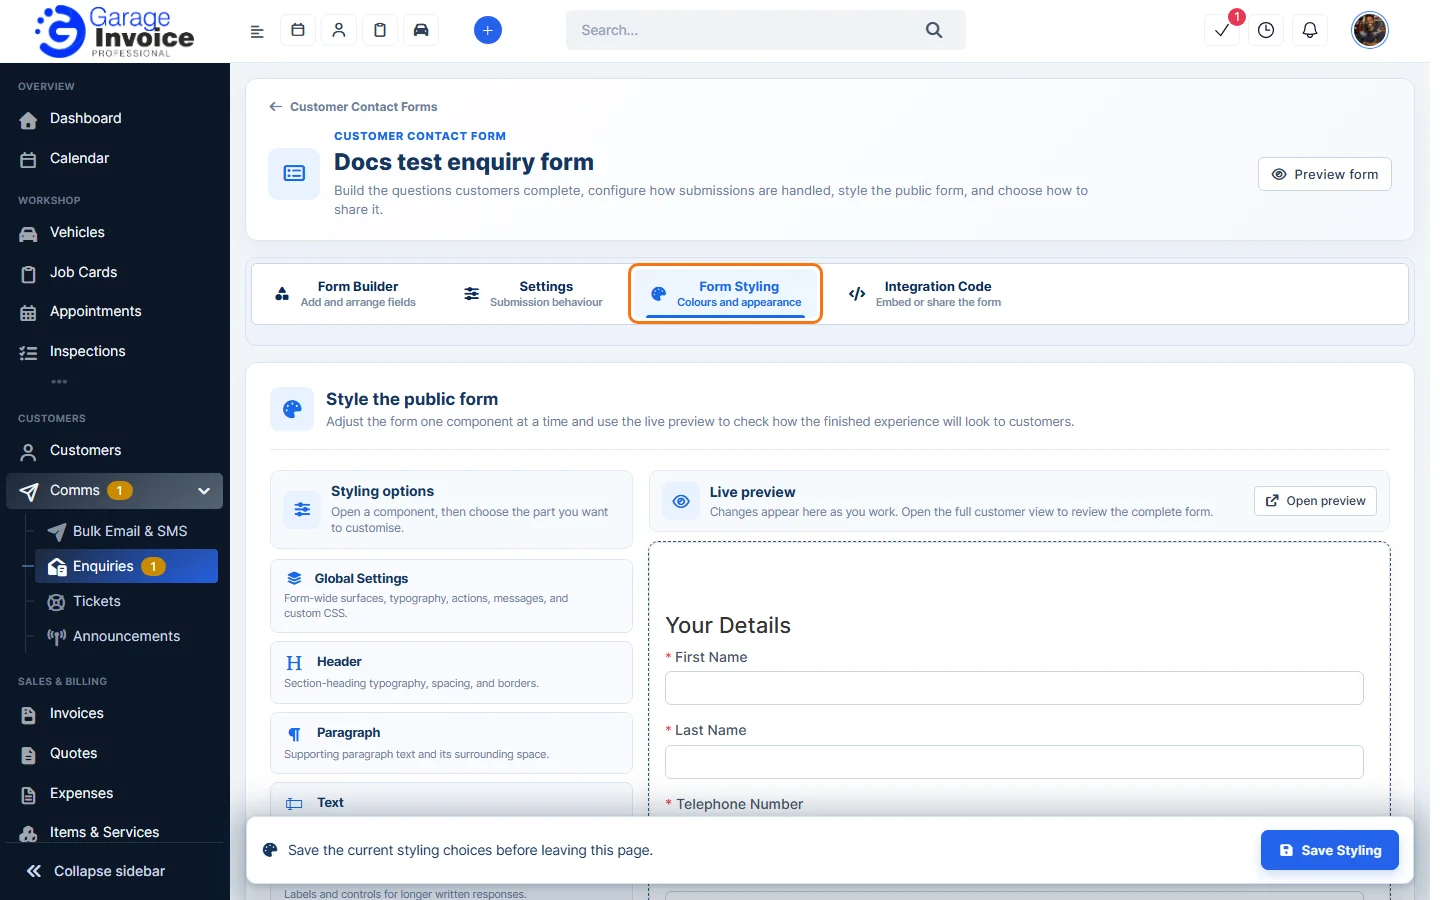
- On the Form Styling tab, open a part of the form (Global Settings, Header, Paragraph, Text, Text Area, Select, Checkbox Group, Radio Group, Date & Time, Registration number, Customer Details & Address) and change its colours, fonts and spacing. The Live preview shows the result.
Put the form on your website
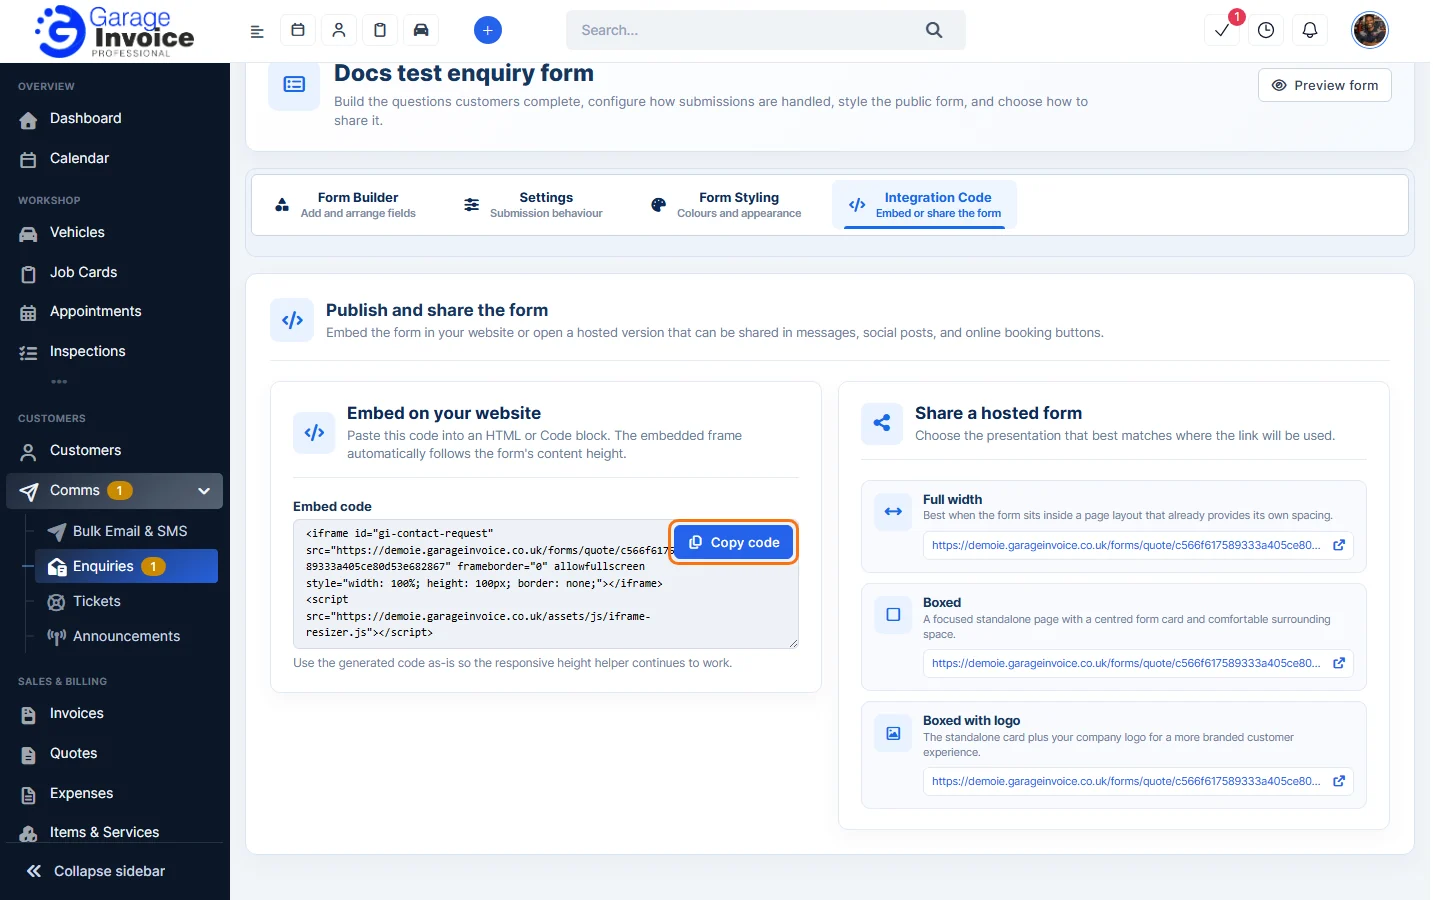
- Click the Integration Code tab.
- To show the form inside a page of your website, click Copy code under Embed on your website and paste the code into an HTML or Code block on that page. Use the code as it is, so the form’s height adjusts by itself.
- To share a link instead (in an email, a social post or a “Get a quote” button), copy one of the links under Share a hosted form:
- Full width: best inside a page that already has its own spacing.
- Boxed: a standalone page with the form in a centred card.
- Boxed with logo: the same, with your company logo.
Edit, preview or delete a form
Click Settings at the bottom of the sidebar. In the panel on the left, open Customers and click Customer Contact Forms. Click the ⋮ button on a form and choose Edit form, Preview form or Delete.
Tip: Garage Invoice can also email the customer to say their enquiry was received. Turn on the Estimate Request Received email in the Forms group of the email templates. See Enable/Disable Email Notifications.