
Customer groups let you sort customers (for example Trade, VIP or Monthly Statement) and give each group its own pricing, payment terms, billing and Customer Portal settings. See Customer Groups.
Assign a group on the customer’s page
- Open the customer (see Search for Customer). The Profile opens on the Customer Details tab.
- Scroll down to Groups in the Other section and choose the group.
- Click Save in the bottom right corner.
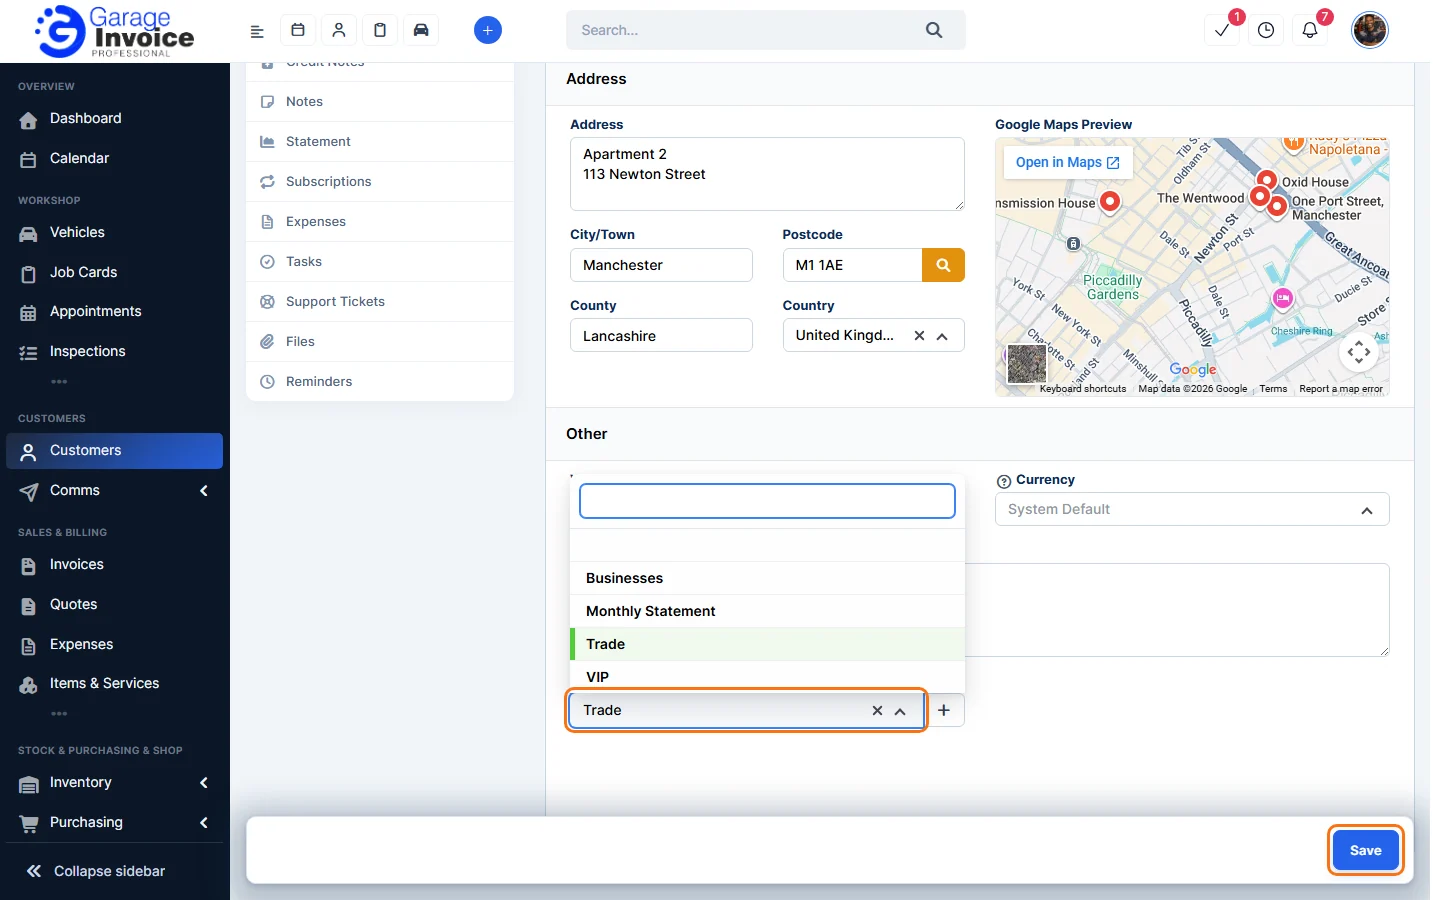
Create a new group while you’re there
- Click + next to the Groups field.
- In Add New Customer Group, enter the Group Name and pick a Colour. You can add a Description, and use the tabs (Discounts, Notes | T&Cs, Payment, Monthly Statement, Trade Customer and Portal) to set up how the group works.
- Click Save changes, then choose the new group in the Groups field.
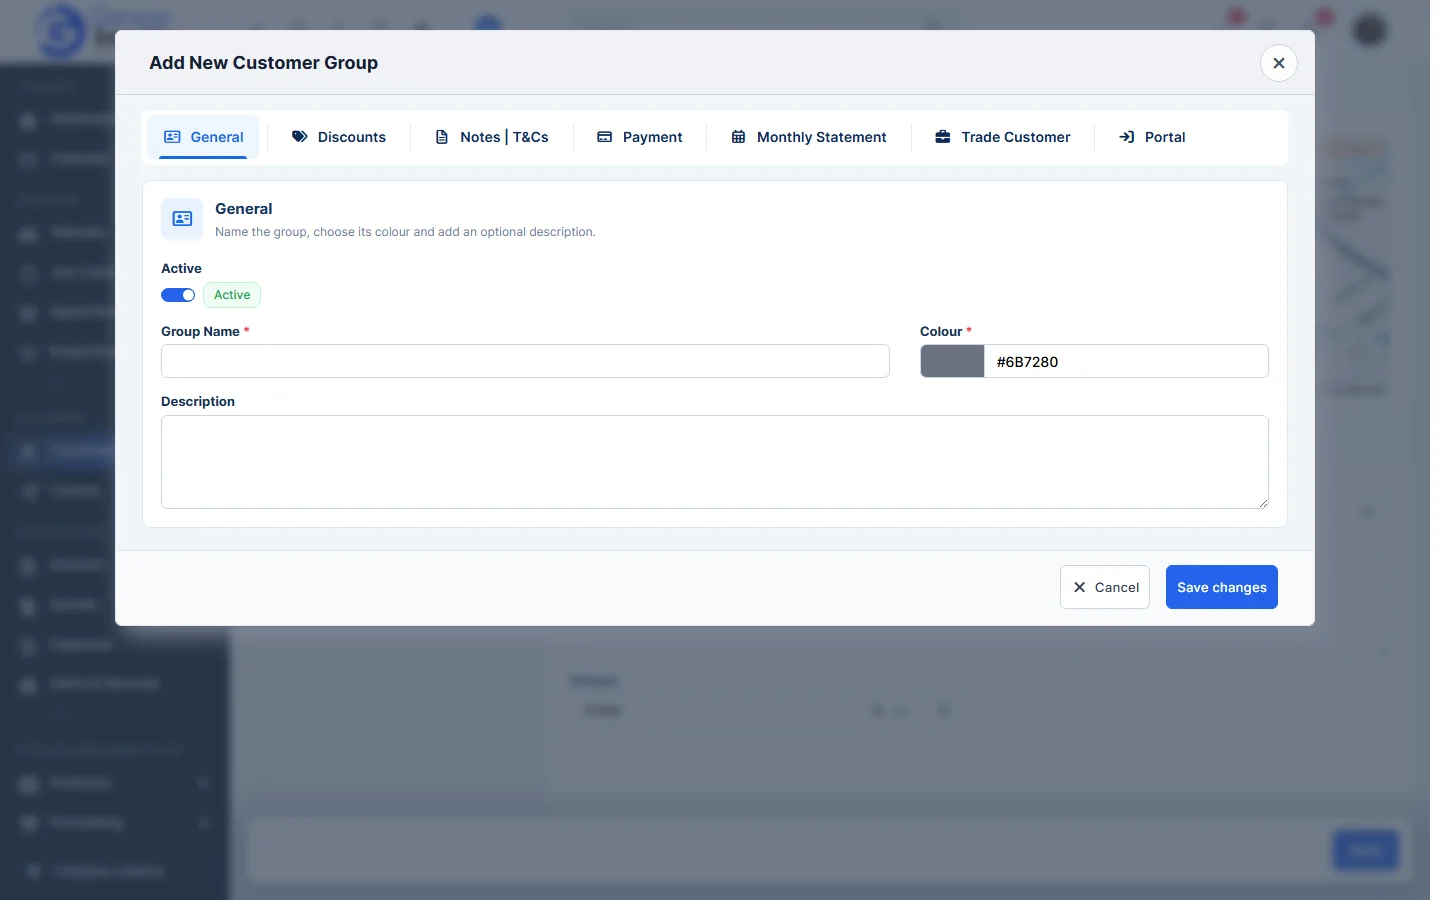
For more on these settings, see Add New Customer Group.
Assign a group to several customers at once
- Click Customers in the sidebar and tick the box at the start of each customer.
- Click Bulk actions above the table.
- Choose the group under Groups and click Confirm.
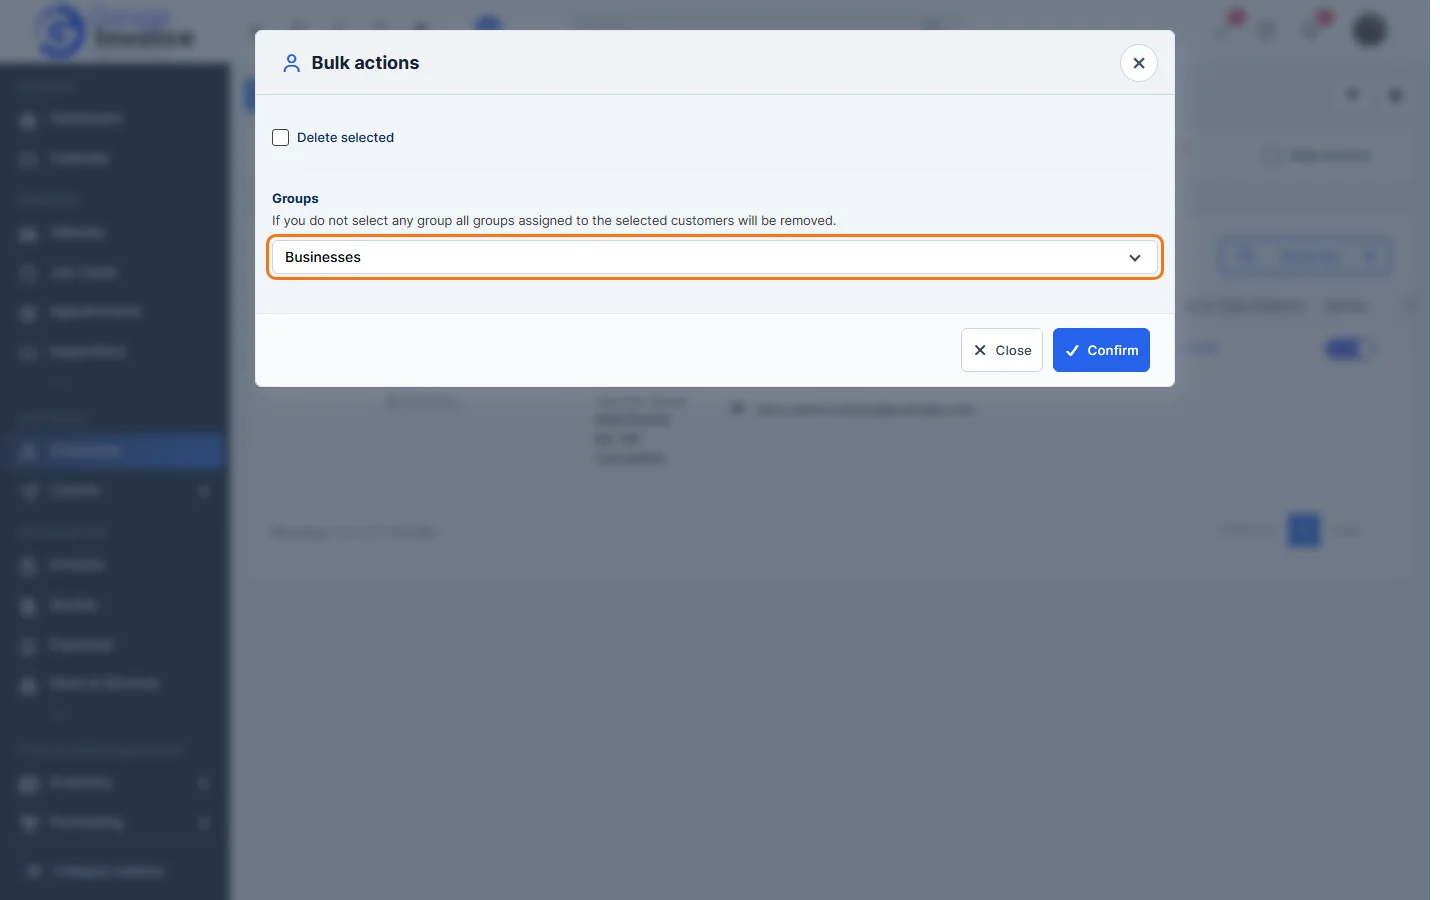
Note: if you click Confirm without choosing a group, all groups are removed from the selected customers.
To list the customers in a group, use the Groups filter on the Customers list. See Search for Customer.
Feature Customer management: see what it does and how it fits your workshop.