
Add a customer before you create job cards, quotes or invoices for them. A customer can be a Retail customer (a private person) or a Business customer (a company).
Open the New Customer form
- Click Customers in the sidebar, then click New Customer at the top of the list.
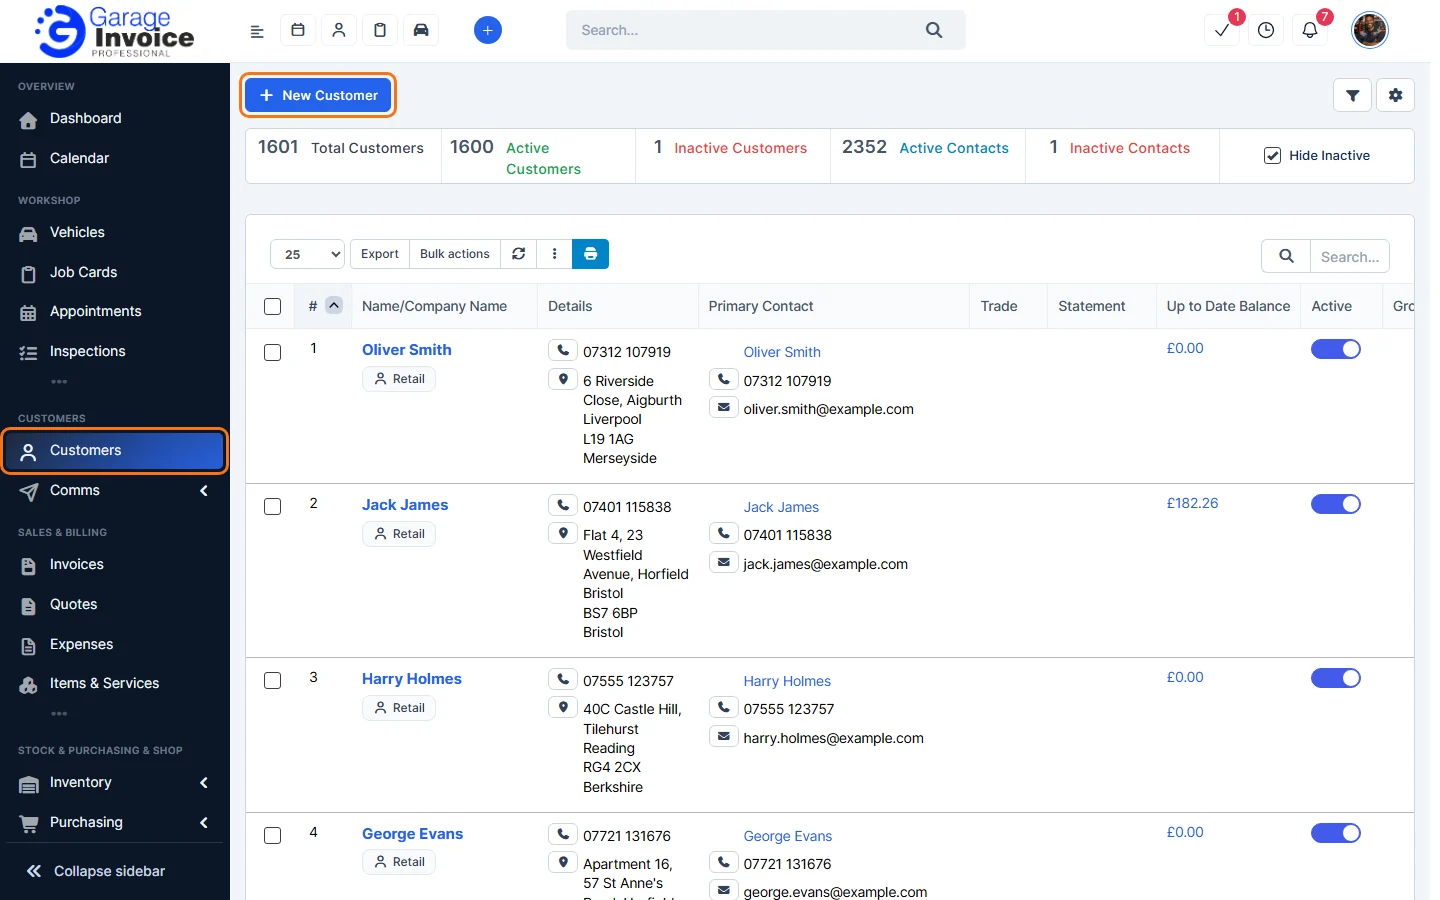
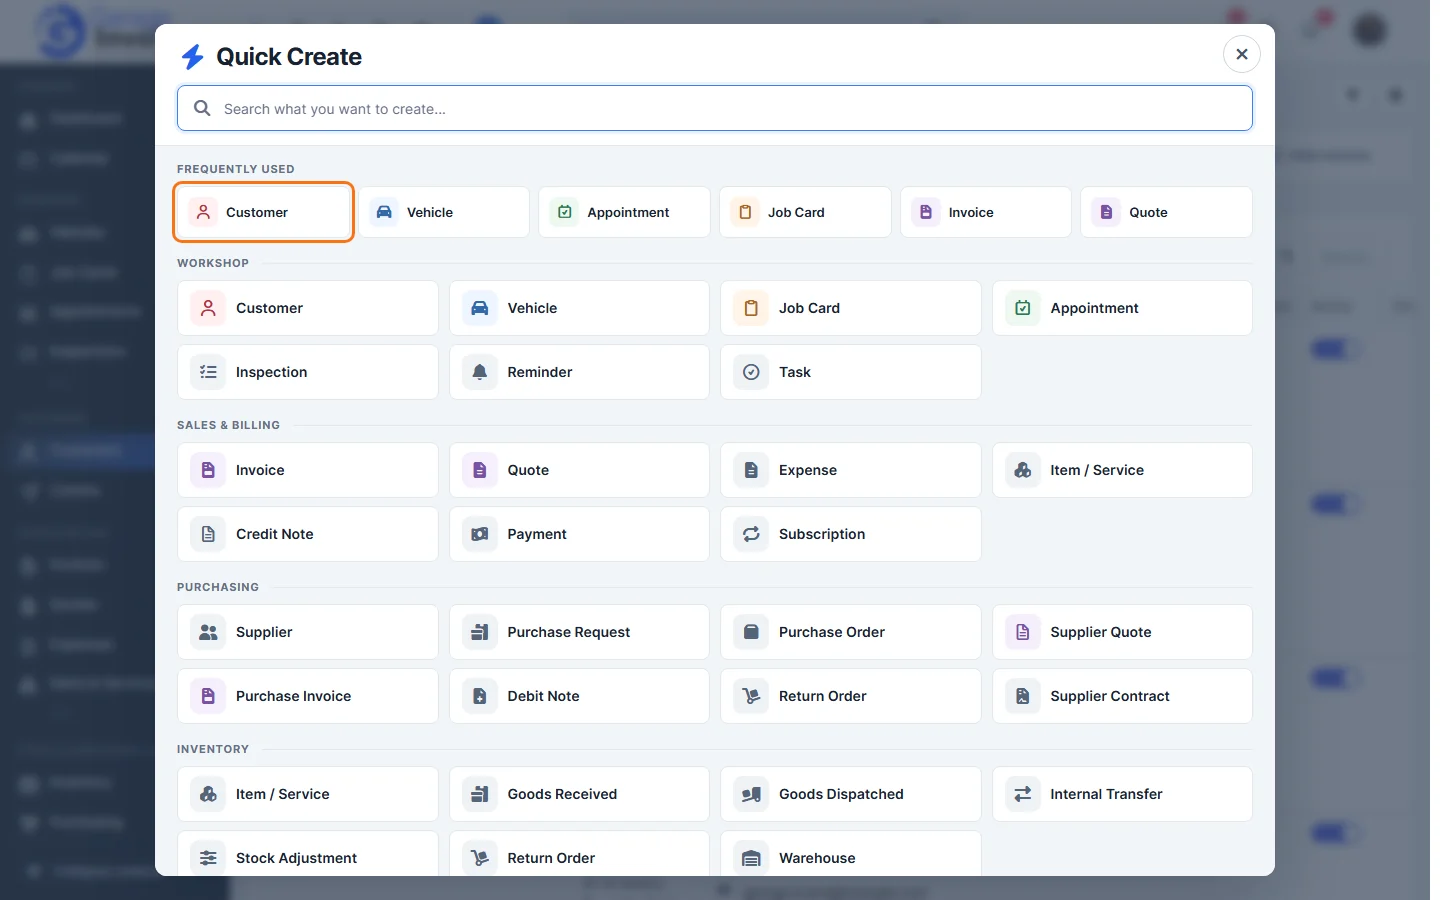
Tip: you can start a new customer from any page. Click the blue + button at the top of the screen to open Quick Create, then click Customer.
Enter the customer’s details
- Choose the Customer Type:
- Retail for a private person. Enter their First Name (required) and Last Name.
- Business for a company. Enter the Company Name (required).
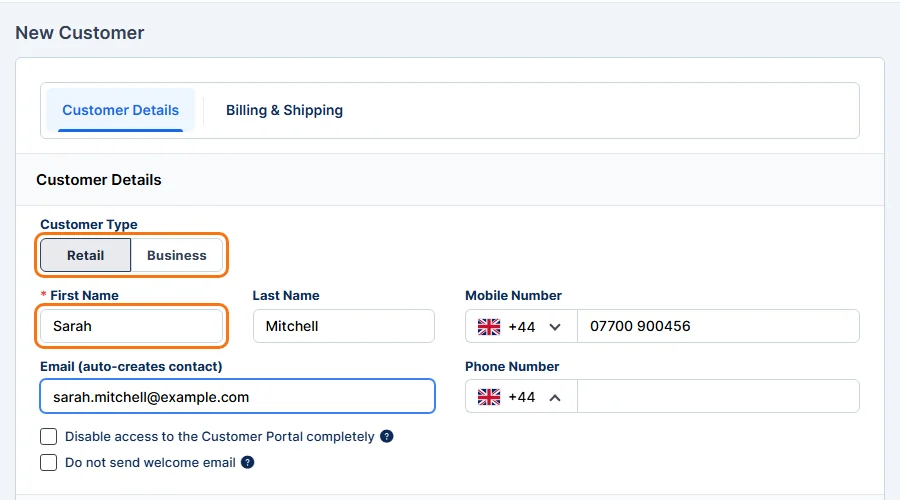
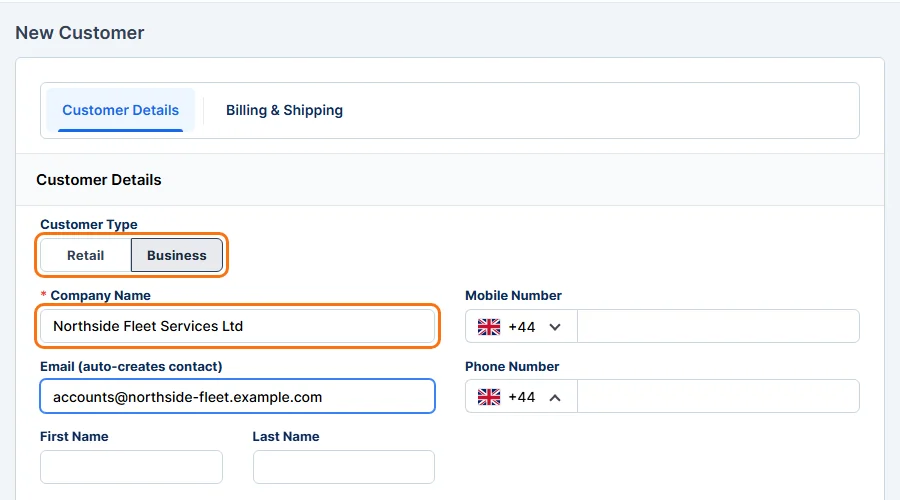
- Enter the Mobile Number and, if they have one, a landline in Phone Number. Click the flag to change the country code (+44 is set for you).
- Enter the customer’s email address in Email (auto-creates contact). When you save, Garage Invoice creates a contact with this email, so the customer can receive invoices, quotes and reminders by email and log in to the Customer Portal.
Two options appear under the email:- Disable access to the Customer Portal completely: the contact won’t be able to use the Customer Portal.
- Do not send welcome email: the contact won’t get the welcome email inviting them to log in to the Customer Portal.
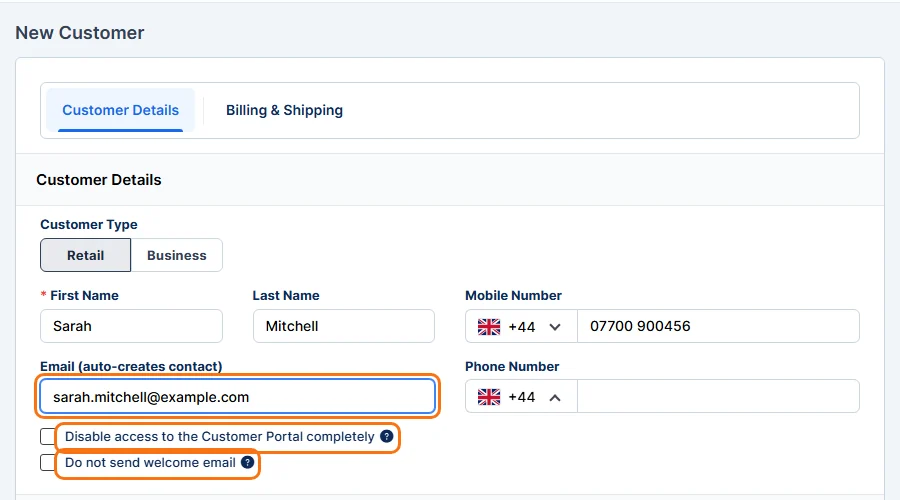
Note: you can leave the email empty and add contacts later. See Add New Customer with Contact.
Add the address
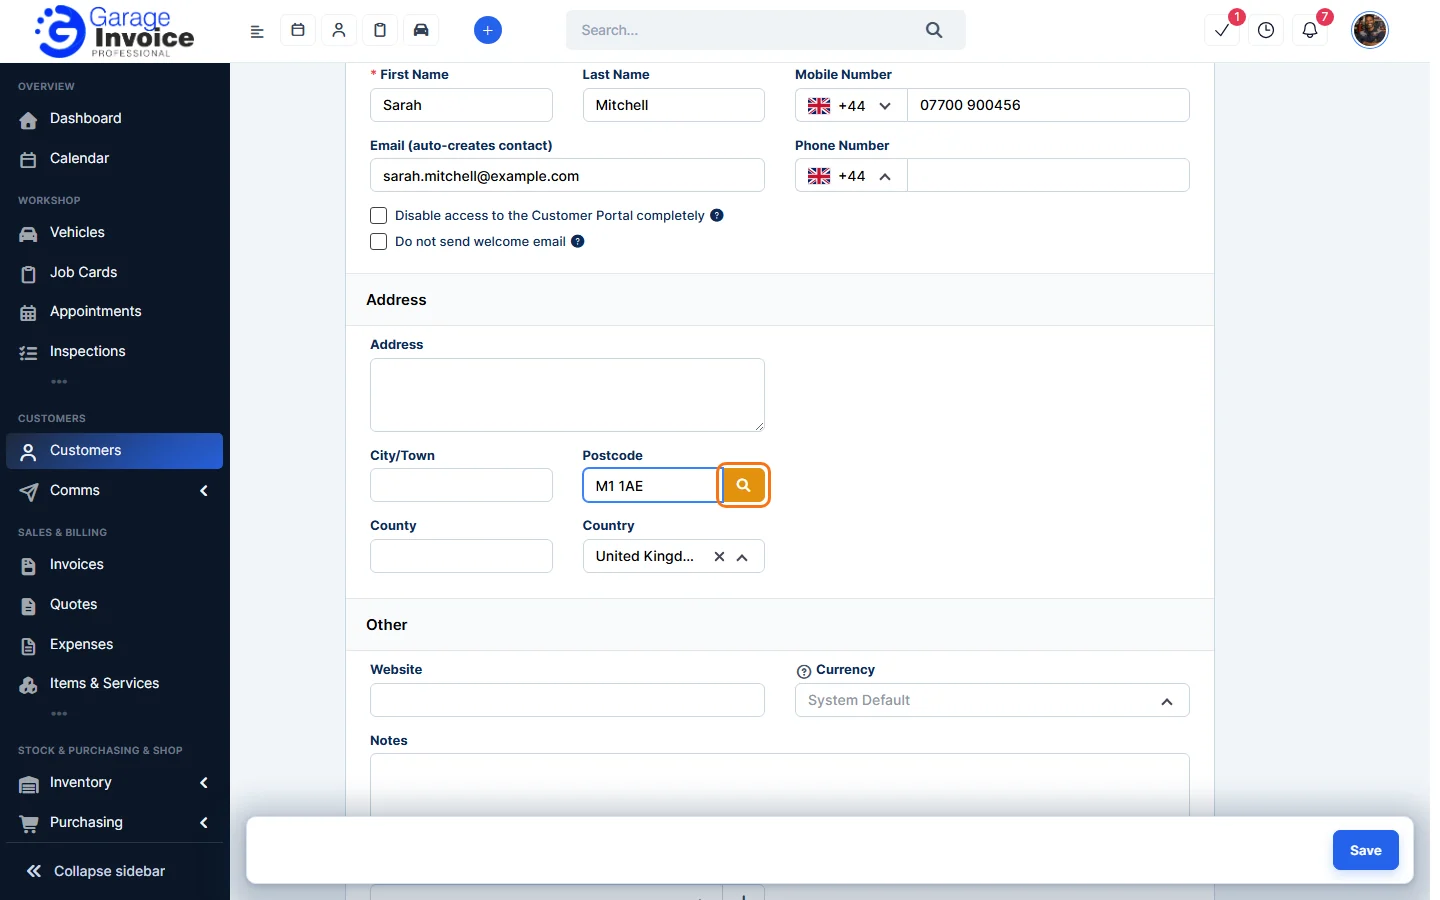
- Type the postcode into Postcode and click the orange Postcode Lookup button next to it.
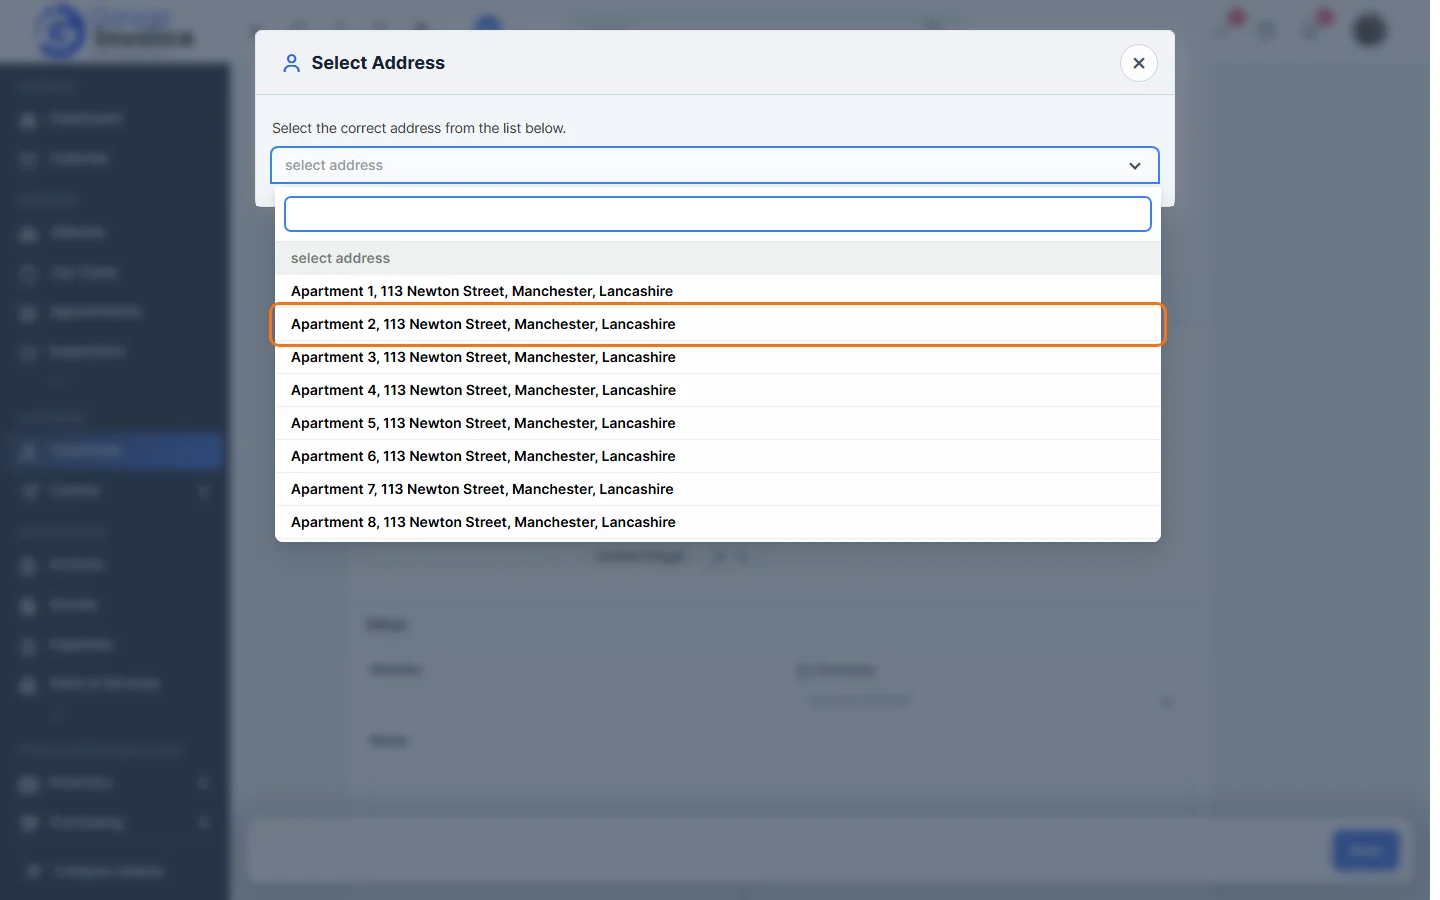
- Choose the right address from the list. If the list is long, type part of the address (for example the house number) into the box above it.
- The Address, City/Town and County fields are filled in for you. Check them and change anything that isn’t right.
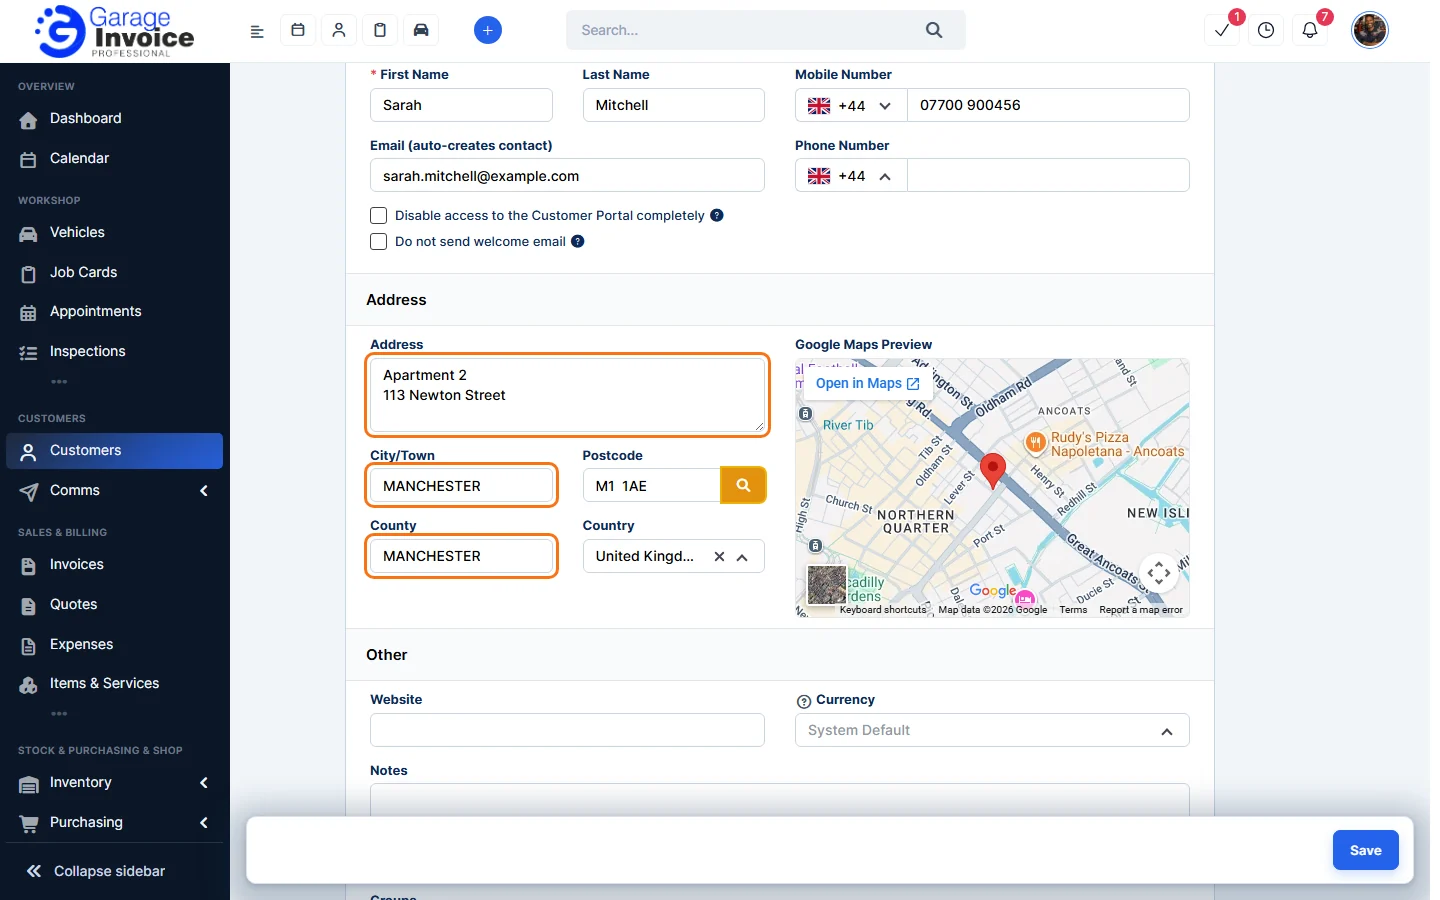
Note: you can also type the address in yourself. To change which country Postcode Lookup searches, see Change Post Code Lookup Country.
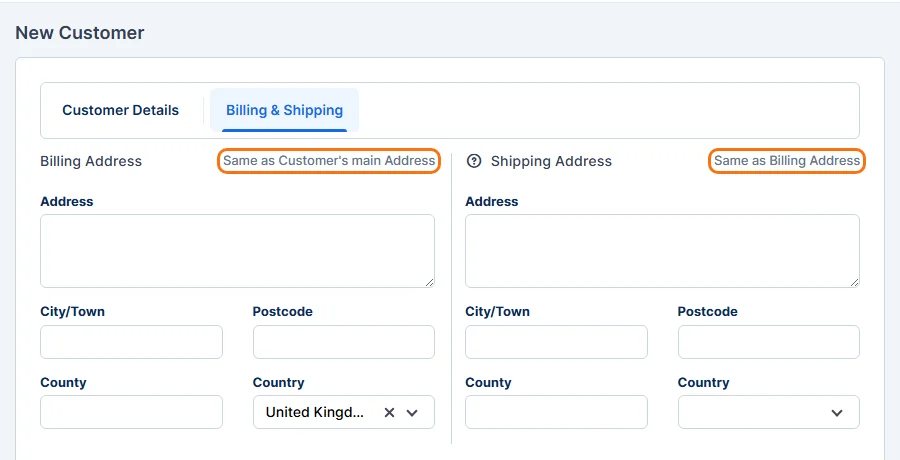
- If the customer’s invoices should go to a different address, open the Billing & Shipping tab:
- Click Same as Customer’s main Address to copy the main address into the billing address, then change what you need.
- Click Same as Billing Address to copy the billing address into the shipping address. Leave the shipping address empty if you don’t use shipping addresses on invoices.
Add other details and save
- In the Other section you can also fill in:
- Website.
- Currency: leave it on System Default unless this customer pays in a different currency. You can’t change the currency after transactions have been recorded for the customer.
- Notes for your team.
- Groups: put the customer into a group such as Trade or VIP. Click + next to the field to create a new group. See Group Customers.
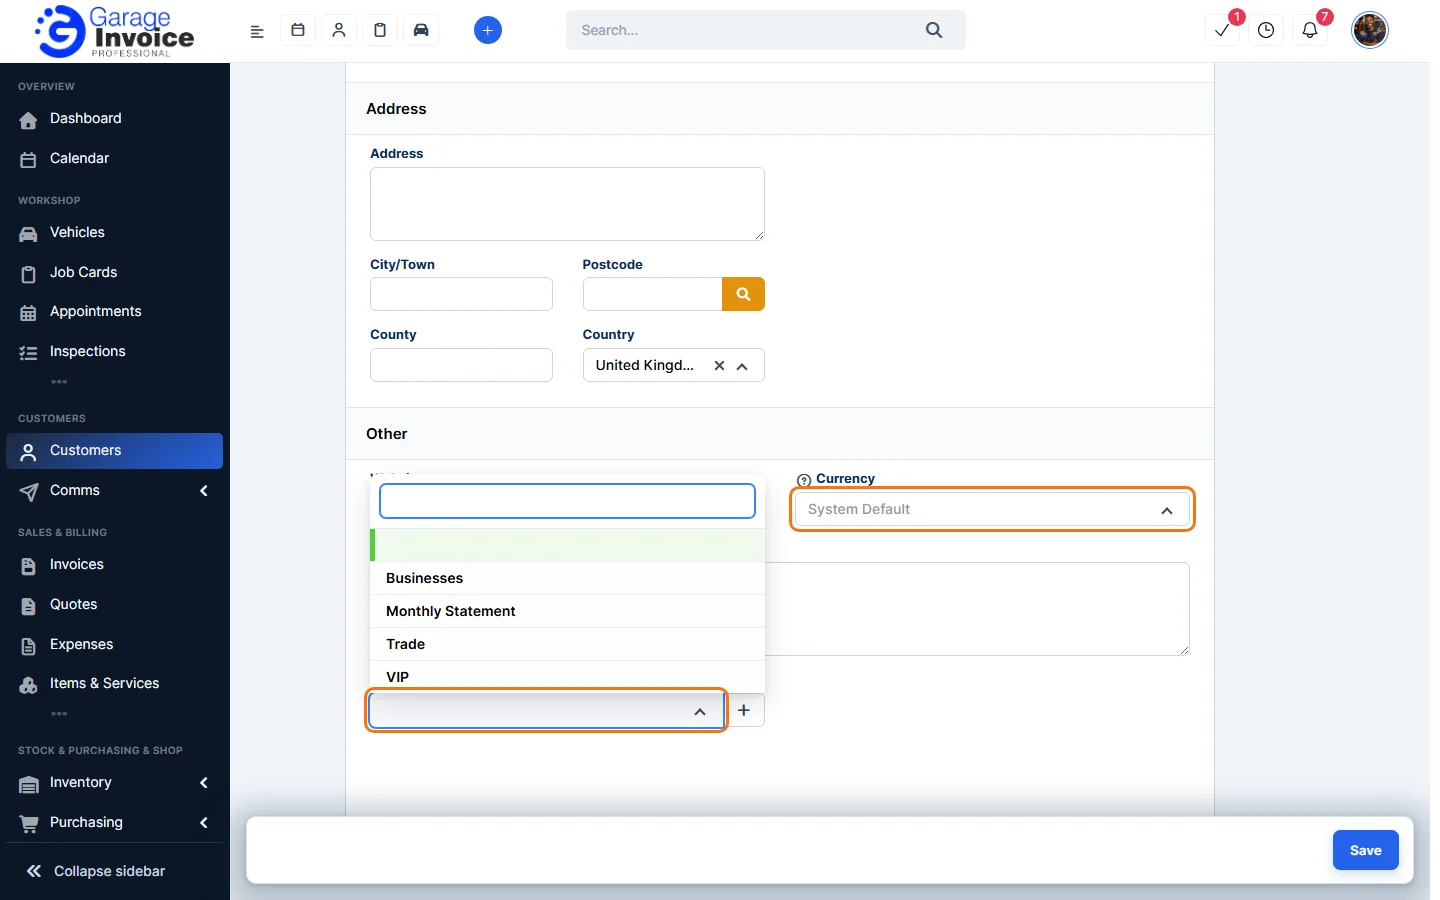
- Click Save in the bottom right corner.
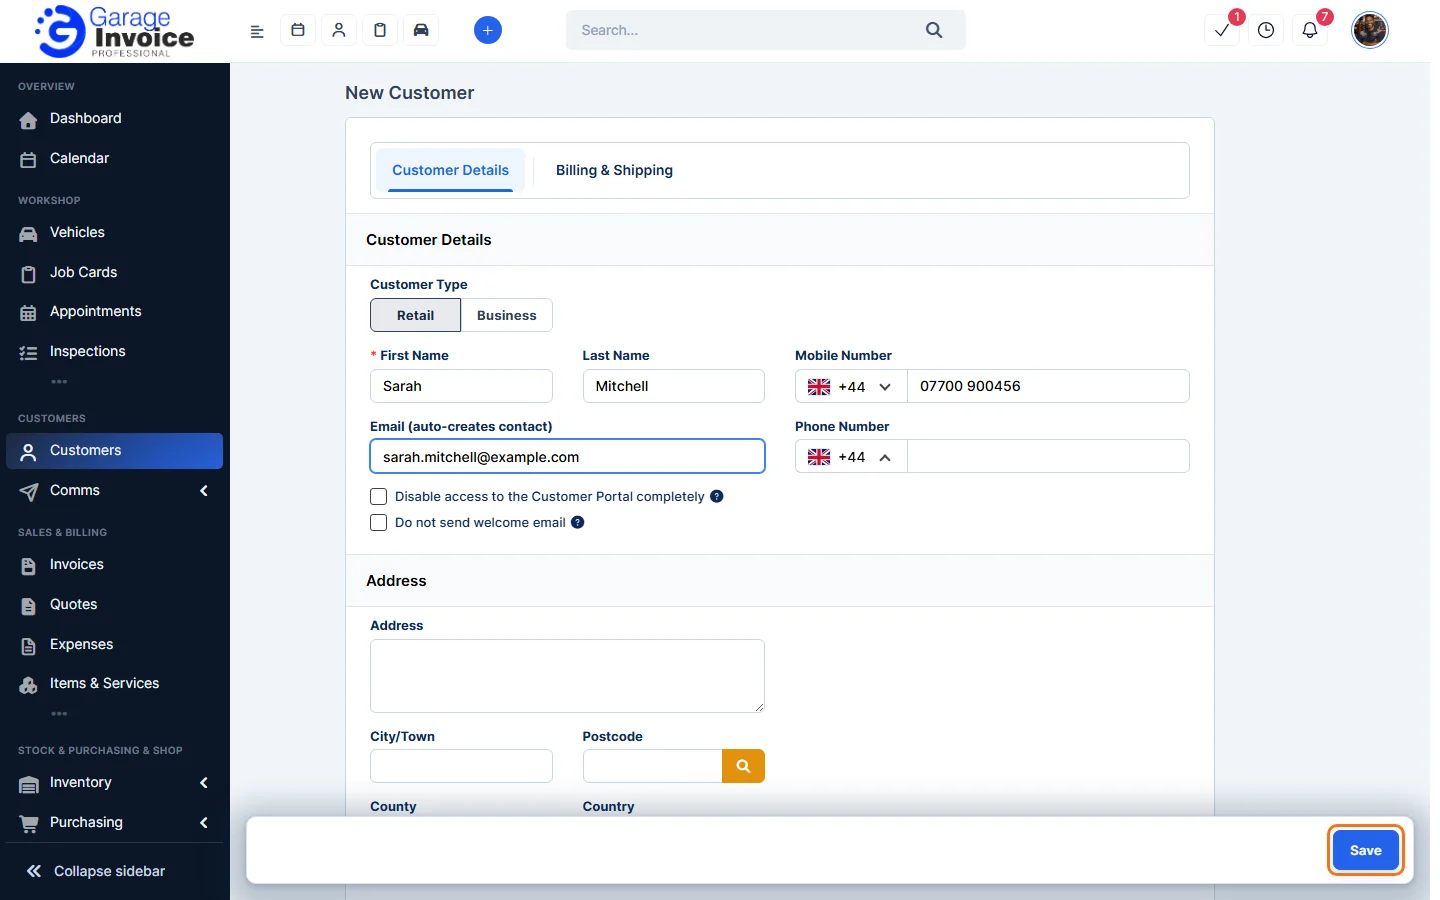
The customer’s page opens and you’ll see Added successfully. If you entered an email, Contacts shows 1: that’s the contact created from the email.
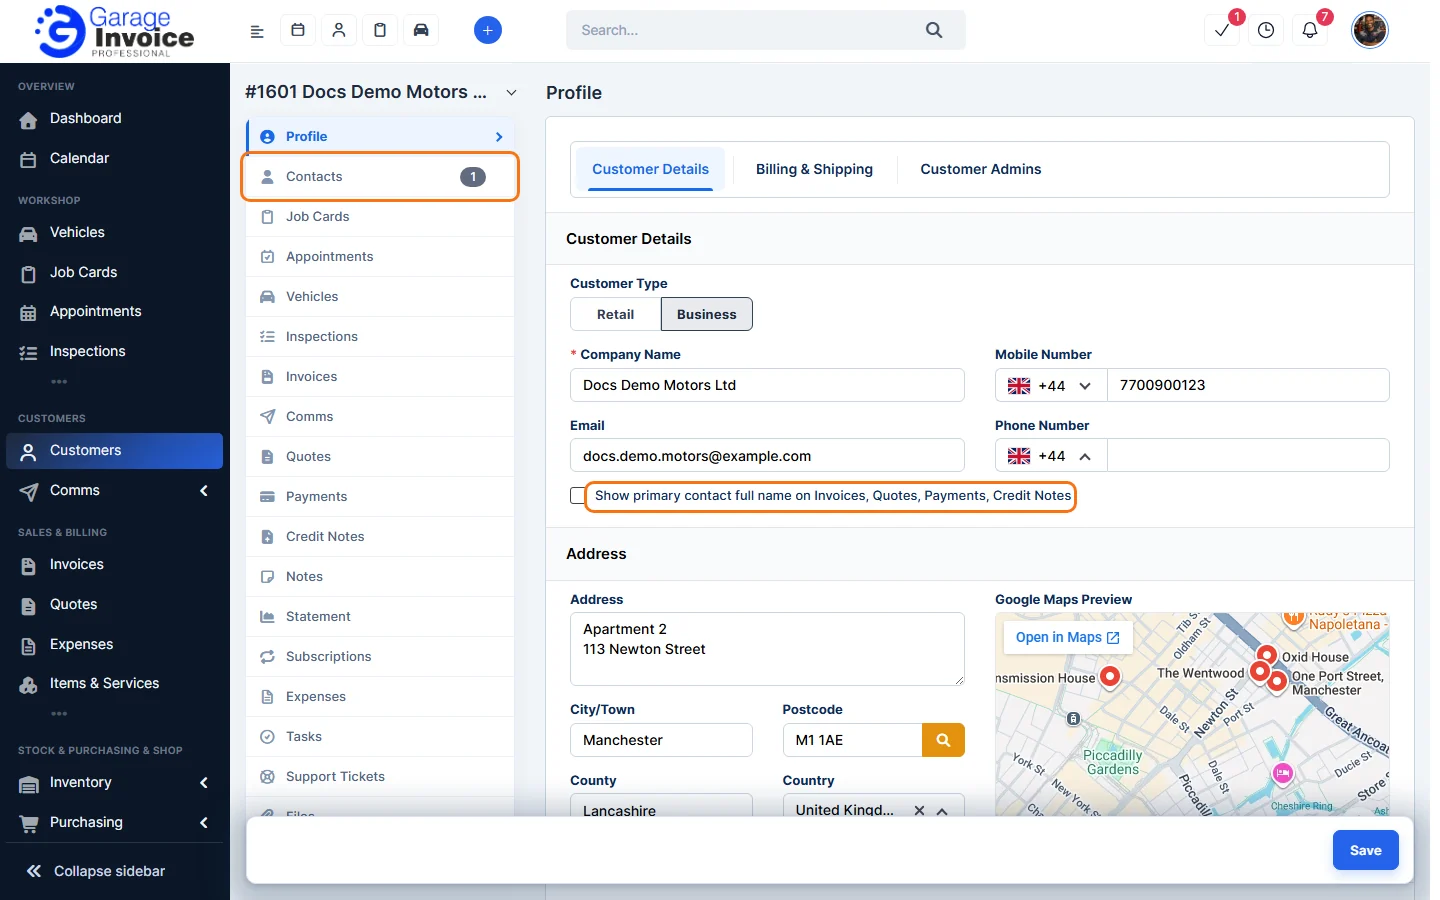
Note: for a Business customer, the customer page also has a Show primary contact full name on Invoices, Quotes, Payments, Credit Notes option. Tick it to show the primary contact’s full name on those documents.
Next steps: View Customer Details · Add New Customer with Contact · Group Customers
Feature Customer management: see what it does and how it fits your workshop.