
- Click Items & Services in the sidebar, under Sales & Billing. Click the cog button at the top right and choose Settings. (You can also click the cog next to Basic Details in the item window.)
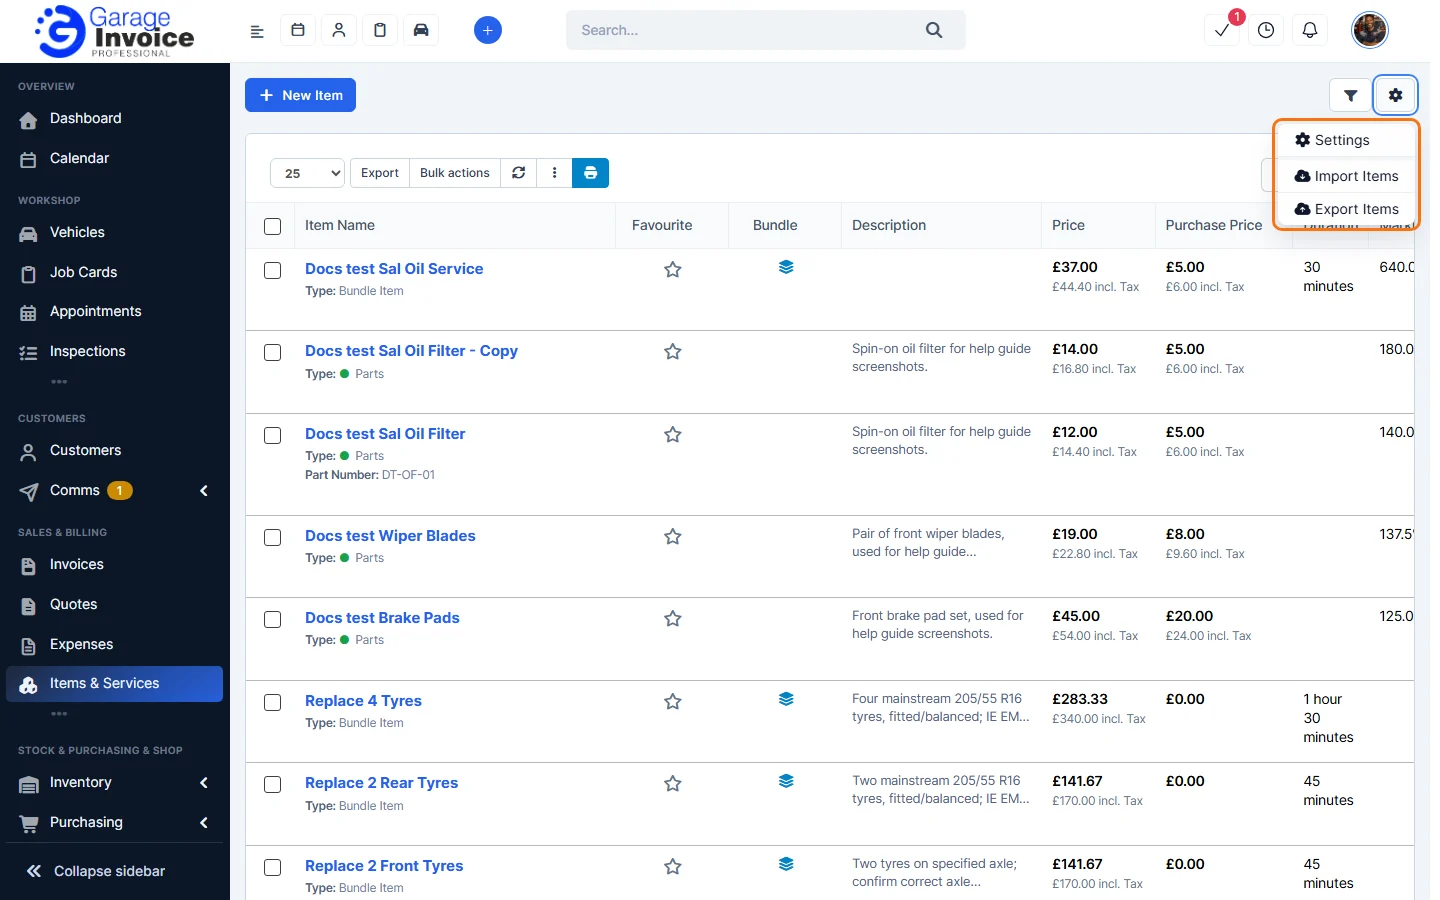
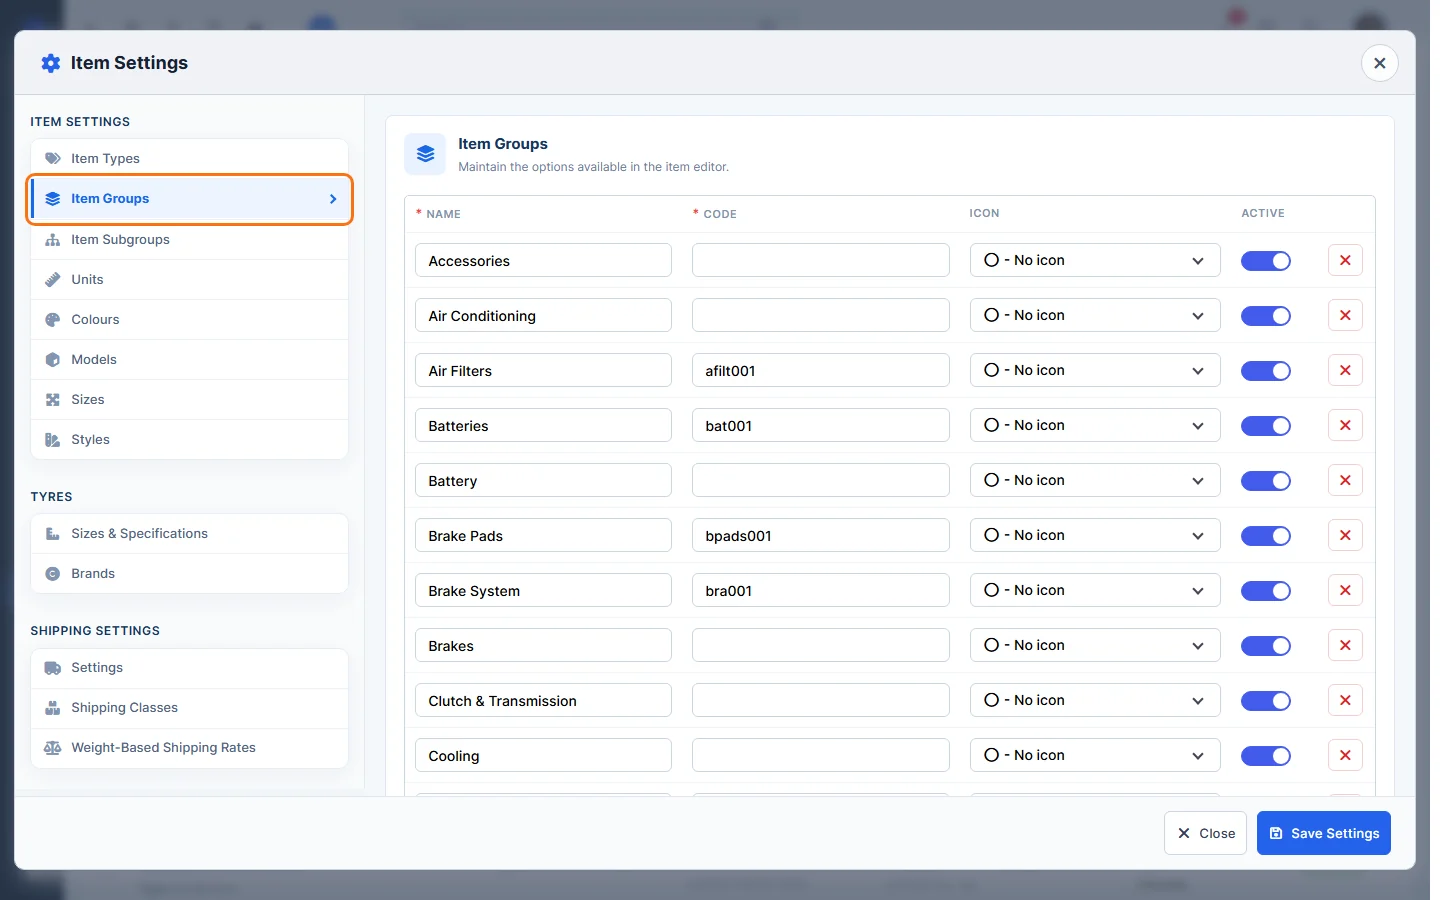
- The Item Settings window opens. Click a list on the left:
- Item Types: the types you choose from, such as Labour or Parts.
- Item Groups: groups such as Brakes, Engine or Tyres. Each has a Name, Code, Icon and Active switch.
- Item Subgroups: groups within a group. Each subgroup belongs to an Item Group; use Filter by Item Group to find them.
- Units: units such as each, hour, litres or box.
- Colours, Models, Sizes and Styles: options for online shop items.
- Under Tyres: Sizes & Specifications and Brands.
- Under Shipping Settings: Settings, Shipping Classes and Weight-Based Shipping Rates for the online shop.
- To add an entry, scroll down and click Add Row, then fill in the Name and Code. To change one, edit it in the list. Turn Active off to hide it without deleting it, or click the red × to delete it.
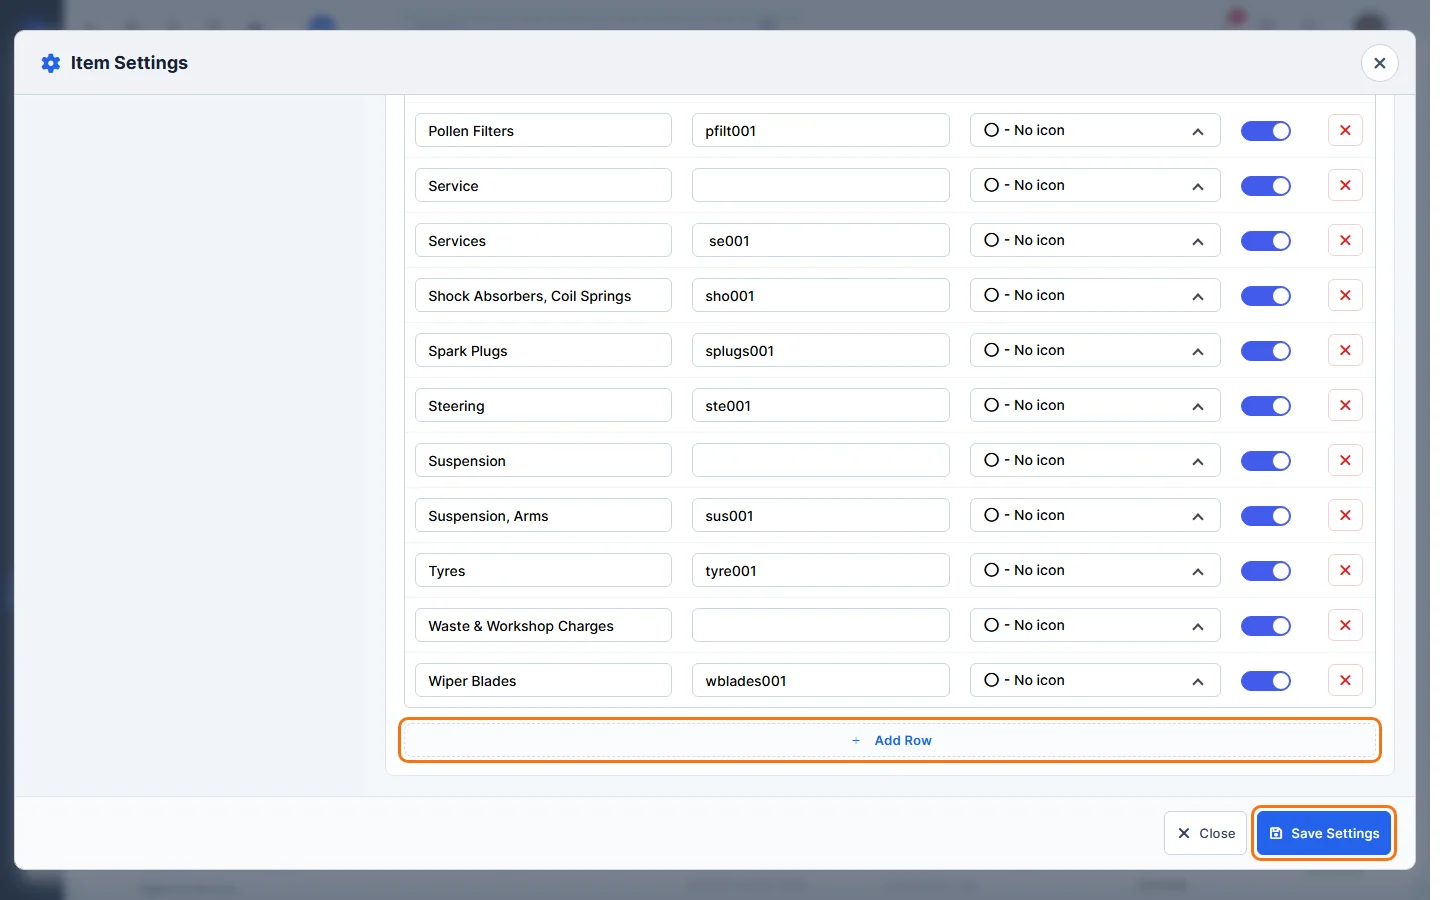
- Click Save Settings.
Note: these lists are shared with Inventory and Purchasing, so a group you add here is also there.
Feature Stock and inventory control: see what it does and how it fits your workshop.