
- Click Settings, open Comms and click Chat.
- Click the switch next to the Chat heading to turn it on.
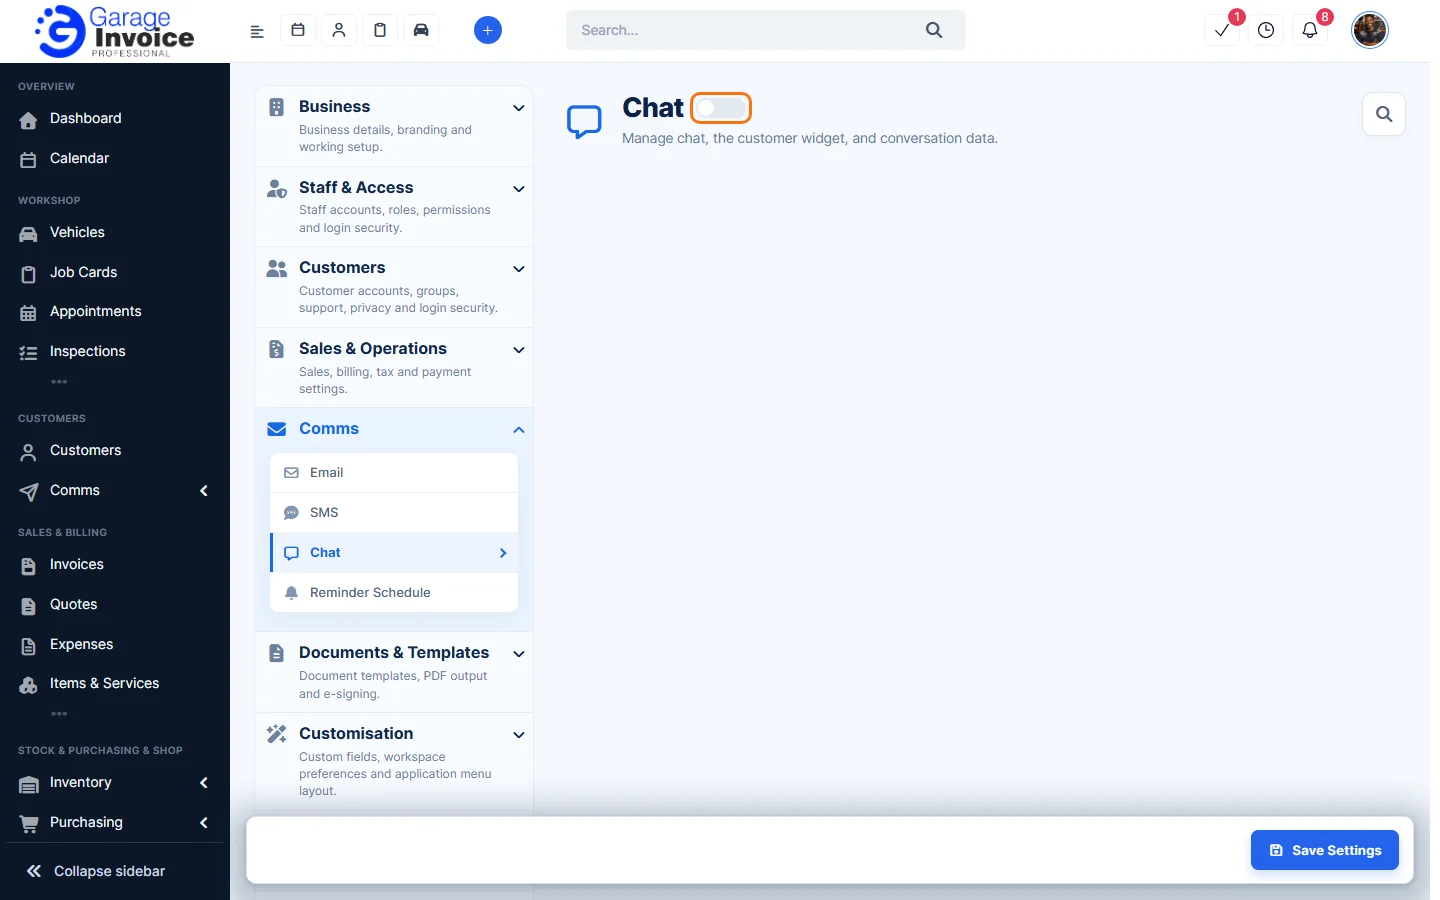
- Click Save Settings.
- The chat settings tabs appear: General, Customer Chat, Website Chat, Canned Responses, Tags, AI Settings and Danger Zone.
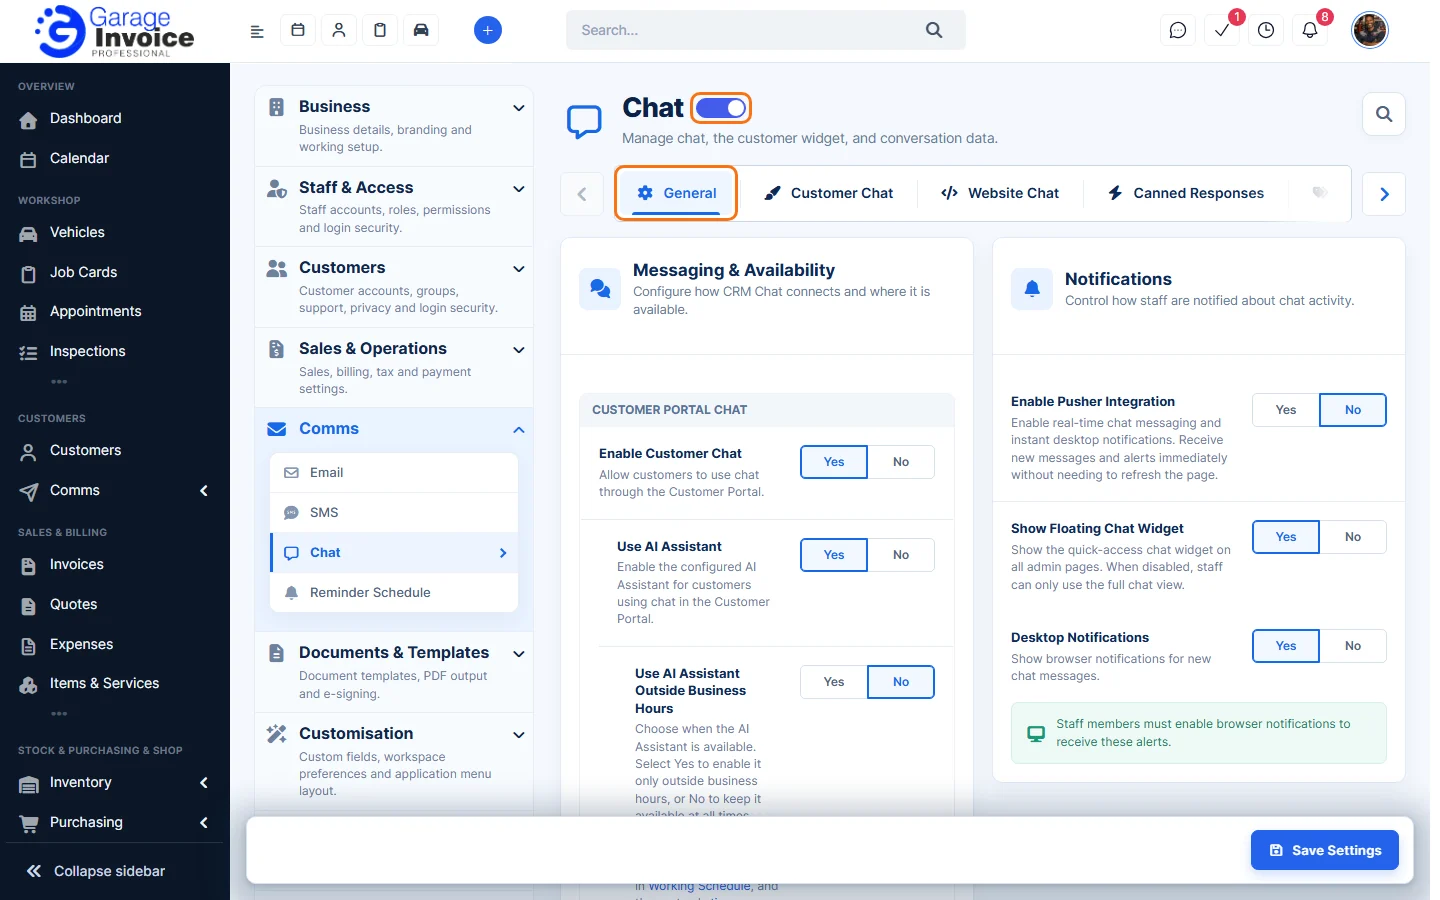
- On the General tab, choose where chat is available and how staff are notified:
- Customer Portal Chat: Enable Customer Chat and AI assistant options. See Enable Chat for Customers in Customer Portal.
- Website Chat: Enable Website Chat and AI assistant options. See Add Live Chat to Your Website.
- Notifications: Enable Pusher Integration (real-time messages), Show Floating Chat Widget on all admin pages, and Desktop Notifications.
- Click Save Settings.
Once chat is on, you’ll see Chat under Comms in the sidebar, a chat icon in the header and the floating chat widget.
Danger Zone
The Danger Zone tab lets you delete old conversations: staff history, client history, group history, AI chatbot conversations, or everything.
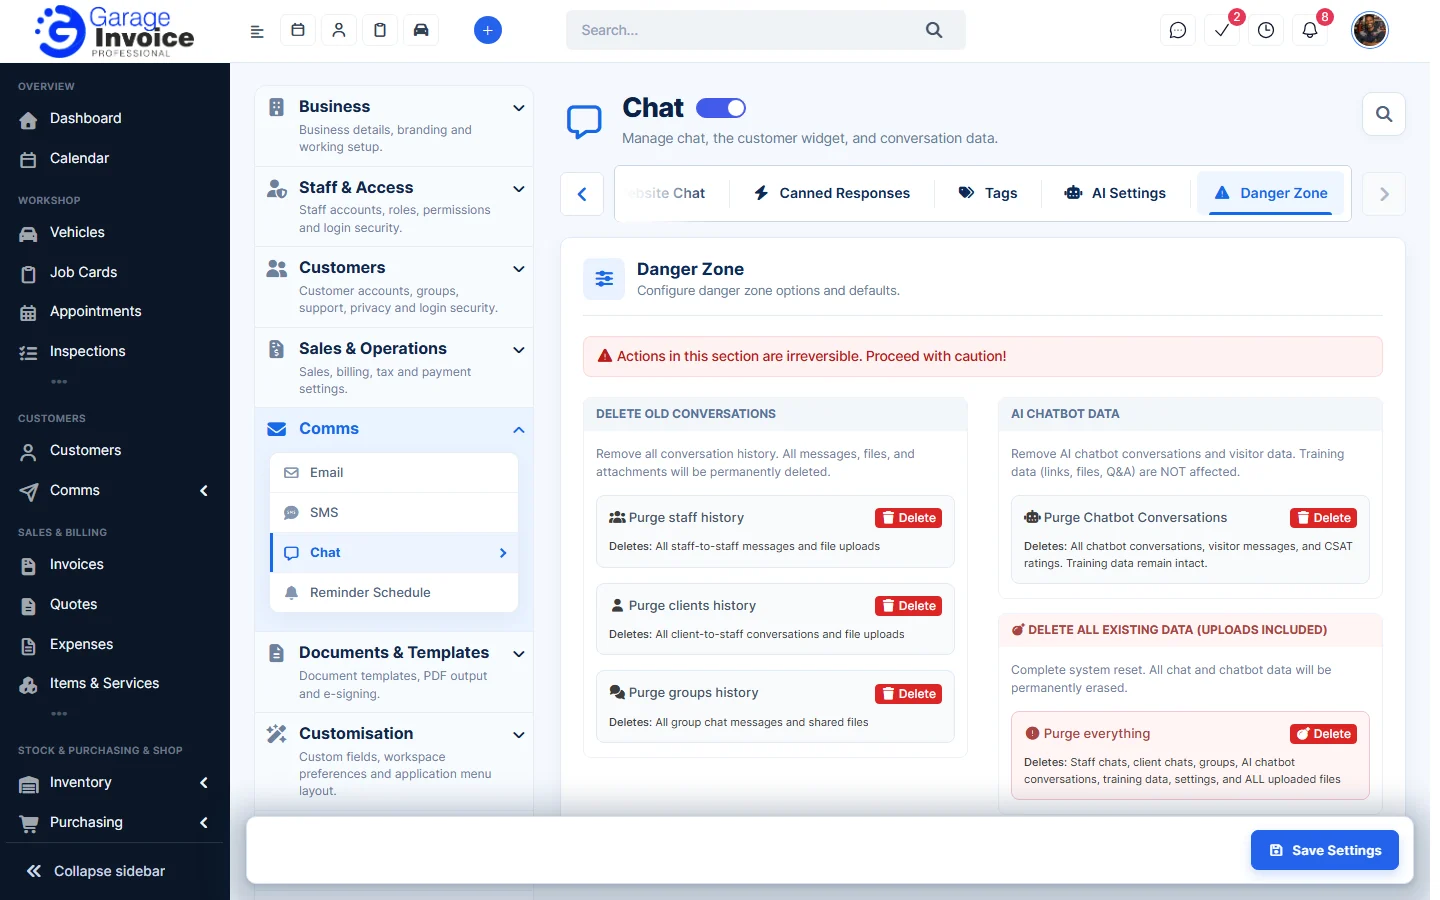
Note: anything deleted in the Danger Zone can’t be recovered.
To turn chat off again, click the switch next to Chat and click Save Settings.