
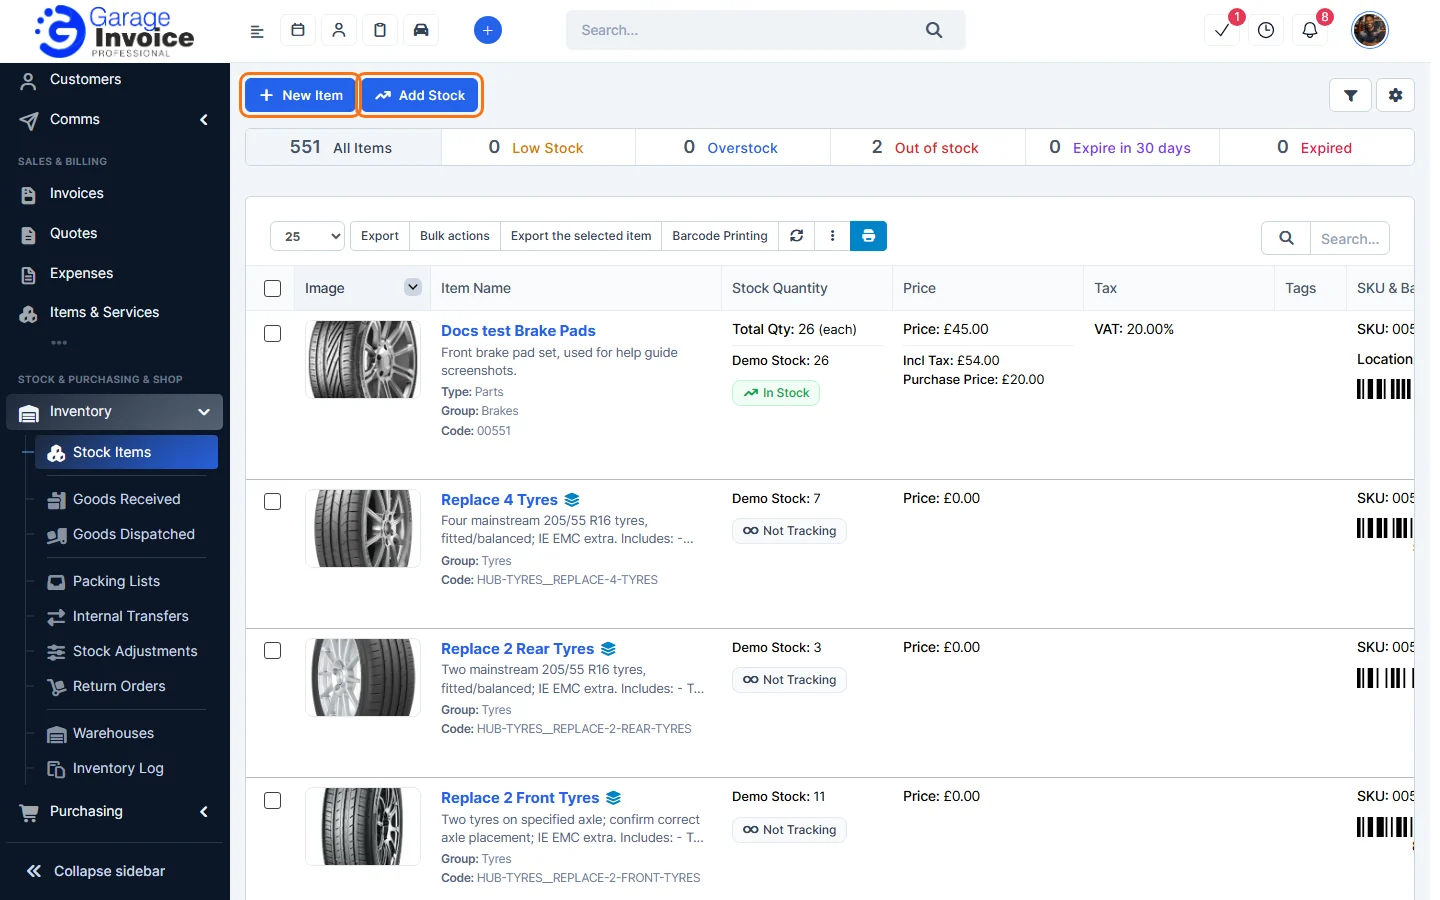
- Click Inventory in the sidebar (under Stock & Purchasing & Shop) and click Stock Items. Click New Item.
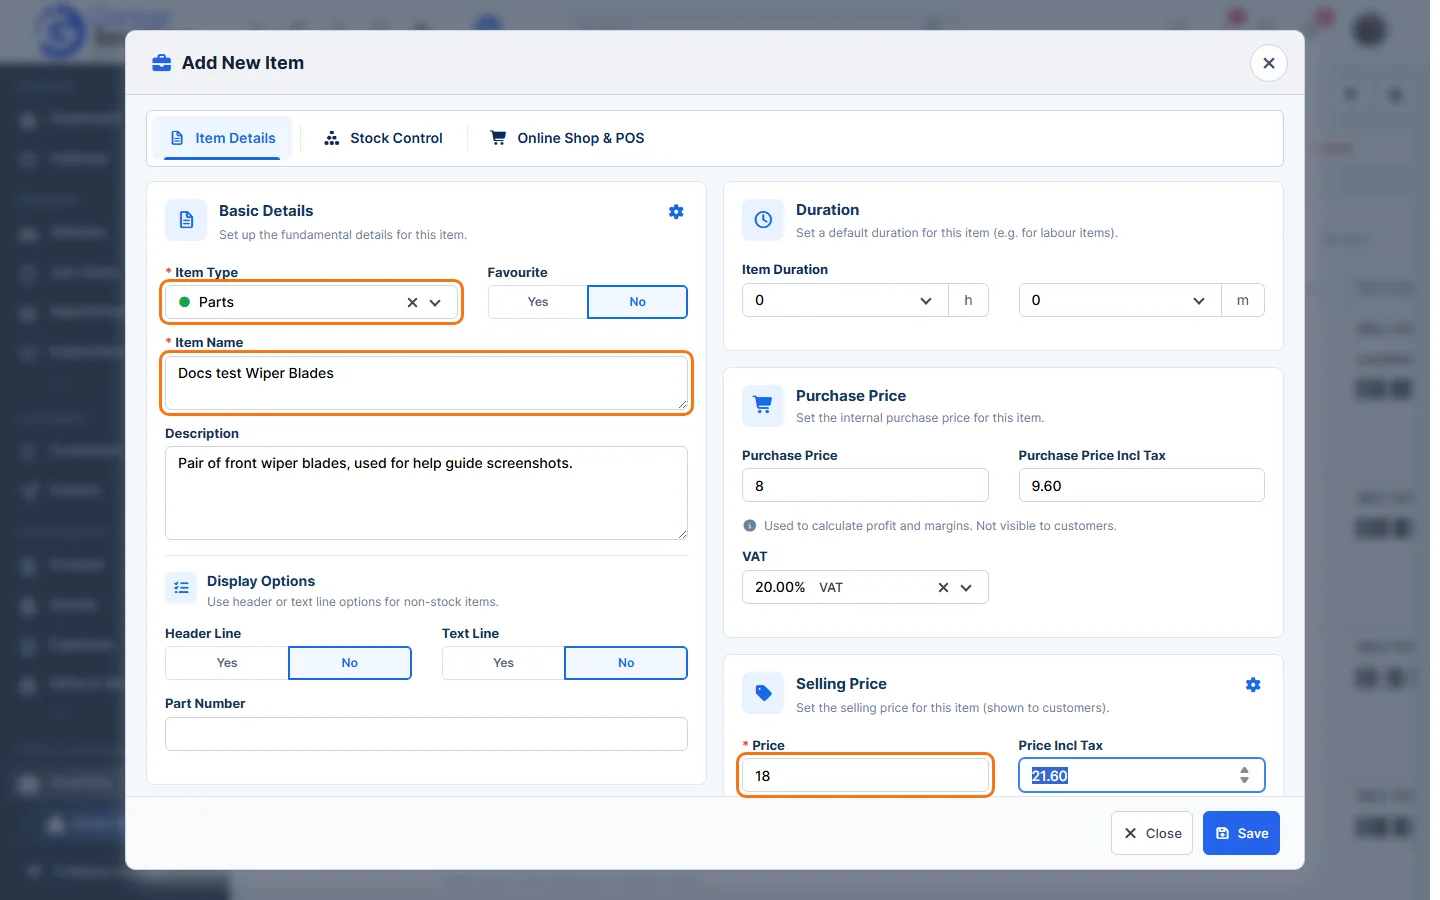
- On the Item Details tab, fill in the basic details:
- Item Type (required), for example Parts, Labour, Tyres or Consumables.
- Item Name (required) and a Description.
- Favourite: choose Yes to mark the item as a favourite.
- Header Line and Text Line: use these for non-stock lines that only hold a heading or text.
- Purchase Price: what you pay for the item. It is used for profit and margins and is not shown to customers.
- Price (required): the selling price, with its VAT. The incl. tax price is worked out for you.
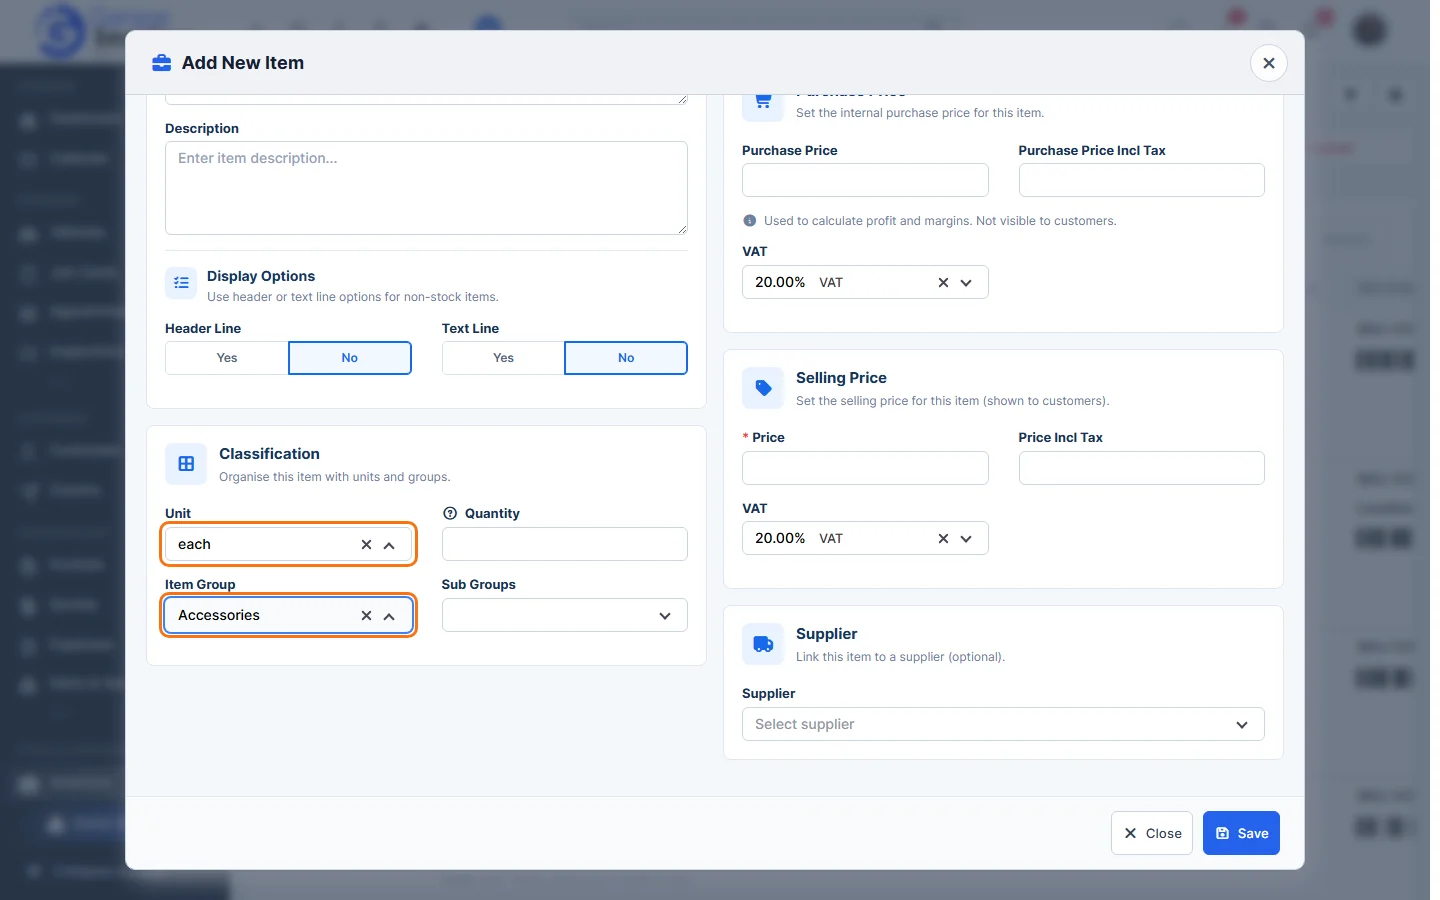
- Scroll down to set the Duration (useful for labour), the Unit, Quantity, Item Group and Sub Groups, and the Supplier. When both prices are filled in, Profitability shows the margin, profit and markup.
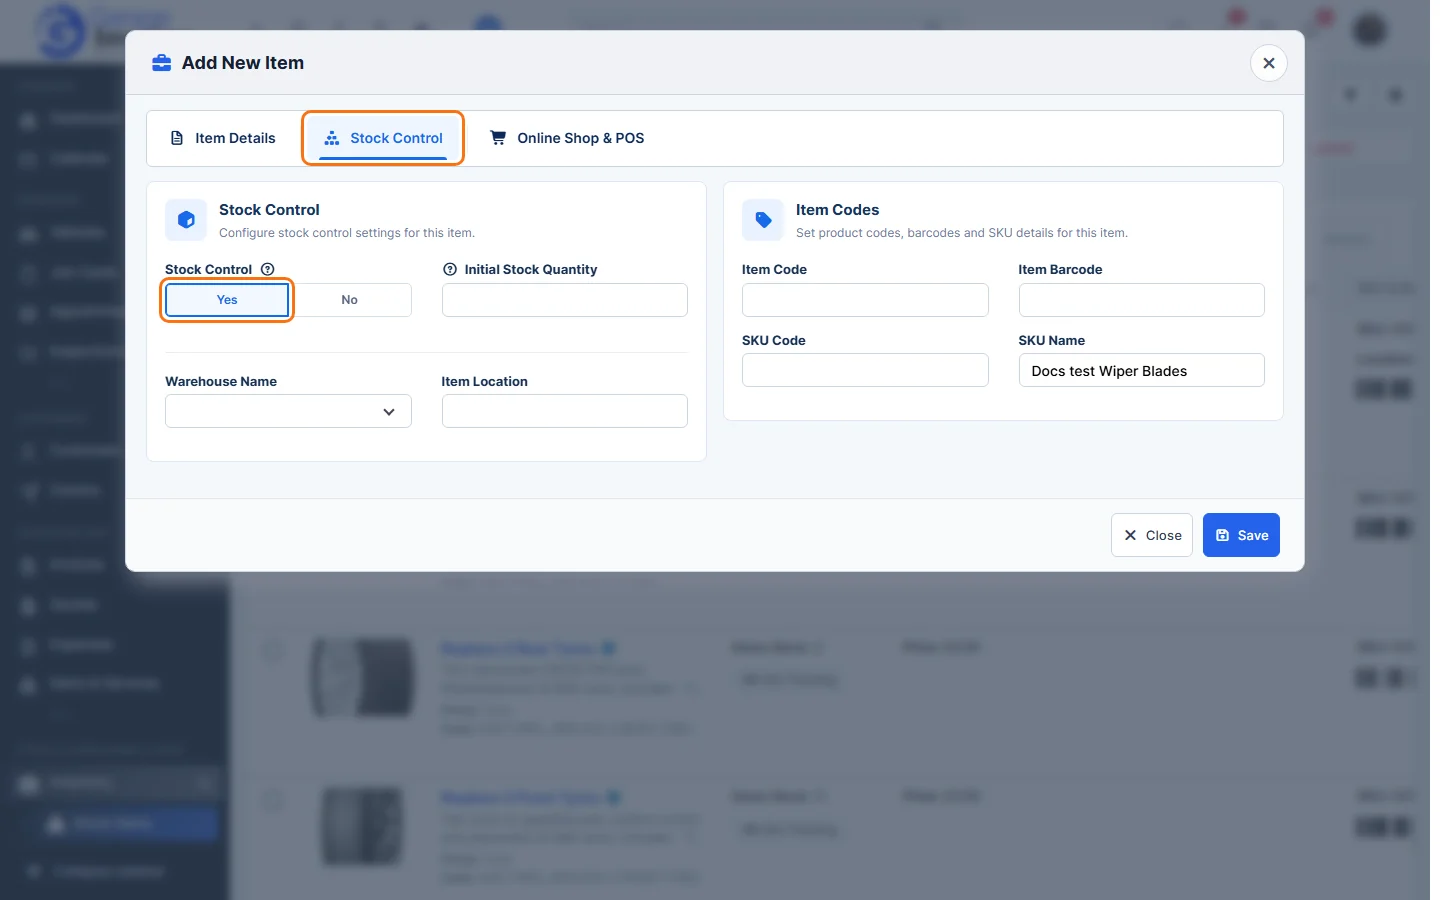
- Click the Stock Control tab. Choose Yes to track stock for this item, then enter the Initial Stock Quantity, Warehouse Name and Item Location (for example a shelf). Under Item Codes you can add an Item Code, Item Barcode, SKU Code and SKU Name.
- Click the Online Shop & POS tab and choose whether to Add to Online Shop and Add to POS.
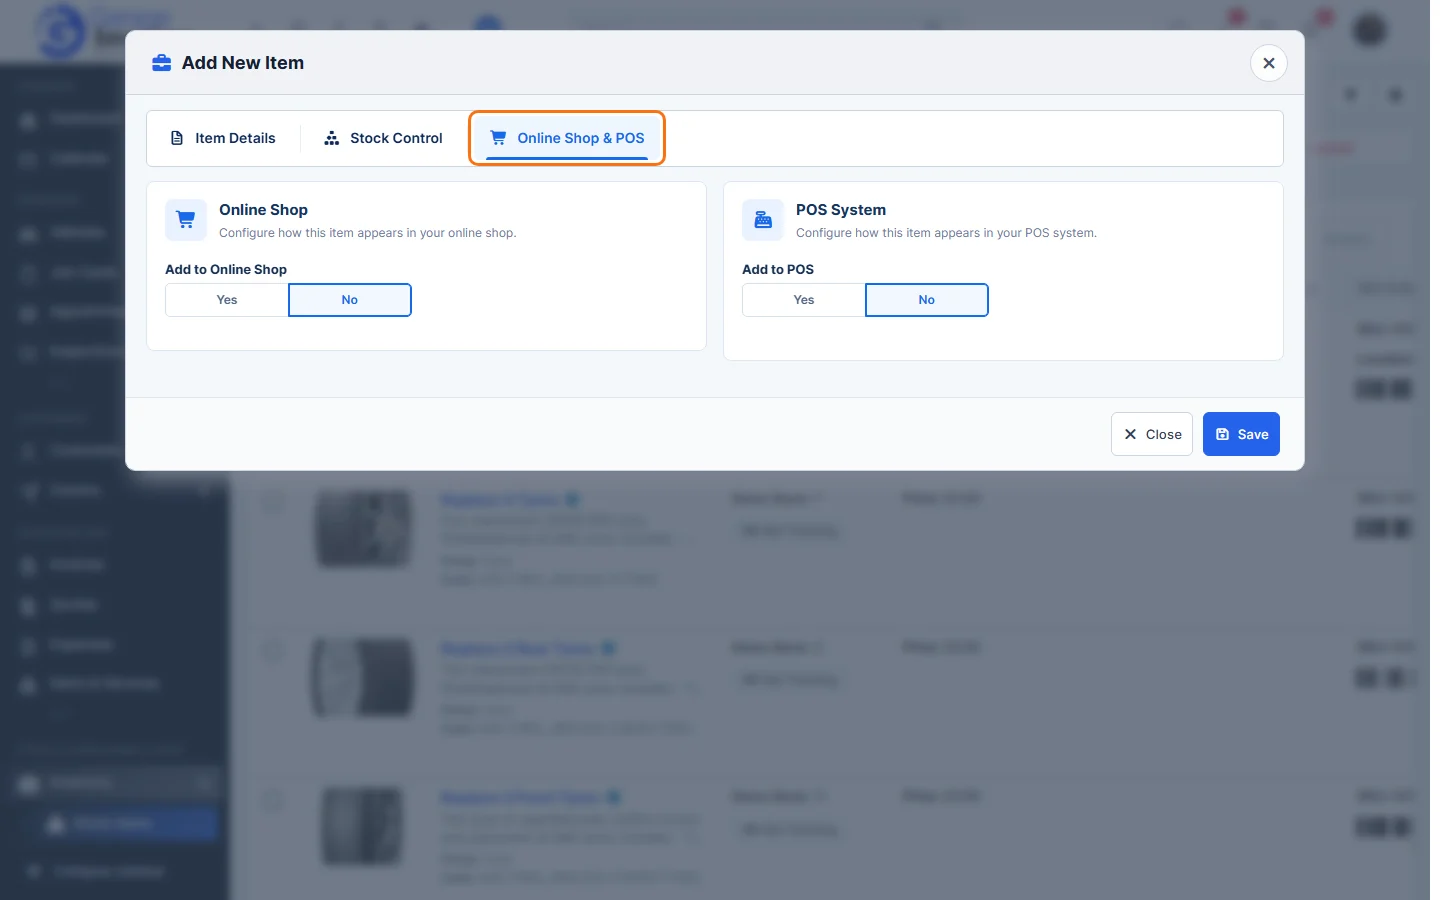
- Click Save. The item appears at the top of the Stock Items list.
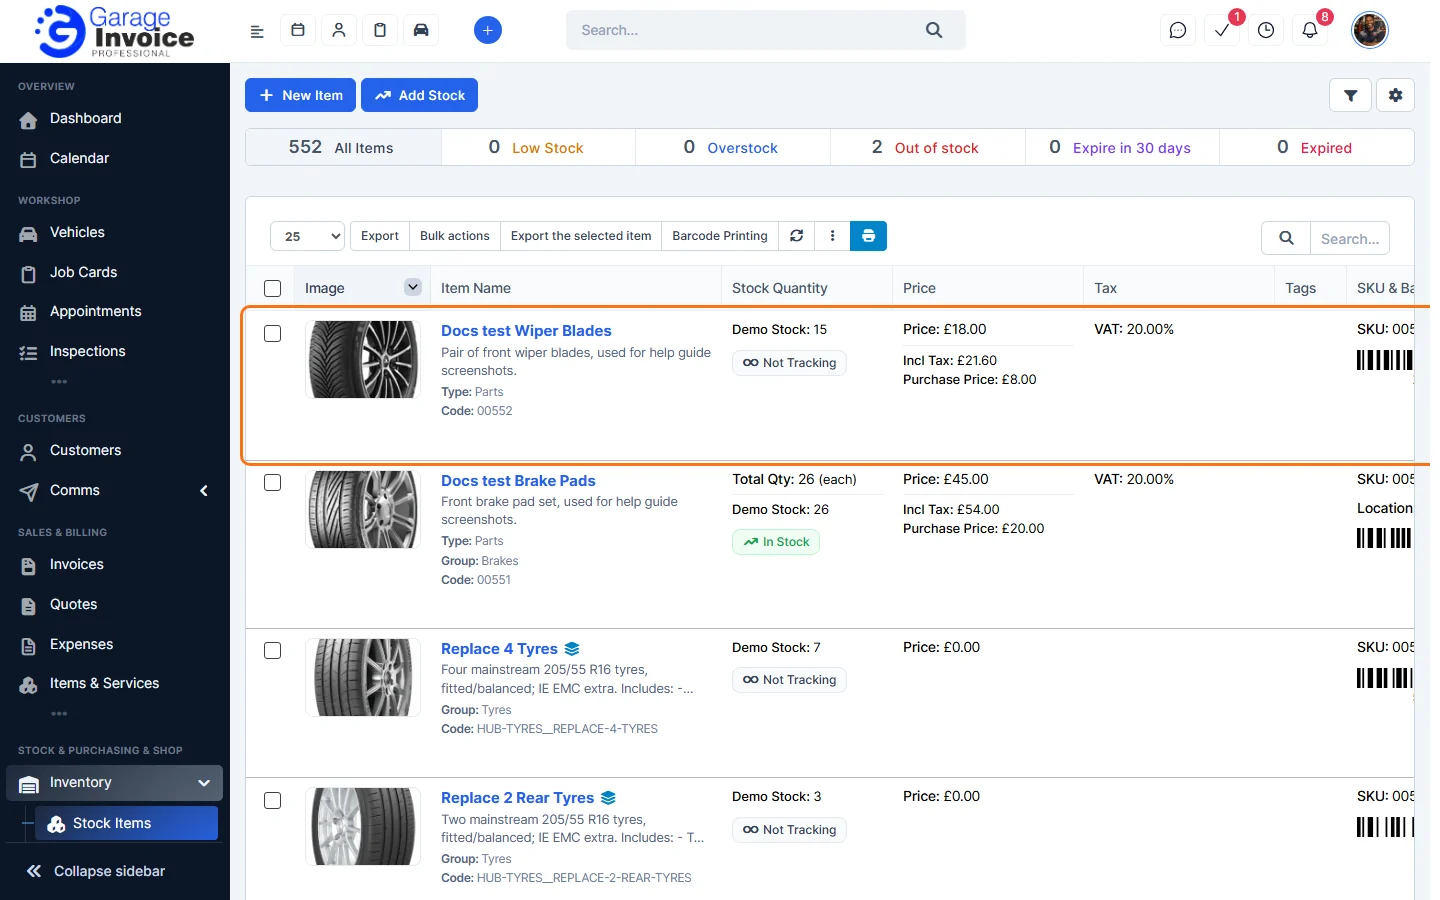
Note: items you don’t track show Not Tracking in the stock column. Items you track show In Stock or Out of stock.
Tip: item types, groups, subgroups and units come from Inventory Settings. See Item Types, Item Groups and Units.
Feature Stock and inventory control: see what it does and how it fits your workshop.