
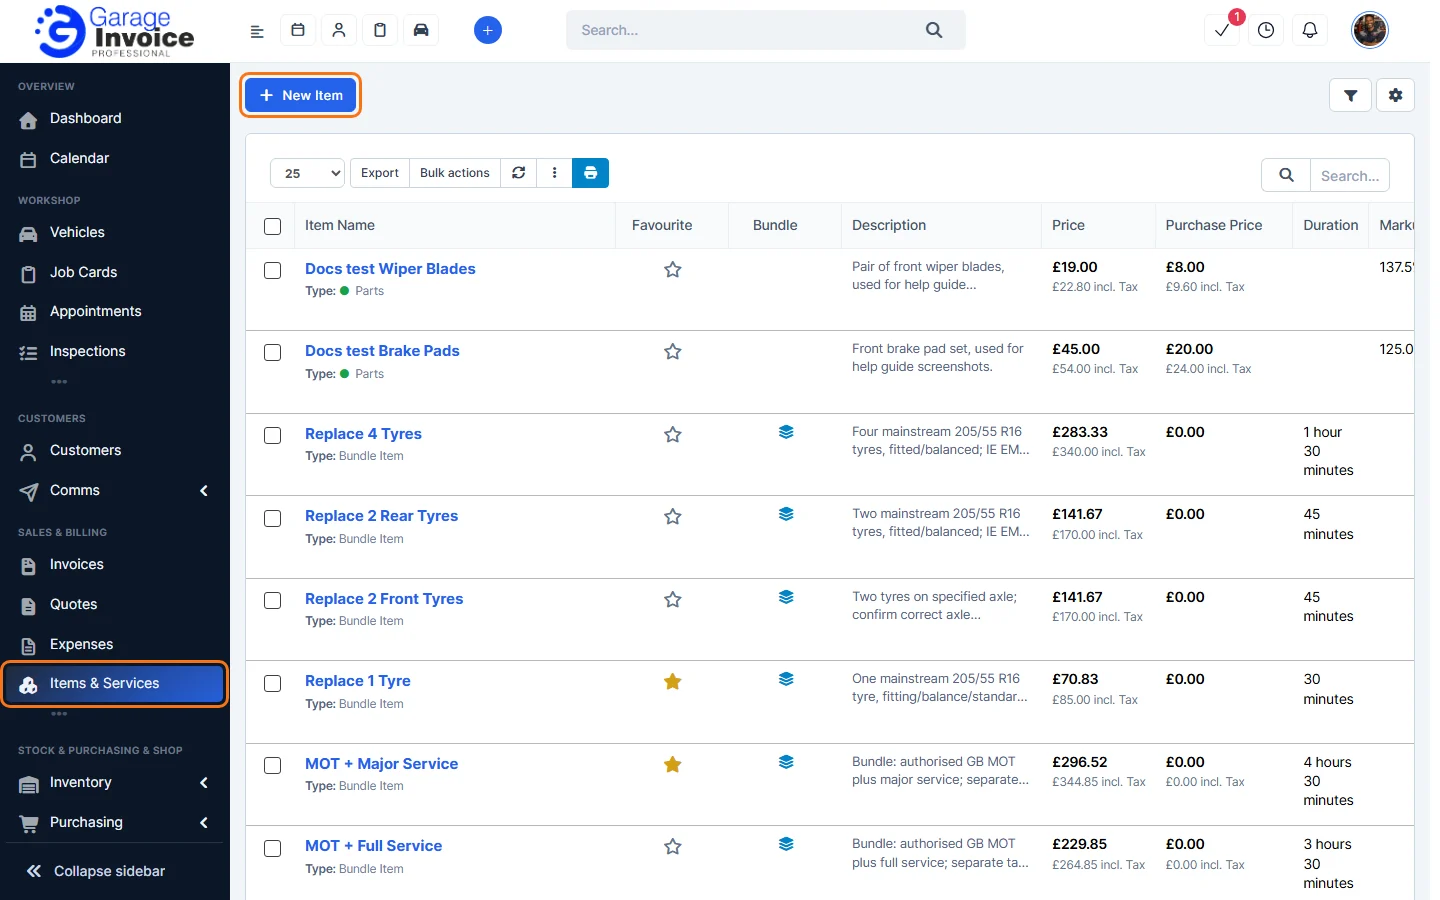
- Click Items & Services in the sidebar, under Sales & Billing. Click New Item.
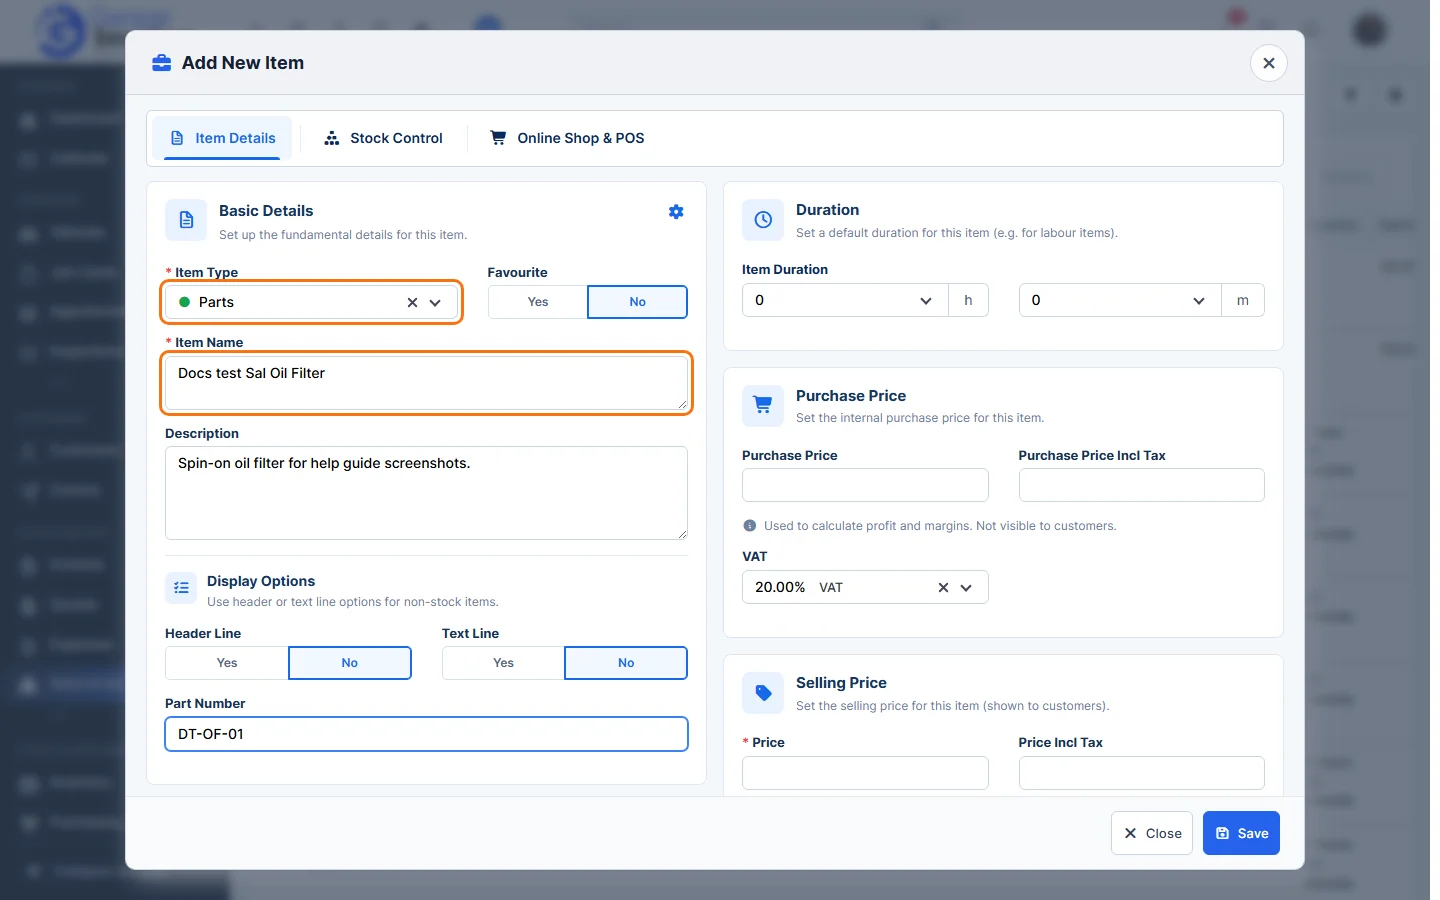
- On the Item Details tab, under Basic Details:
- Item Type (required): Labour, Parts, Tyres, Consumables, Subcontract or Bundle Item. The fields below change with the type.
- Favourite: choose Yes to show the item in the favourites list when you add items to a document.
- Item Name (required) and Description: both appear on your documents.
- Header Line: Yes adds a header when the item is inserted into a document. Type the header in the Header Line box that appears.
- Text Line: Yes adds a text line below the item when it is inserted into a document.
- Part Number (Parts only).
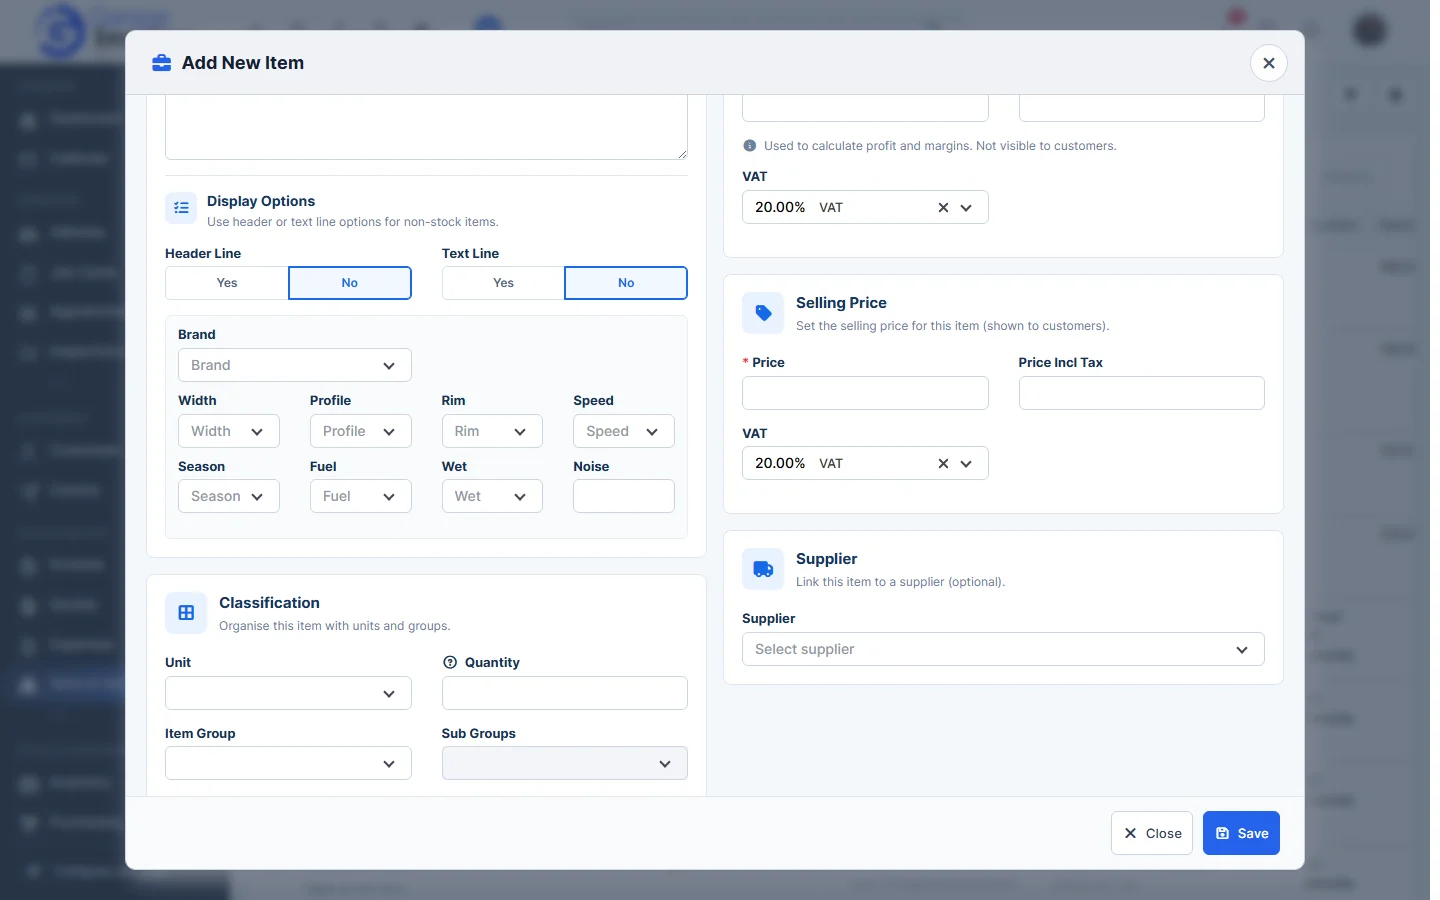
- For Tyres, fill in the Brand, Width, Profile, Rim, Speed, Season, Fuel, Wet and Noise.
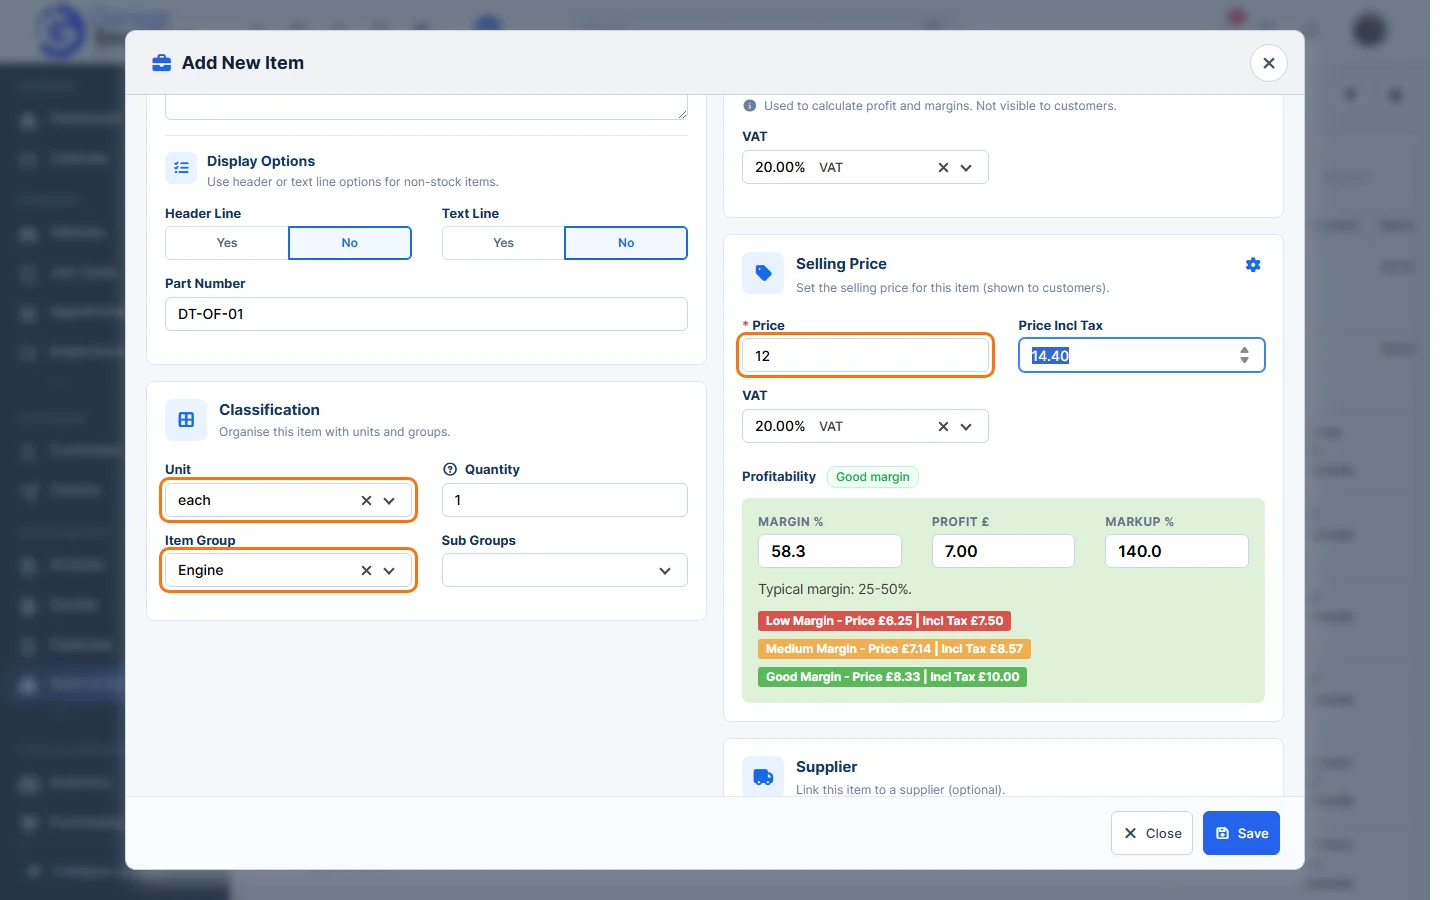
- Under Classification:
- Unit: for example each, hour, litres or box.
- Quantity: the quantity used when the item is added to a document. This is not the stock quantity.
- Item Group and Sub Groups: organise your items, for example Brakes or Engine. You can filter the list and exports by group.
- Under Duration, set the Item Duration in hours and minutes, for example for labour.
- Under Purchase Price, enter what the item costs you, with its VAT. It is used to work out profit and margins and is not shown to customers. For Labour this is the Cost per Hour.
- Under Selling Price, enter the Price (required) and choose the VAT rate. Price Incl Tax is worked out for you, or type the price incl. tax and the price is worked out. For Labour this is the Charge Rate.
- When both prices are filled in, Profitability shows the Margin %, Profit £ and Markup %, and suggests a price for a low, medium and good margin.
- Under Supplier, choose the supplier you buy the item from (optional).
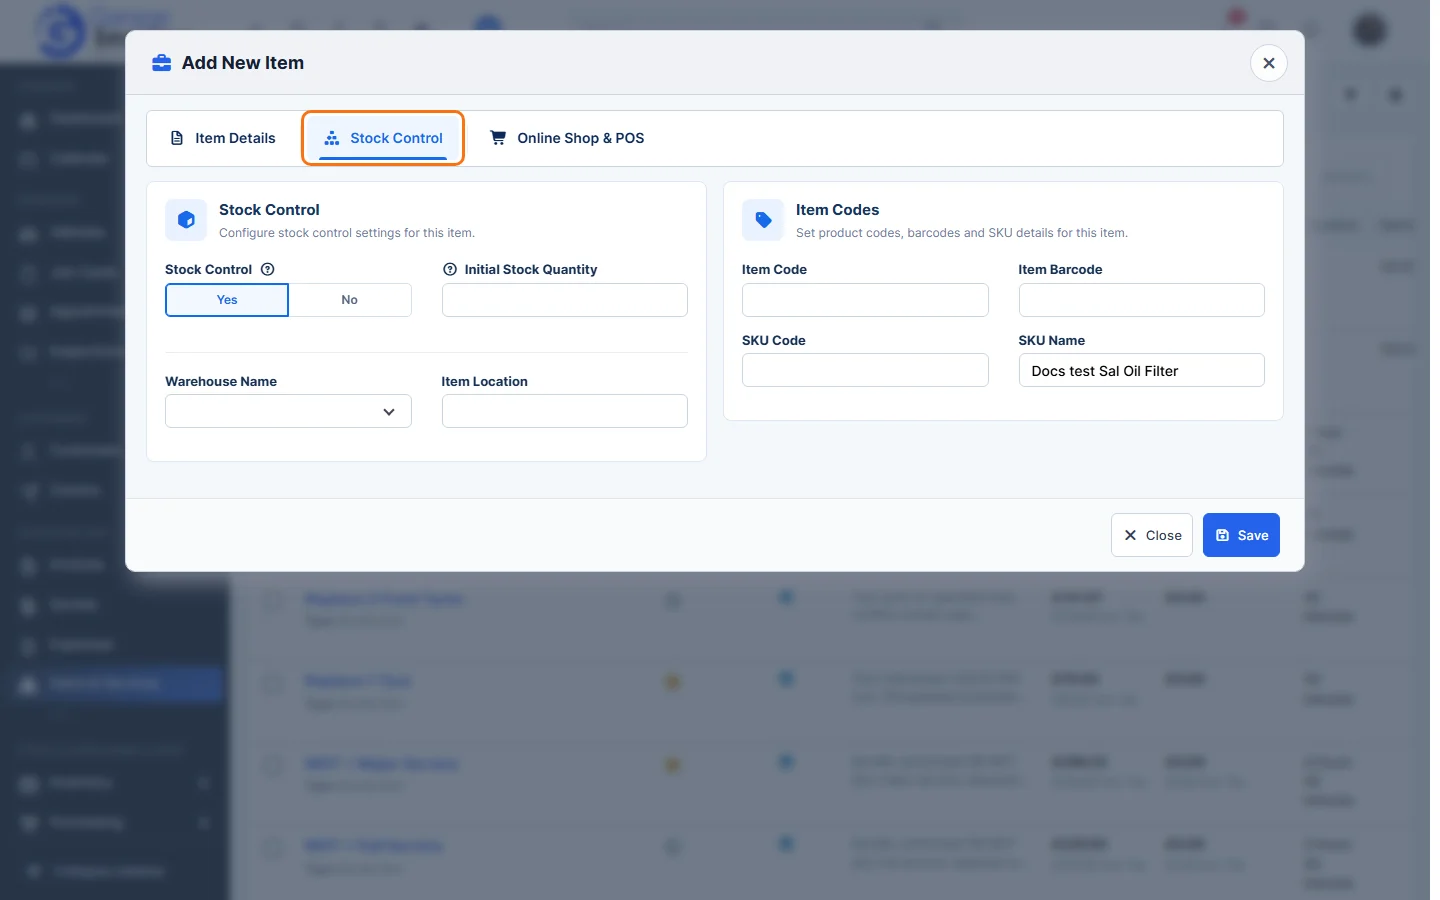
- To track stock, click the Stock Control tab and choose Yes. Then enter the Initial Stock Quantity, Warehouse Name and Item Location, and under Item Codes the Item Code, Item Barcode, SKU Code and SKU Name. The stock level updates each time the item is added to an invoice or a delivery note is created.
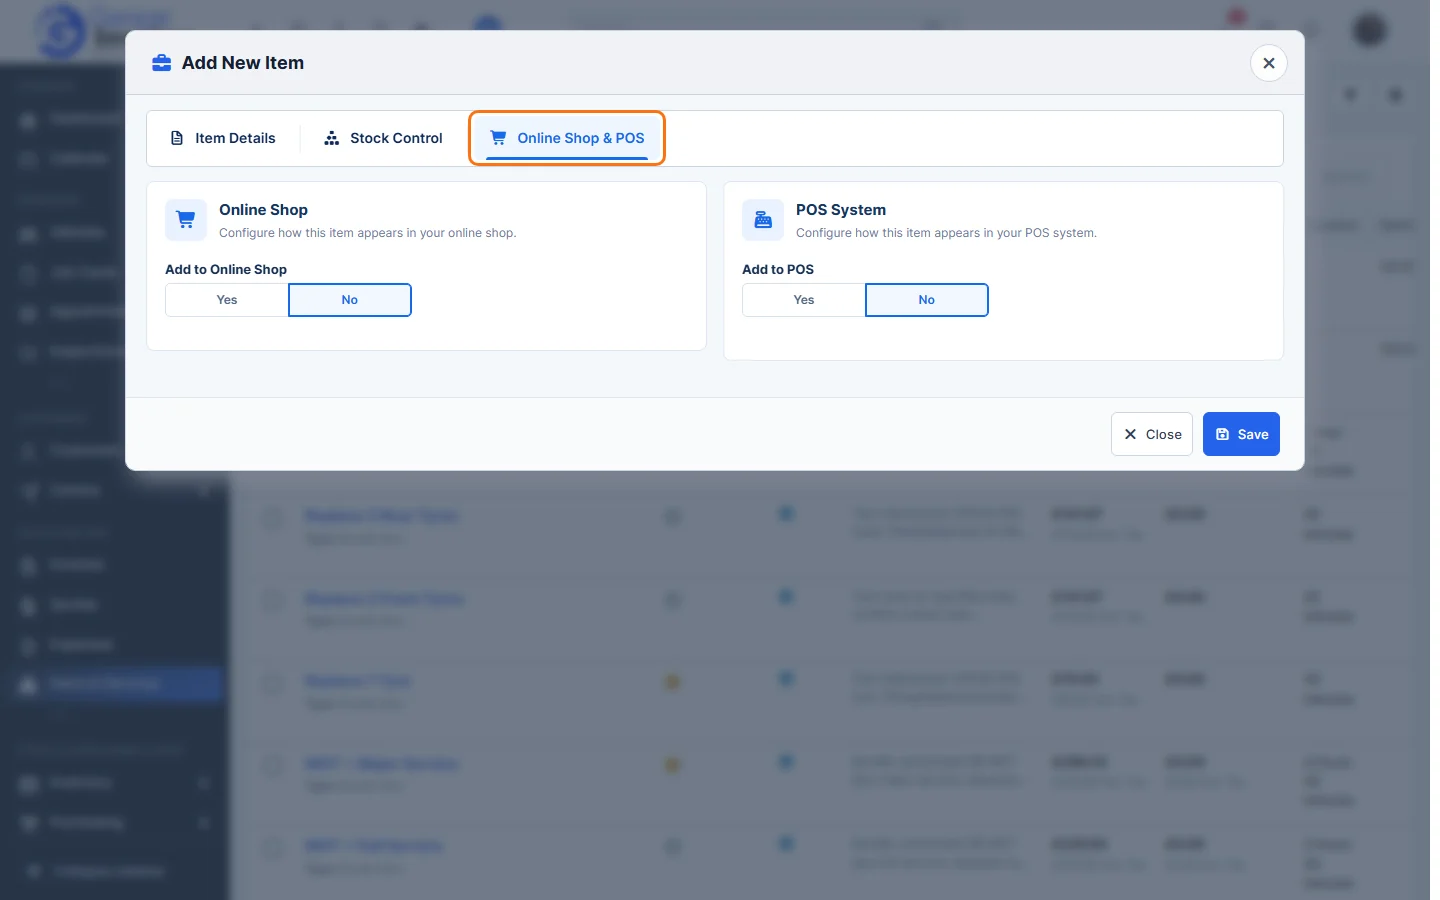
- To sell the item online or in the shop, click the Online Shop & POS tab and choose Yes for Add to Online Shop and/or Add to POS. More fields appear for the shop price, images, weight and shipping. See Add Products to Online Shop and Add Products to POS.
- Click Save. You’ll see Added successfully and the item appears at the top of the list.
Tip: click the cog next to Basic Details to open Item Settings and add a new unit, group or item type. See Item Groups, Units and Item Settings.
Note: the VAT rate filled in for new items comes from Sales Configuration. See Set Default Tax.
Feature Stock and inventory control: see what it does and how it fits your workshop.