
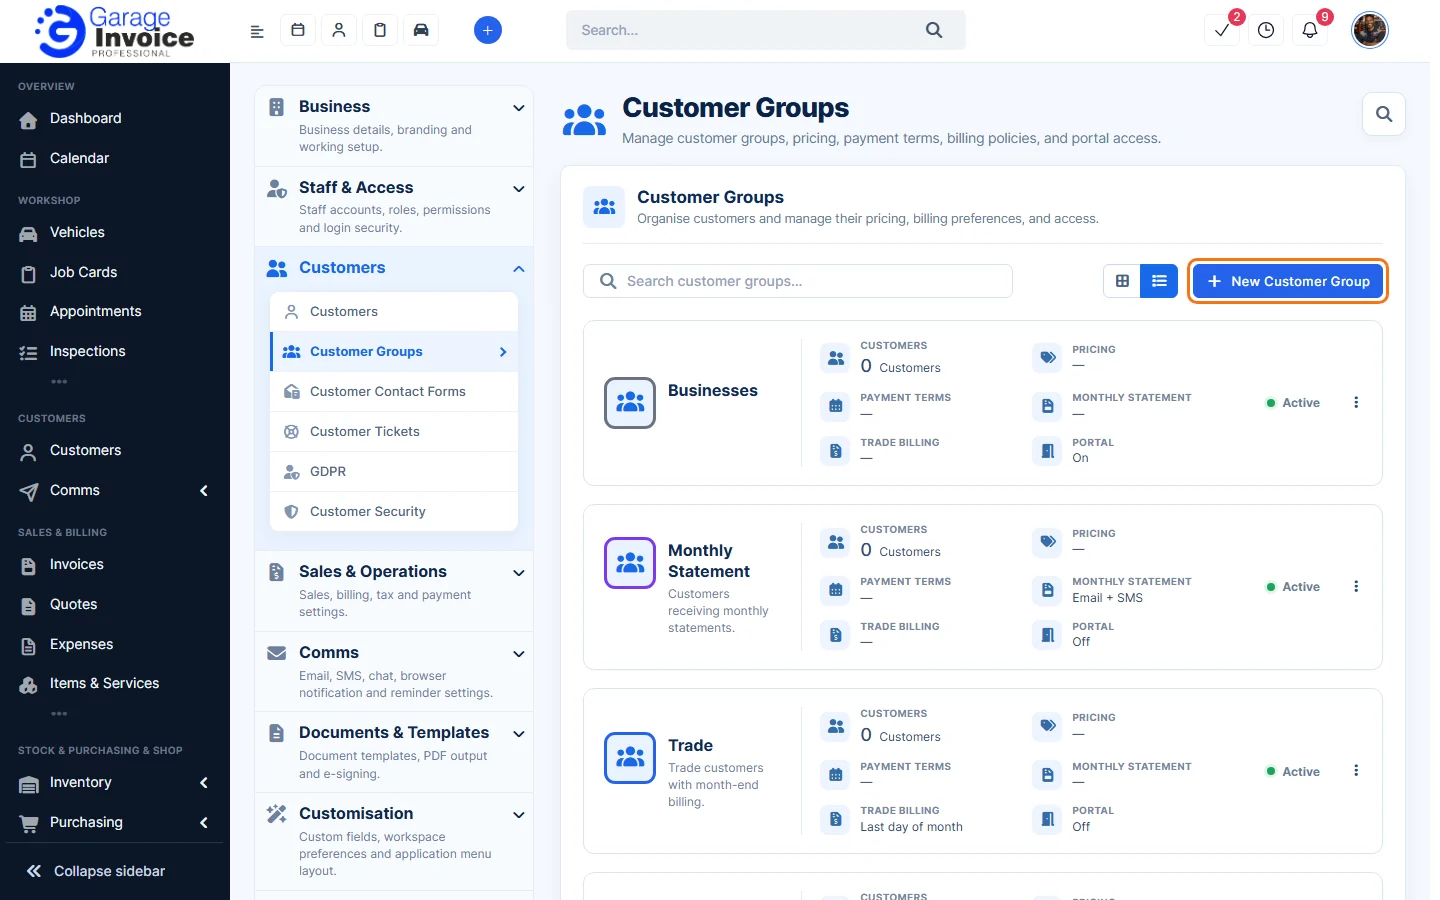
- Click Settings at the bottom of the sidebar, under Administration. In the panel on the left, open Customers and click Customer Groups. Click New Customer Group.
- On the General tab, leave Active on and enter the Group Name, a Colour and, if you like, a Description.
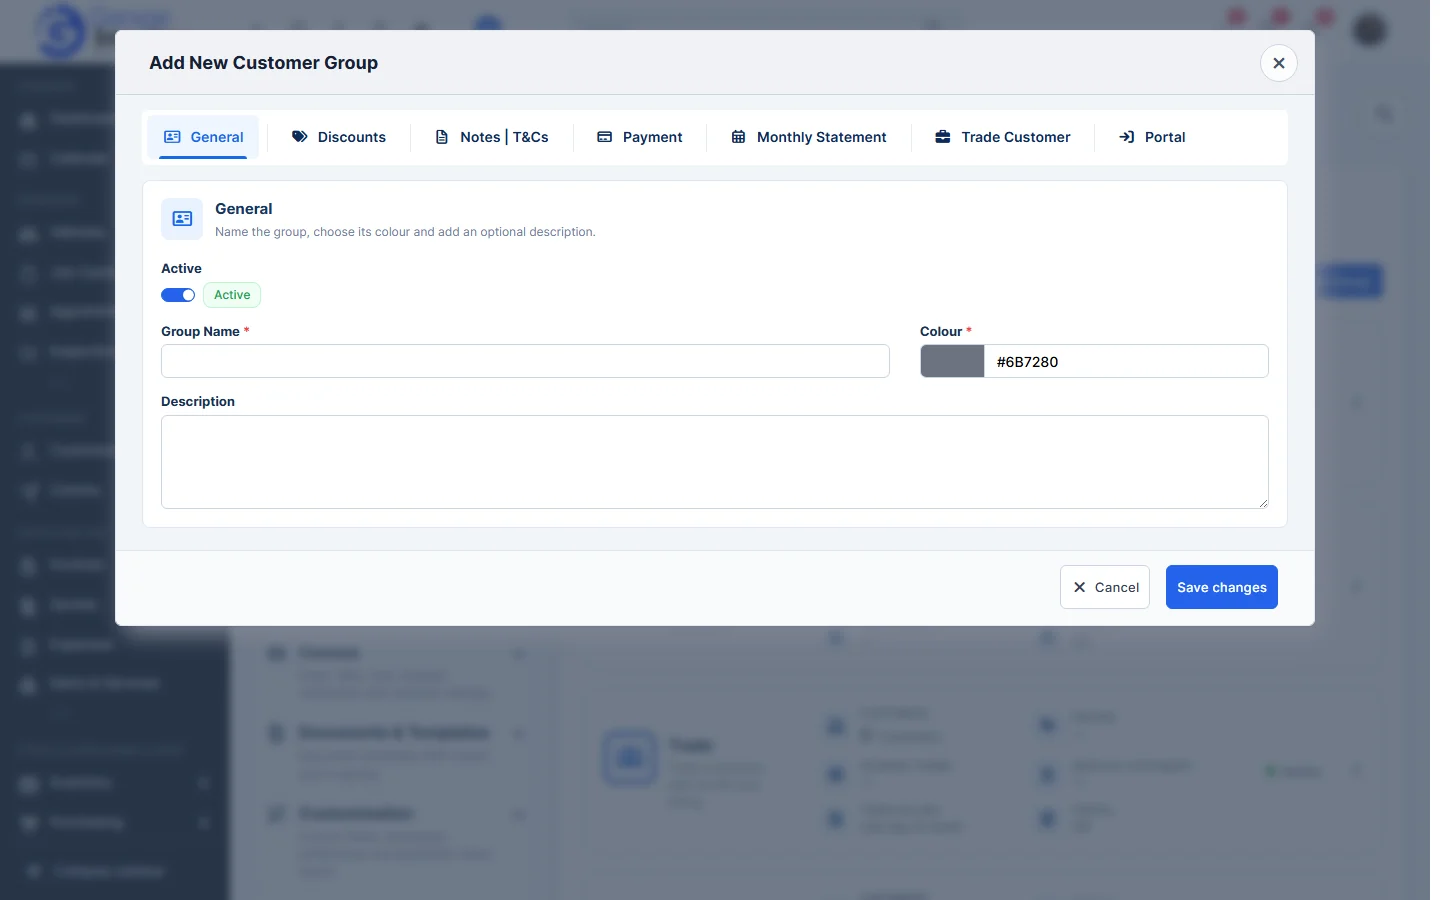
- Use the other tabs if you need them (explained below).
- Click Save changes.
Discounts
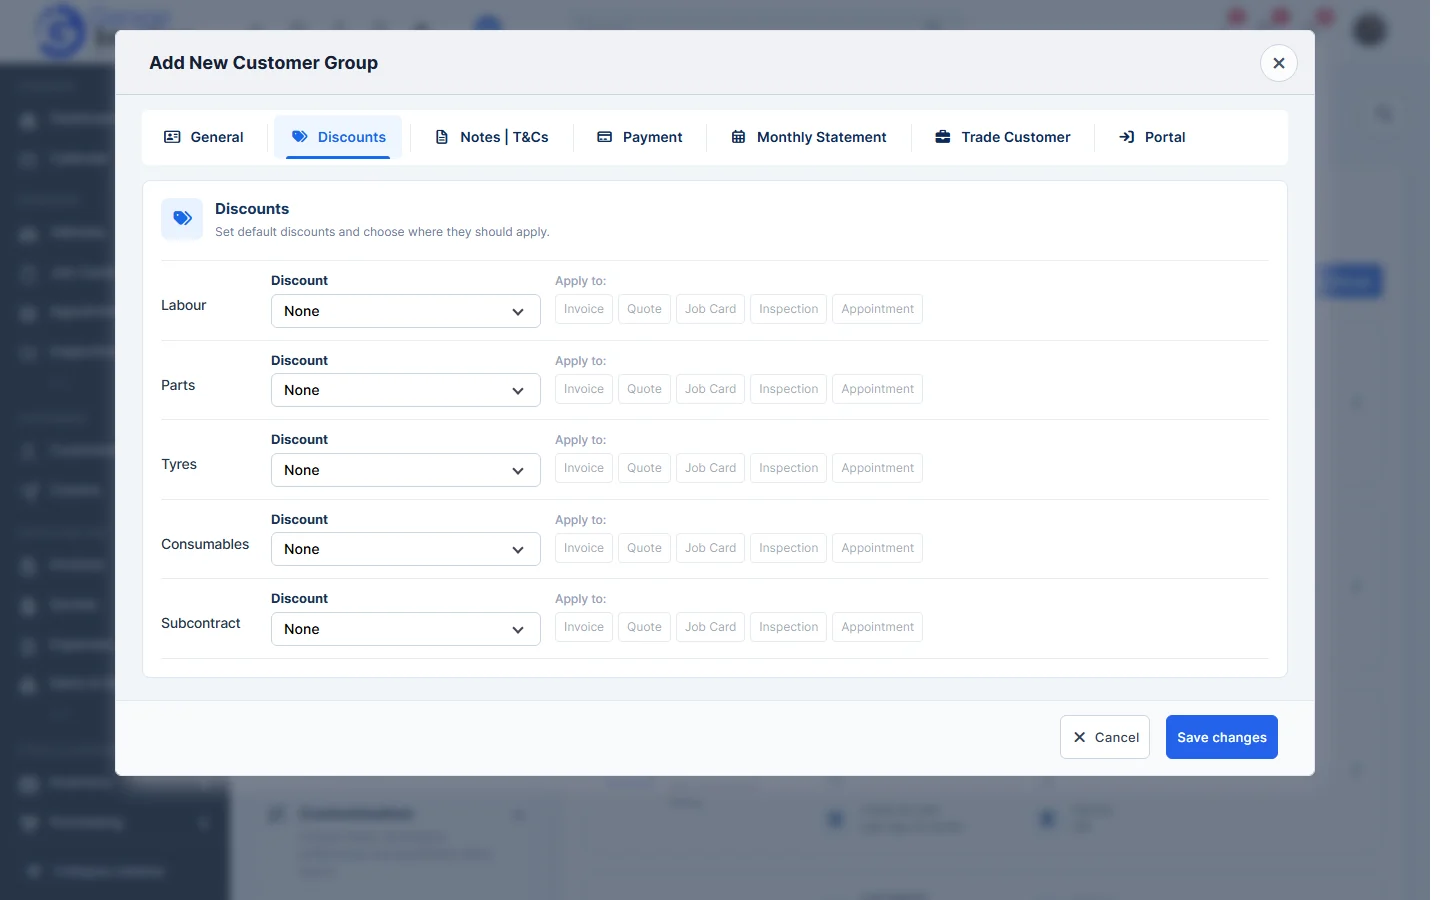
Set a default Discount for Labour, Parts, Tyres, Consumables and Subcontract, and tick where each one applies: Invoice, Quote, Job Card, Inspection and Appointment.
Notes | T&Cs
Click Add to set a Client Note and Terms & Conditions for new invoices, quotes, job cards and inspections for this group. If you leave them empty, your company defaults are used.
Payment
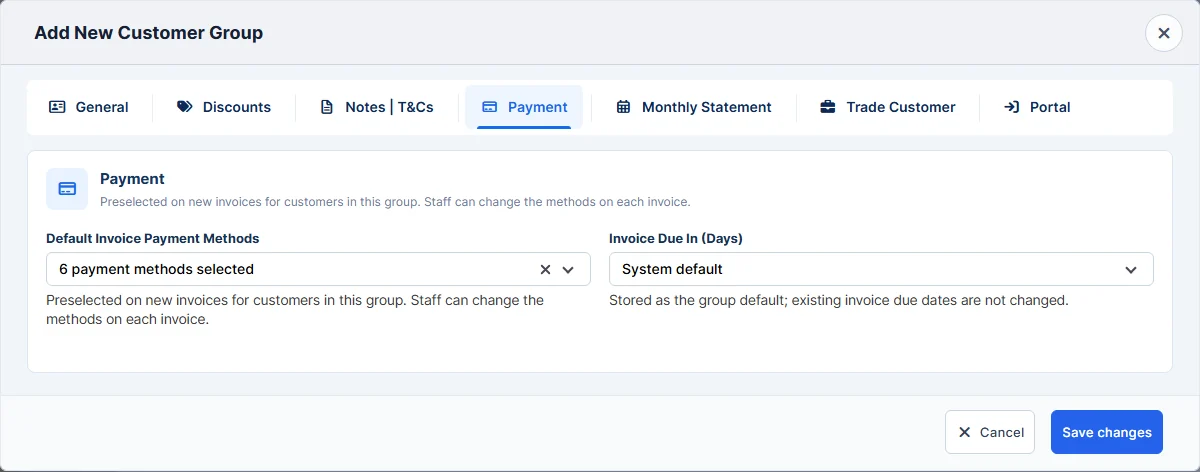
- Default Invoice Payment Methods: the payment methods preselected on new invoices for customers in this group. Staff can still change them on each invoice.
- Invoice Due In (Days): the group’s payment terms. System default uses your normal setting. Existing invoice due dates are not changed.
Monthly Statement
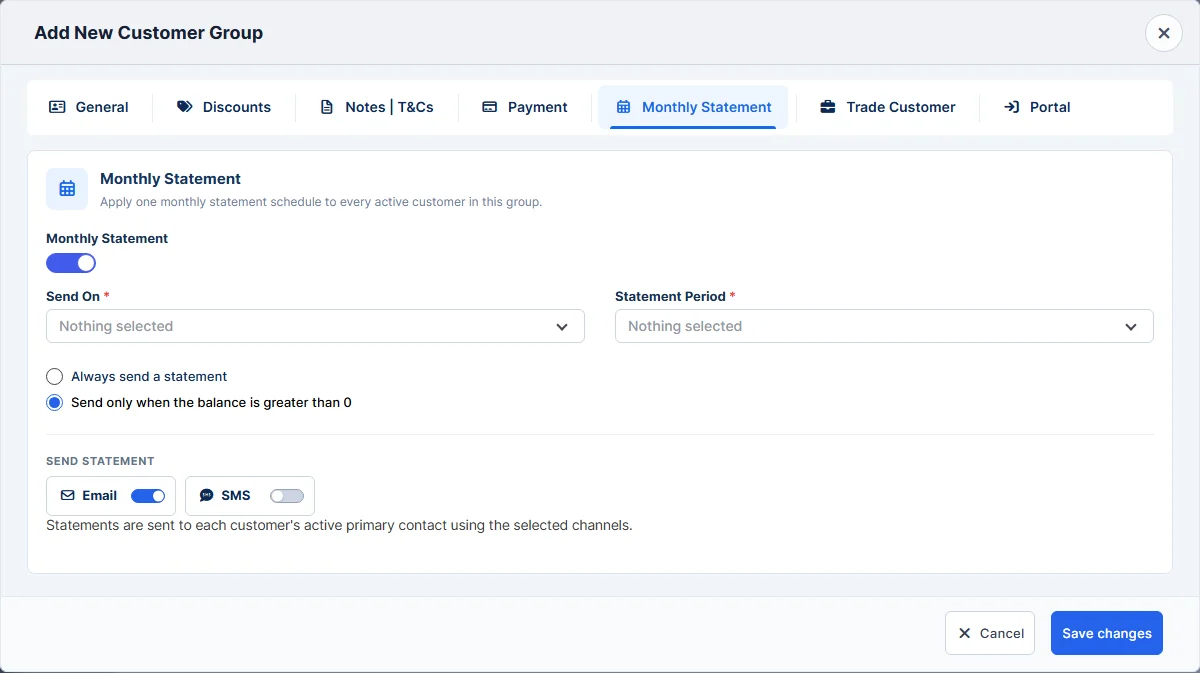
Turn on Monthly Statement to send every active customer in the group a statement each month.
- Send On: the day of the month (1st to 31st, or Last day of month).
- Statement Period: This Month, Last Month, Last 3 Months, This Year, Last Year or Last 3 Years.
- Always send a statement, or Send only when the balance is greater than 0.
- Send Statement: by Email, SMS or both. Statements go to each customer’s active primary contact.
Trade Customer
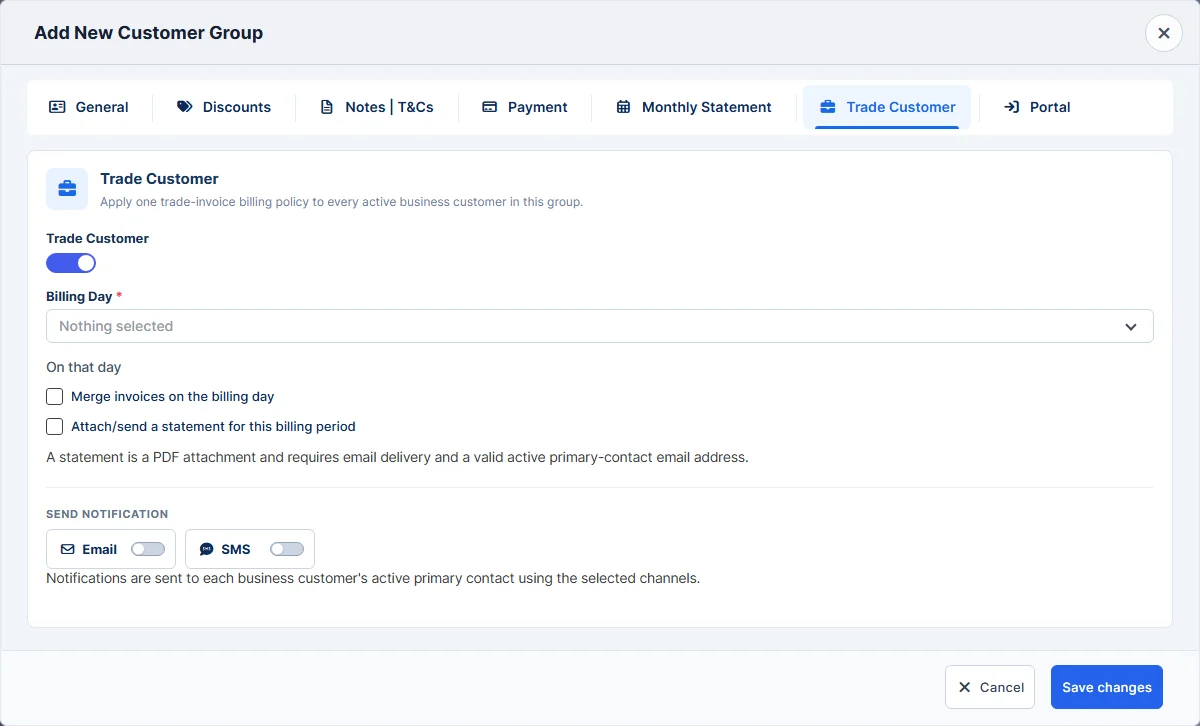
Turn on Trade Customer to apply one trade billing policy to every active business customer in the group.
- Billing Day: the day of the month to bill (1st to 31st, or Last day of month).
- On that day: tick Merge invoices on the billing day and/or Attach/send a statement for this billing period. The statement is a PDF attachment, so it needs email delivery and a valid, active primary-contact email address.
- Send Notification: by Email, SMS or both, to each business customer’s active primary contact.
Portal
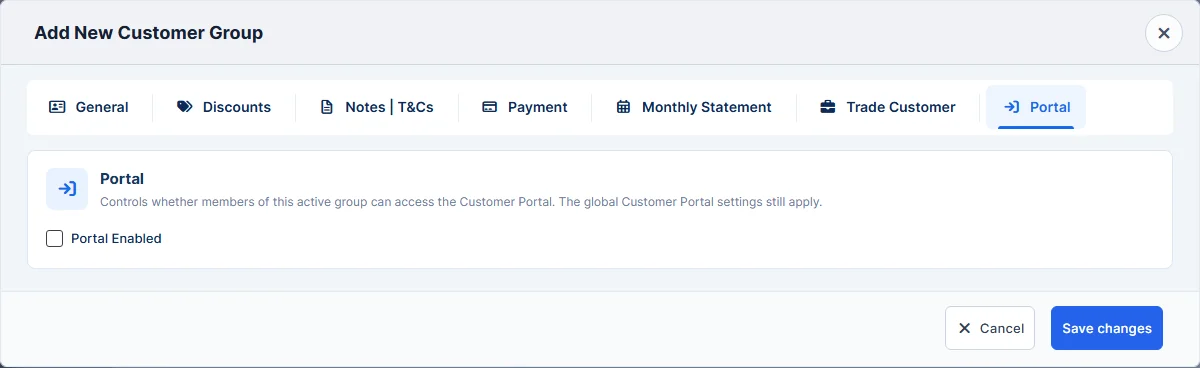
Tick Portal Enabled to let members of this group use the Customer Portal. The main Customer Portal setting still applies (see Customer Settings).
Tip: to put a customer in a group, see Group Customers | Assign Customer to Group. To edit or delete a group, see Customer Groups.
Feature Customer management: see what it does and how it fits your workshop.