How do I add gallery to my website?
Estimated reading: 2 minutes
319 views
Add Gallery Module
- Go to Dashboard page in your account.
- Select the required site (click on site’s image).
- Click Edit Site button.
- From Add New or Edit Pages drop-down list, select the page that you would like to edit.

- Once the Website Builder is loaded, click on plus button to open a Content Panel.

- On the Modules tab click and drag to your page a Gallery module.


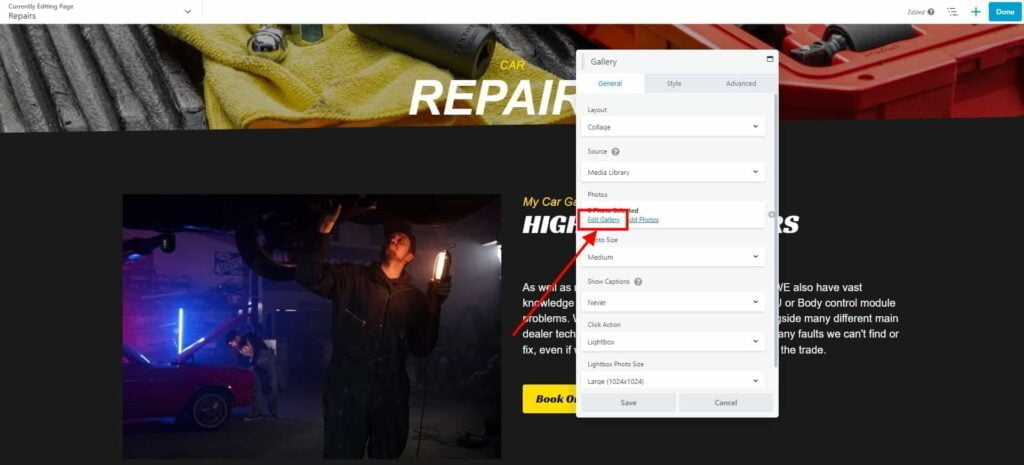
- On General tab, click Edit Gallery.

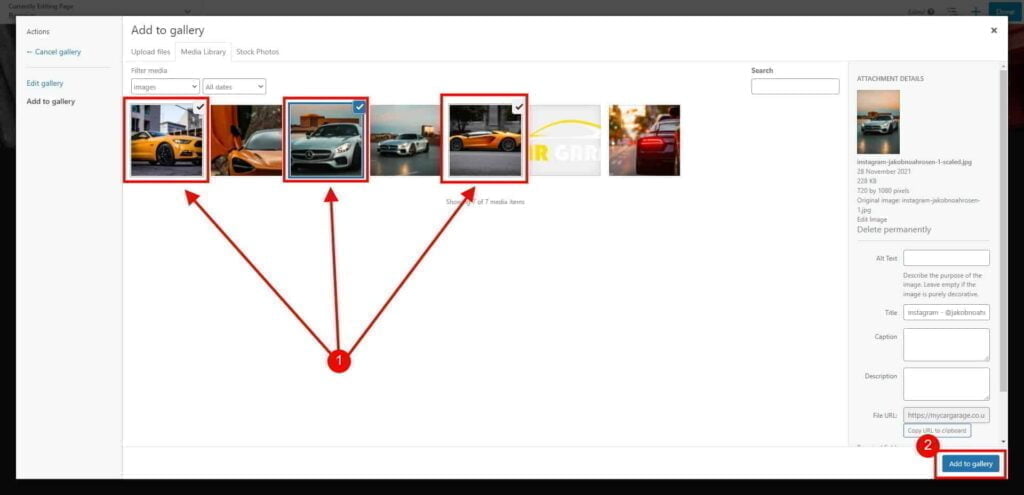
- Add your images from Media Library, Stock Photos tab, or upload images from your device.
Select as many images as required, and click Add to Gallery button and Update Gallery.

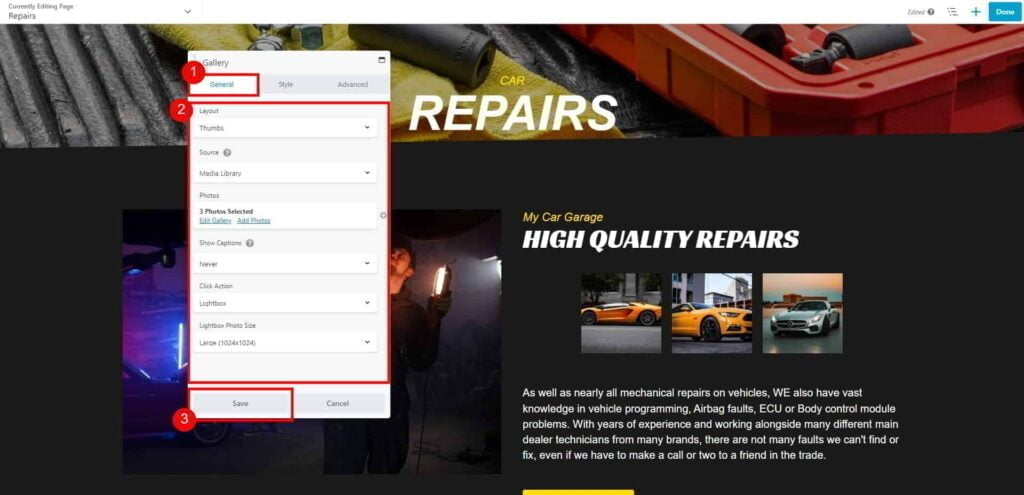
- Adjust gallery settings on General and Style tabs, and click Save, to apply changes.

- Click Done → Publish to save changes to your page.

Add Gallery Pre-built Row
- Go to Dashboard page in your account.
- Select the required site (click on site’s image).
- Click Edit Site button.
- From Add New or Edit Pages drop-down list, select the page that you would like to edit.

- Once the Website Builder is loaded, click on plus button to open a Content Panel.

- On the Rows tab click Group drop-down and select Ready Made Rows option.

- From the Ready Made Rows list, select Gallery row, and drag it to your page.

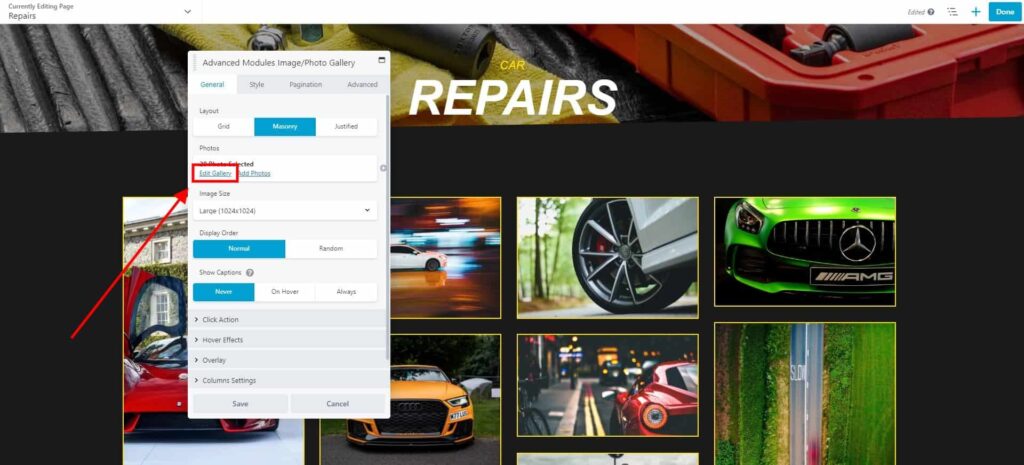
- Click on added gallery to open Settings window.
Click Edit Gallery to add your pictures.

- Add your images from Media Library, Stock Photos tab, or upload images from your device.
Select as many images as required, and click Add to Gallery button and Update Gallery.

- Adjust gallery settings on General and Style tabs, and click Save, to apply changes.

- Click Done → Publish to save changes to your page.


