Editing a Site Header (Content & Design)
- Go to Dashboard page in your account.
- Select the required site (click on site’s image).
- Click Edit Site button.
- Under Edit My Websites, click on Edit Header button.

- After modifying the header design, click Done → Publish, to save your changes.
Note: See a Website Builder guides, to learn how to change a content and design.
Change the Advanced settings
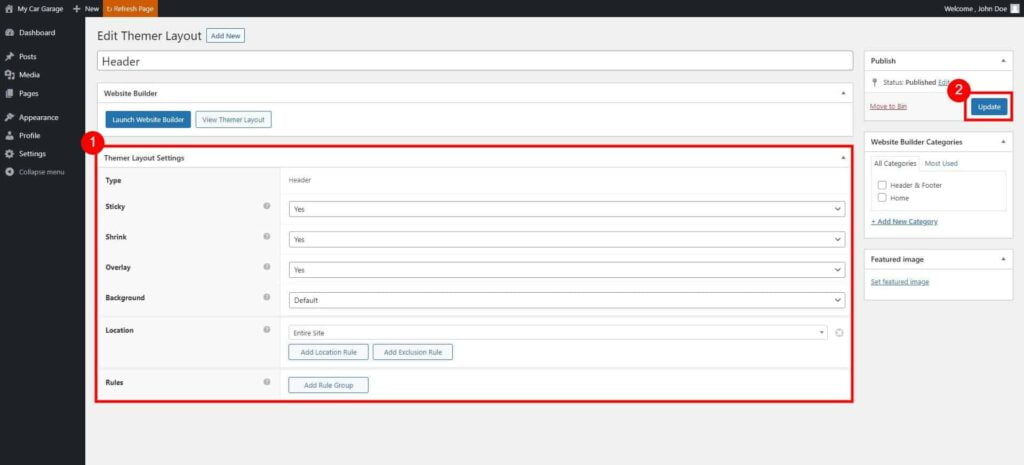
While editing Header’s design, click on Tools menu, and select Edit Title & SEO option.
Adjust settings:
- Sticky – The header stays in place at the original size while the page is scrolled.
- Shrink – If you choose a sticky header, you also get the option to shrink it as the page scrolls up. The amount of shrink is determined by the height required for the full-size header logo, text, and menu.
Note: Fixed and sticky headers only apply to large devices. No matter what the setting, the header scrolls up out of sight on medium and small devices. - Overlay – The row background for the header becomes transparent, and the content row moves up to the top of the window. The overlay appears at all screen sizes.
- Background – Select Transparent background for your header, or default one that can be changed when in Website Builder mode.
- Location – select where header should appear. Default: Entire Site.

Click Update button to save your changes.
Restoring Default Header Design
If you would like to restore default Header design:
- Go to Dashboard page in your account.
- Select the required site (click on site’s image).
- Click Edit Site button.
- Under Edit My Websites, click on Edit Header button.

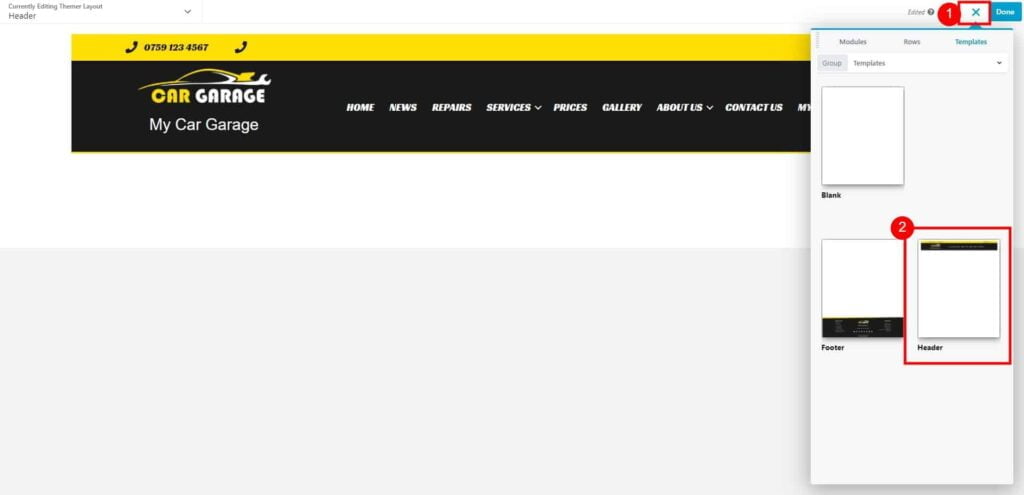
- Open the Content Panel: In the upper-right corner, click + (plus sign) to expose the Content panel, then click the Templates tab.
- Select the Header template.
If your page is empty (doesn’t have any content), the selected layout will be applied automatically.
If you already have some content on your page, the system will ask if you want to replace the current design, or append it with a selected layout.
Click Replace Existing Layout.

- Click Done → Publish, to save your changes.

